Loading ...
Loading ...
Loading ...
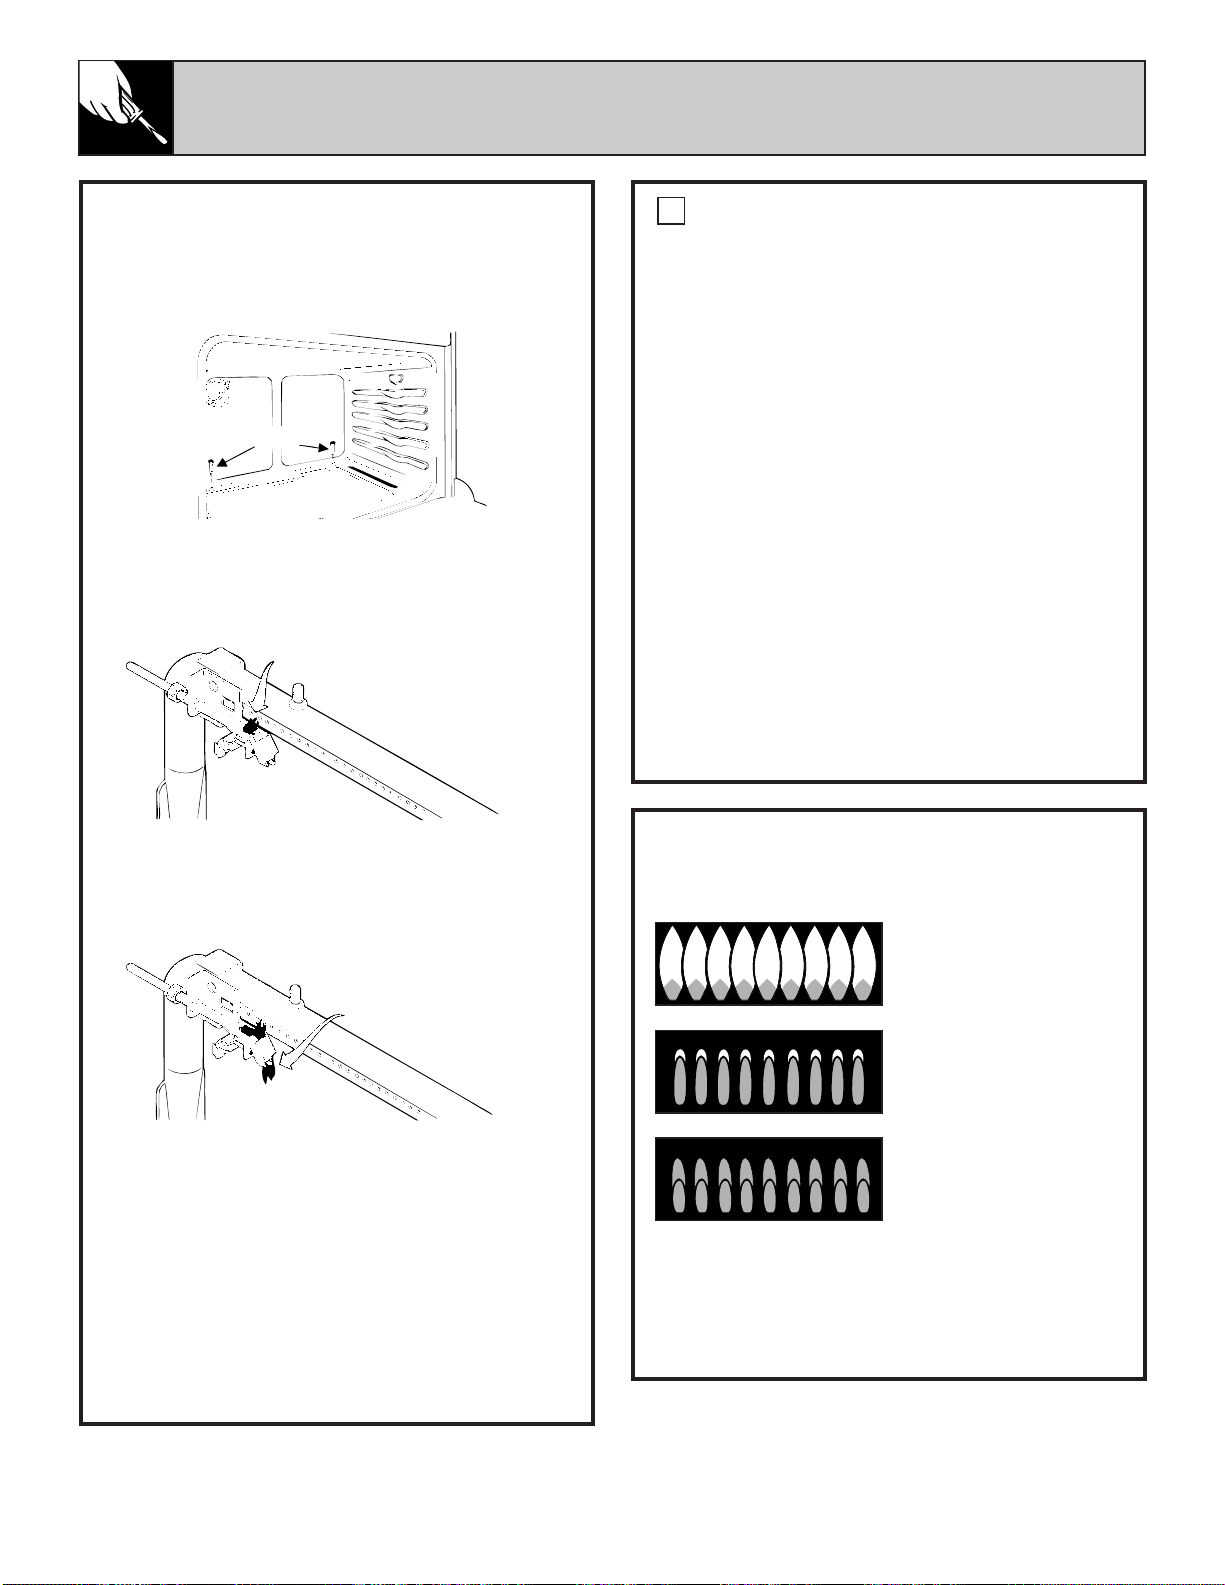
Quality of Flames
The combustion quality of burner flames needs
to be determined visually.
If burner flames look like (A), call for service.
Normal burner flames should look like (B) or
(C), depending on the type of gas you use.
With LP gas, some yellow tipping on outer
cones is normal.
(A) Yellow flames—
Call for service
(B) Yellow tips on
outer cones—
Normal for LP gas
(C) Soft blue flames—
Normal for natural gas
32
INSTALLATION INSTRUCTIONS
(continued)
Operation of Standing Pilot Oven Burners and
Oven Adjustment
To light the oven pilot, turn the oven thermostat
knob to OFF. Remove oven bottom.
To remove the oven bottom, remove oven hold
down screws at rear of oven bottom. Pull up at
rear, disengage front of oven bottom from oven
front frame, and pull the oven bottom out of the
oven.
Light the oven pilot with a match. The oven
pilot should burn with a stable flame after a few
seconds operation and should have a small
primary pilot flame visible only at the opening
in the top of the pilot assembly.
Turn oven thermostat knob to 300°F. The oven
pilot should now have a larger secondary pilot
flame that extends down the slanted ramp and
burns against a small metal bulb.
After 20–40 seconds, the main oven burner
should ignite and burn until the oven
temperature has reached 300°F. At that time, the
oven pilot should get smaller, moving up away
from the metal bulb which will turn off the main
oven burner after 20–40 seconds.
The oven burner will continue to turn off and on
to maintain oven temperature.
CHECK IGNITION OF SURFACE BURNERS
Surface Burner Ignition
Operation of all cooktop and oven burners
should be checked after the pilots have been
lighted (on some models) and range and gas
supply lines have been carefully checked
for leaks.
Standing Pilot Models
Select a surface burner knob and simultaneously
push in and turn to HI position. The burner
should light within a few seconds. Try each
burner in succession until all burners have
been checked.
Electric Ignition Models
Select a surface burner knob and simultaneously
push in and turn to LITE position. You will hear
a snapping sound indicating proper operation
of the spark module. Once the air has been
purged from the supply lines, burners should
light within 4 seconds. After burner lights,
rotate knob out of the LITE position. Try each
burner in succession until all burners have
been checked.
6
Remove
Primary pilot flame
Secondary pilot flame
Loading ...
Loading ...
Loading ...