Loading ...
Loading ...
Loading ...
Ins_llation
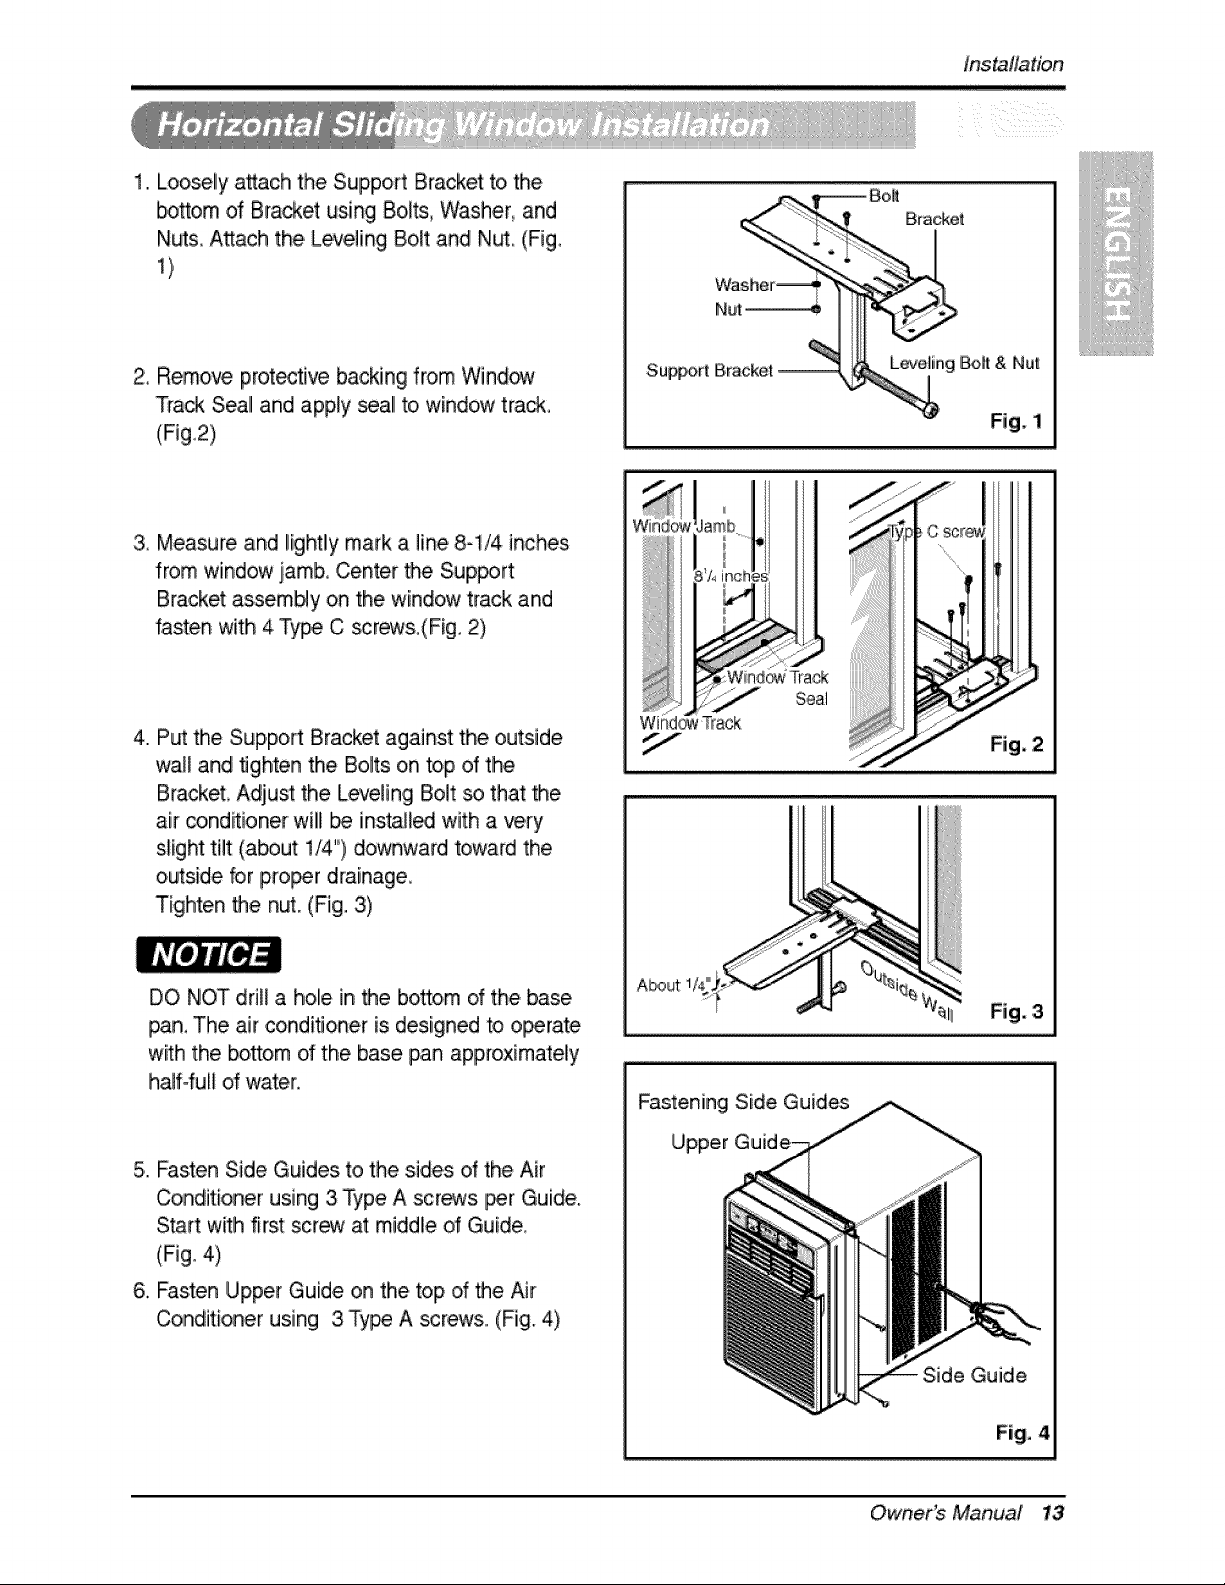
1. Loosely attach the Support Bracket to the
bottom of Bracket using Bolts, Washer, and
Nuts Attach the. Leveling Bolt and Nu¢ (Fig.
1)
2_ Remove prot_ive backing from Window
Track Seall and apply seal to window track,
(Fig,2)
Sup_rt
Bra_et
Fig. 1
3, Measure and ffghtly mark a fine 8-1/4 inches
from window jamb, Center the Sup_rt
Bracket assem_y on the window track and
fasten with 4 Type C _r_s,(Fig, 2)
4. Put the Support Bracket against the outside
wall and tighten the Bolts on top of the
Bracket, Adjust the Leveling Bolt so that the
ak ,cond_ioner will be [nstaff_ with a very
slight tilt (about 1/4') downward toward the
outside for pro_r drainage,
Tighten the n_. (Fig. 3)
DO NOT drift a hole in the bottom d the base
pan, The air conditioner is designed to operate
with the bottom o# the base pan approximately
halfofuff of water,
5. Fasten Side ,Guides to the sides ,d the Air
Conditioner using 3 l_ype A screws per Guide,
Start with first screw at middle of Guide,
,(Fig. 4)
6, Fasten Upper Guide on the top d the Air
Conditioner using 3 Type A _rews. (Fiig. 4)
i ....
}Z_inch
):Wii_
i Track
dTrack
Seal
s
Fig, 2
A_ut:
Fig. 3
Fastening Side Guides
Upper Guid_
Side Guide
Fig, 4
Owner_ Manual 13
Loading ...
Loading ...
Loading ...