Loading ...
Loading ...
Loading ...
WARNING – SERVICING TO BE CARRIED OUT ONLY BY AN AUTHORISED PERSON
Disconnect from electricity before servicing. Check appliance is safe when you have nished.
32
ArtNo.320-0005 Oven door rubber seal
Fig.8-11
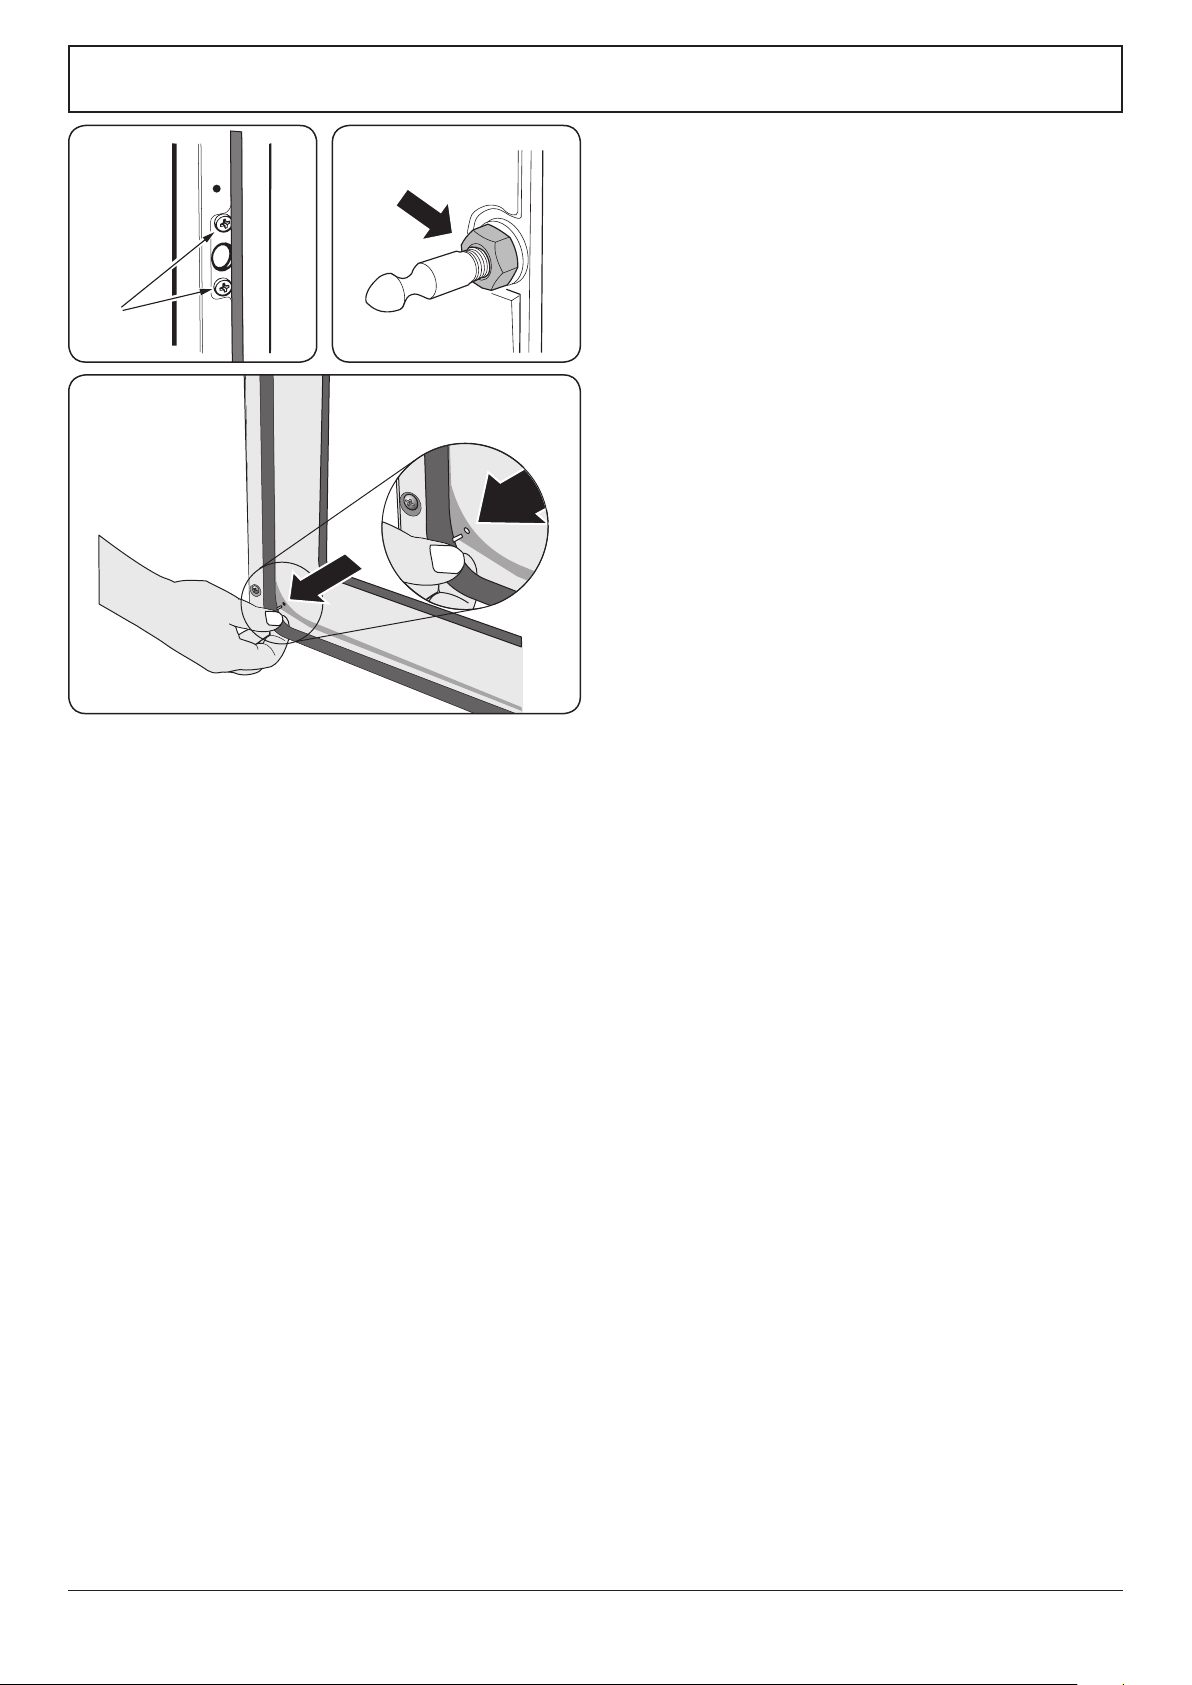
13. To Change an Oven Door Latch
Remove the outer door panel (see 12). Remove screws ‘B’ that
hold the latch assembly to the inner door panel (Fig.8-9). Fit
the new catch and reassemble in reverse order.
Verify the door operation.
14. To Adjust an Oven Door Catch Keep
Open the oven door, and slacken o the locknut at the base of
the keep (Fig.8-10).
Screw in or out as required until the required t is obtained.
Retighten the locking nut.
15. To Replace an Oven Door Seal
Open the oven door. The seal has small hooks that hold it in
place by locating into holes in the rear door face on the main
oven and oven front face on tall oven. At the corner, pull the
seal diagonally away from the door centre until the hook is
released (Fig.8-11). Proceed to the next hook and release it in
a similar way, and so on.
You can use force if the hooks are sti, as the old seal will be
discarded.
Carefully lift away the inner back. Reassemble in reverse
order making sure that the four screws and washers are fully
tightened.
16. To Replace a Thermostat
Disconnect from the electricity supply.
Lift the ceramic hob and remove the control panel (see 2 & 3).
Open the oven door. Remove the oven furniture.
For the right-hand oven, remove the thermostat phial cover
(two screws). Unclip the thermostat phial from the clips in the
oven back.
For the left-hand oven, pull cooker forward to gain access
to the cover box at the rear of the cooker. Remove the four
screws securing the cover and lift clear.
Feed the thermostat capillary out of the oven. Disconnect
the wiring from the thermostat. Remove two screws holding
thermostat to mounting panel. Fit new thermostat and
reassemble in reverse order. Ensure that the phial is clipped to
the oven back with the phial centrally positioned between the
clips.
Check the operation of the thermostat.
17. To Remove an Oven Element Thermal Cut-out
Disconnect from electricity supply.
Pull the cooker forward to gain access to the cover box. Undo
the cover screws and lift clear. The cut-out is located on the
earth plate beside the oven element connections. Disconnect
the cut-out wiring. Undo the xings that secure the cut-out to
the earth plate and remove. Fit the replacement control and
re-assemble in reverse order.
ArtNo.320-0004 Oven door keep
Fig.8-10
ArtNo.320-0003 Oven door latch
B
Fig.8-9
Loading ...
Loading ...
Loading ...