Loading ...
Loading ...
Loading ...
SERVICE
REMOVING MOTOR FOR SERVICE
AND REPLACING SHAFT SEAL
Should repair or replacement of motor or seal be necessary,
the pomp need not be disconnected from the piping.
(If it is necessary to repair or replace the motor, ALWAYS re-
place the shaft seal, Key No. 7, Page 16. Therefore, we sug-
gest that you order this item and have on hand for future
use).
Remove motor as follows:
1. Disassemble pump per disassembly instruction on Page 11.
2. Remove diffuser and impeller, Key Nos. 8 and 9, Page 16,
from pump back half.
Remove Impeller as follows:
1. Loosen two-machine screws and remove the motor
canopy, Key No. 1A, Page 16.
2. Partially tmscrew capacitor clamp and move capacitor to
one side.
3. Place a 7/16" open end wrench on the motor shaft flat.
4. To remove, turn the impeller counterclockwise (when
facing impeller).
The seal consists of two parts, a rotating member and a float-
ing seat.
NOTICE: The highly polished and lapped faces of the seal are
easily damaged. Read instructions carefully.
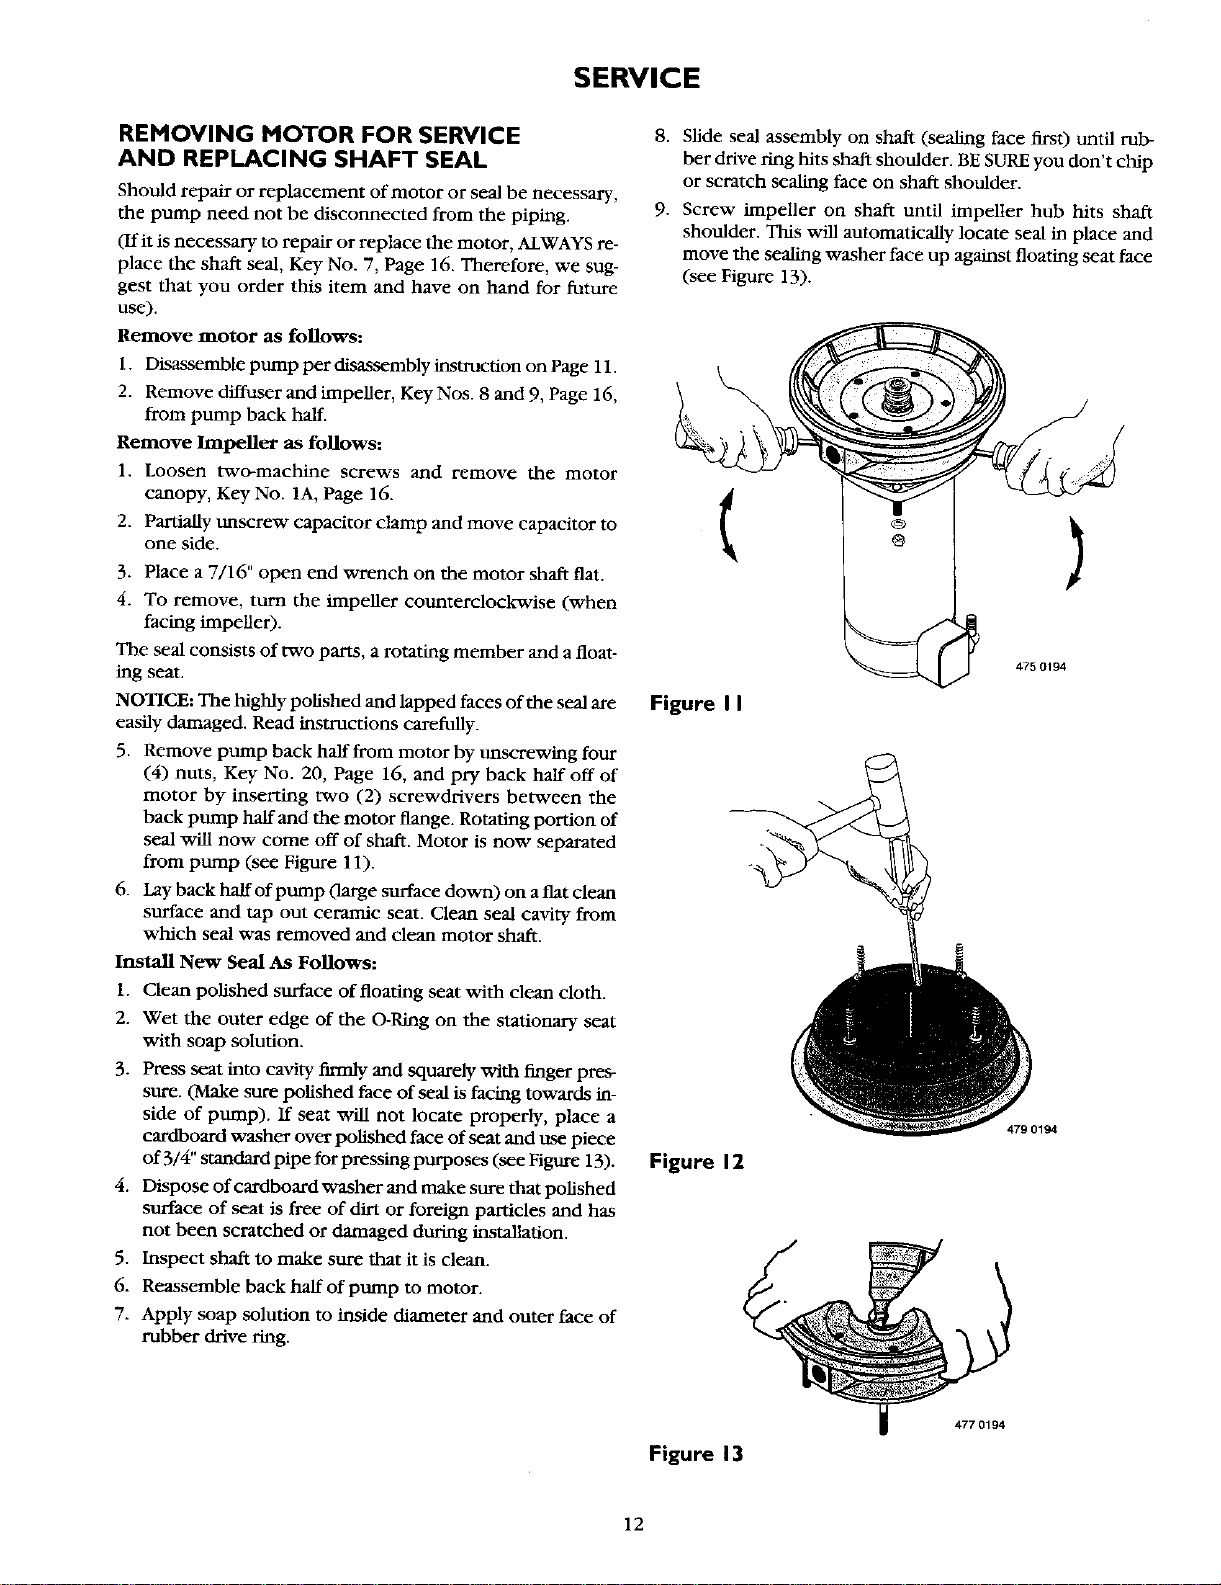
5. Remove pump back half from motor by unscrewing four
(4) nuts, Key No. 20, Page 16, and pry back half off of
motor by inserting two (2) screwdrivers between the
back pump half and the motor flange. Rotating portion of
seal will now come off of shaft. Motor is now separated
from pump (see Figure 1 I).
6. Lay back half of pump 0arge surface down) on a flat clean
surface and tap out ceramic seat. Clean seal cavity from
which seal was removed and clean motor shaft.
Install New Seal As Follows:
1. Clean polished surface of floating seat with clean cloth.
2. Wet the outer edge of the O-Ring on the stationary seat
with soap solution.
3. Press seat into cavity firmly and squarely with finger pres-
sure. (Make sure polished face of seal is facing towards in-
side of pump). If seat will not locate properly, place a
cardboard washer over polished face of seat and use piece
of 3/4" standard pipe for pressing purposes (see Figure 13).
4. Dispose of cardboard washer and make sure that poLished
surface of seat is free of dirt or foreign particles and has
not been scratched or damaged during installation.
5. Inspect shaft to make sure that it is clean.
6. Reassemble back half of pump to motor.
7. Apply soap solution to inside diameter and outer face of
rubber drive ring.
8. Slide seal assembly on shaft (sealing face firs 0 until rub-
ber drive ring hits shaft shoulder. BE SURE you don't chip
or scratch sealing face on shaft shoulder.
9. Screw impeller on shaft until impeller hub hits shaft
shoulder. This will automatically locate seal in place and
move the seating washer face up against floating seat face
(see Figure 13).
Figure I I
475 0194
Figure 12
479 0194
Figure 13
477 0194
12
Loading ...
Loading ...
Loading ...