Loading ...
Loading ...
Loading ...
TO INSTALL OPTIONAL FLUSH CUTTING
BLADES
See Figure 12.
Flush cutting blades should be used when making
close or flush cuts to the walls.
• Unplug your saw,
_1, WARNING: Failure to unplug your saw could
result in accidental starting causing possible
serious injury.
• Using a screwdriver, loosen base pivot screw and
rotate base 180 ° as shown in Figure 12.
• Slide base all the way to the rear of saw.
• Set the cutting angle at 0°. To set, adjust base until
0° mark on scale aligns with the parting line
located on the front of the motor housing.
• Tighten base pivot screw securely.
CENTERNOTCH
IN BASE
SLIDENOTCH
TOTHE REAR
BASE
PIVOTSCREW
BASE
SCREWDRIVER
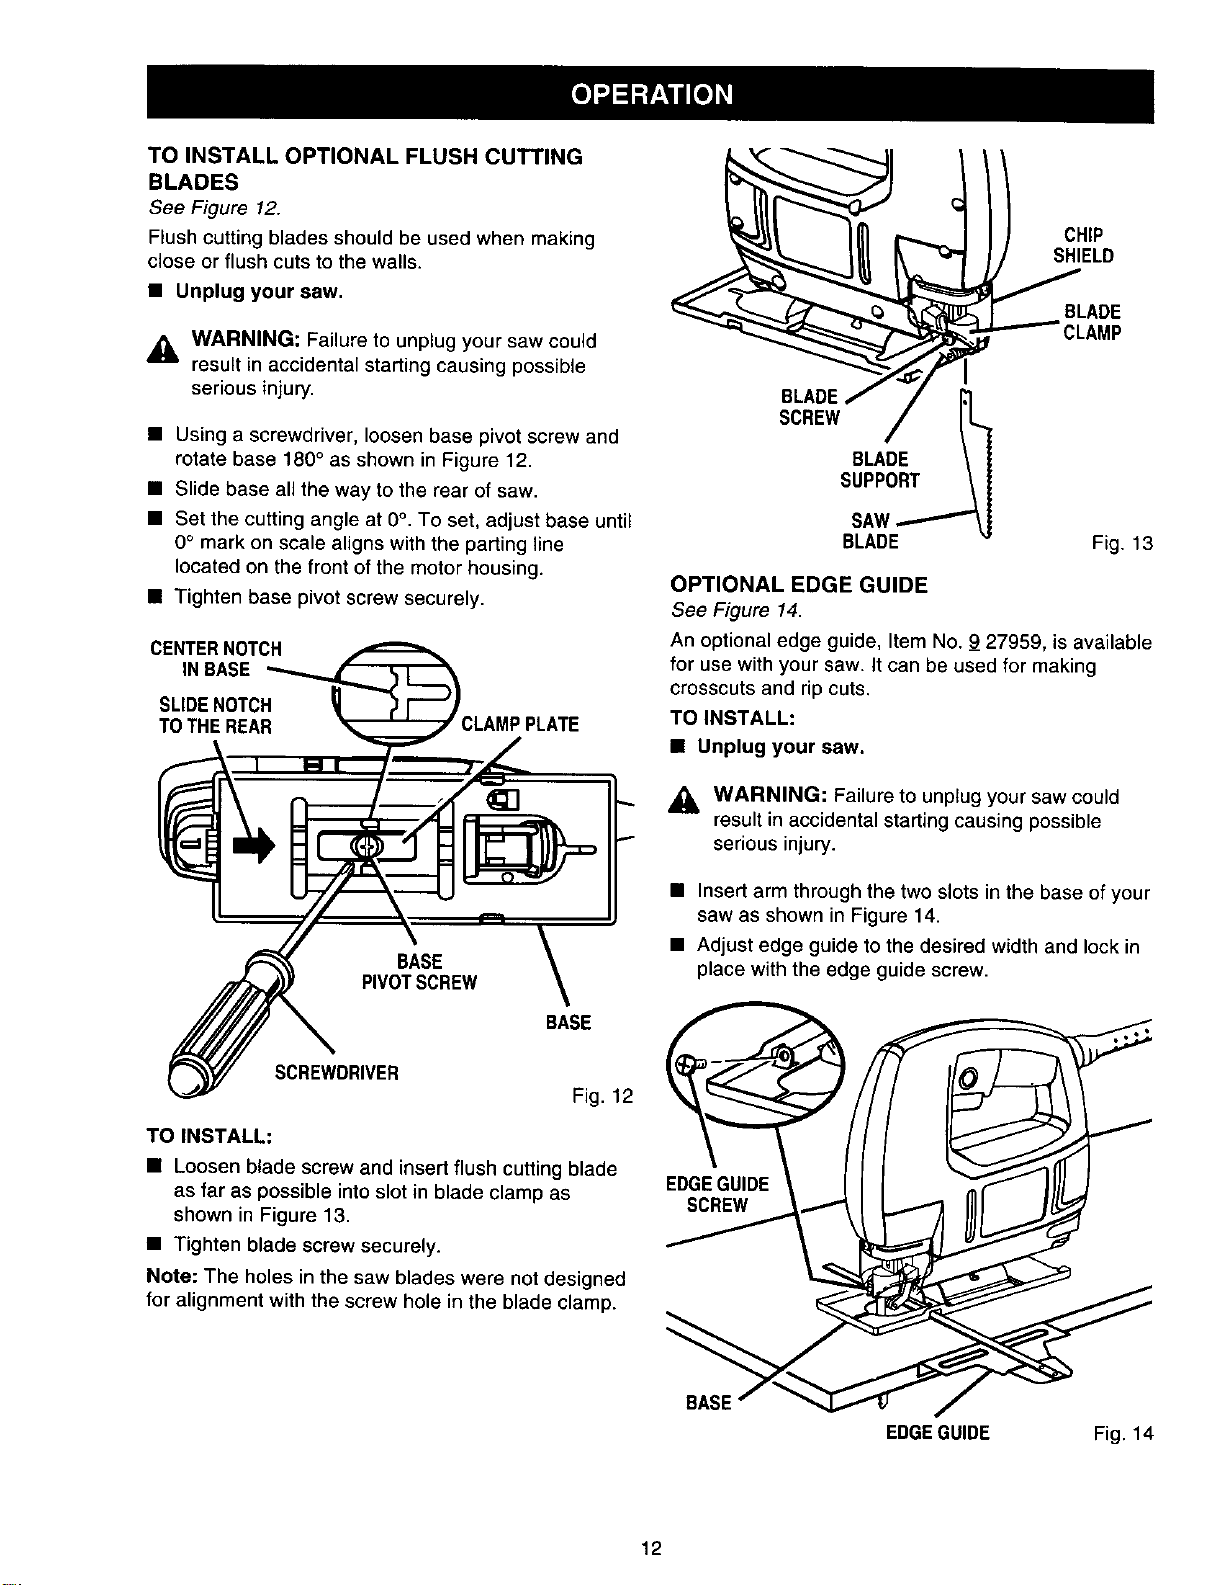
Fig. 12
TO INSTALL:
• Loosen blade screw and insert flush cutting blade
as far as possible into slot in blade clamp as
shown in Figure 13.
• Tighten blade screw securely.
Note: The holes in the saw blades were not designed
for alignment with the screw hole in the blade clamp.
CHIP
SHIELD
BLADE
CLAMP
BLADE
SCREW
BLADE
SUPPORT _.._I
SAW_'-
BLADE
Fig. 13
OPTIONAL EDGE GUIDE
See Figure 14.
An optional edge guide, Item No. 9 27959, is available
for use with your saw. It can be used for making
crosscuts and rip cuts.
TO INSTALL:
• Unplug your saw.
,_ WARNING: Failure to unptug your saw could
result in accidental starting causing possible
serious injury.
• Insert arm through the two slots in the base of your
saw as shown in Figure 14.
• Adjust edge guide to the desired width and lock in
place with the edge guide screw.
EDGEGUIDE
SCREW
BASE
EDGEGUIDE Fig. 14
12
Loading ...
Loading ...
Loading ...