Loading ...
Loading ...
Loading ...
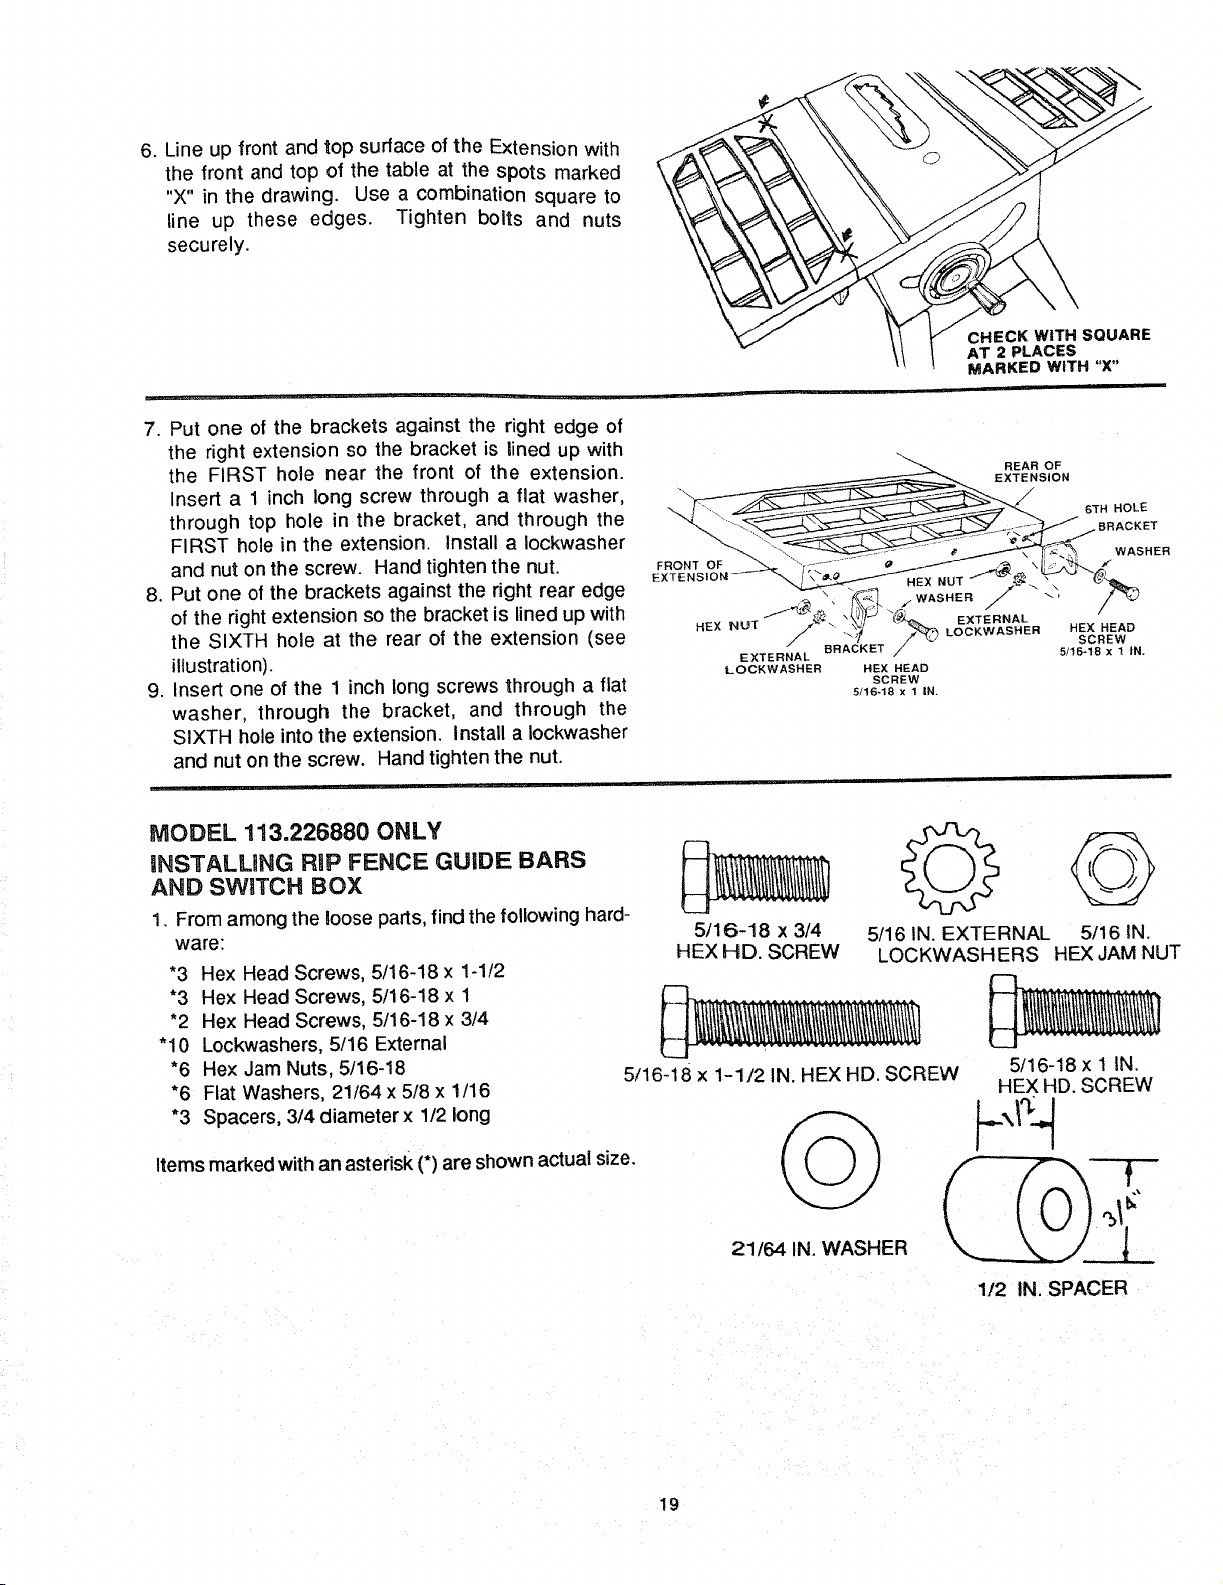
6. Line up front and top surface of the Extension with
the front and top of the table at the spots marked
"X" in the drawing. Use a combination square to
line up these edges. Tighten bolts and nuts
securely.
7. Put one of the brackets against the right edge of
the right extension so the bracket is lined up with
the FIRST hole near the front of the extension.
Insert a 1 inch long screw through a fiat washer,
through top hole in the bracket, and through the
FIRST hole in the extension. Install a Iockwasher
and nut on the screw. Hand tighten the nut
8. Put one of the brackets against the right rear edge
of the right extension so the bracket is lined up with
the SIXTH hole at the rear of the extension (see
illustration).
9. Insert one of the 1 inch long screws through a flat
washer, through the bracket, and through the
SIXTH hole into the extension. Install a Iockwasher
and nut on the screw. Hand tighten the nut.
CHECK WITH SQUARE
AT 2 PLACES
MARKED WITH "X"
REAR OF
_-_ "--._-_ _ _ 7%.ih WASHER
EXTENS!ON_-_ "_/__HEX NUT "'1- _'_'.N _ _ "_.
/ ,OOKWAS.E".gX#? D
BRACKET / 5/16_18 x 1 IN.
EXTERNAL
LOCKWASHER HEX HEAD
SC REW
5/16-18 x 1 IN.
MODEL 113.226880 ONLY
INSTALLING RIP FENCE GUIDE BARS
AND SWITCH BOX
1 From among the loose parts, find the following hard-
ware:
*3 Hex Head Screws, 5/16-18 x 1-1/2
*3 Hex Head Screws, 5/16-18 x 1
*2 Hex Head Screws, 5/16-18 x 3/4
* 10 Lockwashers, 5/16 External
*6 Hex Jam Nuts, 5/16-18
"8 Flat Washers, 21/64x 5/8 x 1/16
*3 Spacers, 3/4 diameter x 1/2 long
Items marked with an asterisk (*) are shown actual size.
5/16-18 x 3/4
HEX HD. SCREW
G
5/16 IN. EXTERNAL
LOCKWASHERS
5/16 IN.
HEX JAM NUT
5/16-18 x 1-1/2 IN. HEX HD. SCREW
5/16-18 x 1 IN.
HEX HD. SCREW
--!-
21/64 IN. WASHER
1/2 IN. SPACER
19
Loading ...
Loading ...
Loading ...