Loading ...
Loading ...
Loading ...
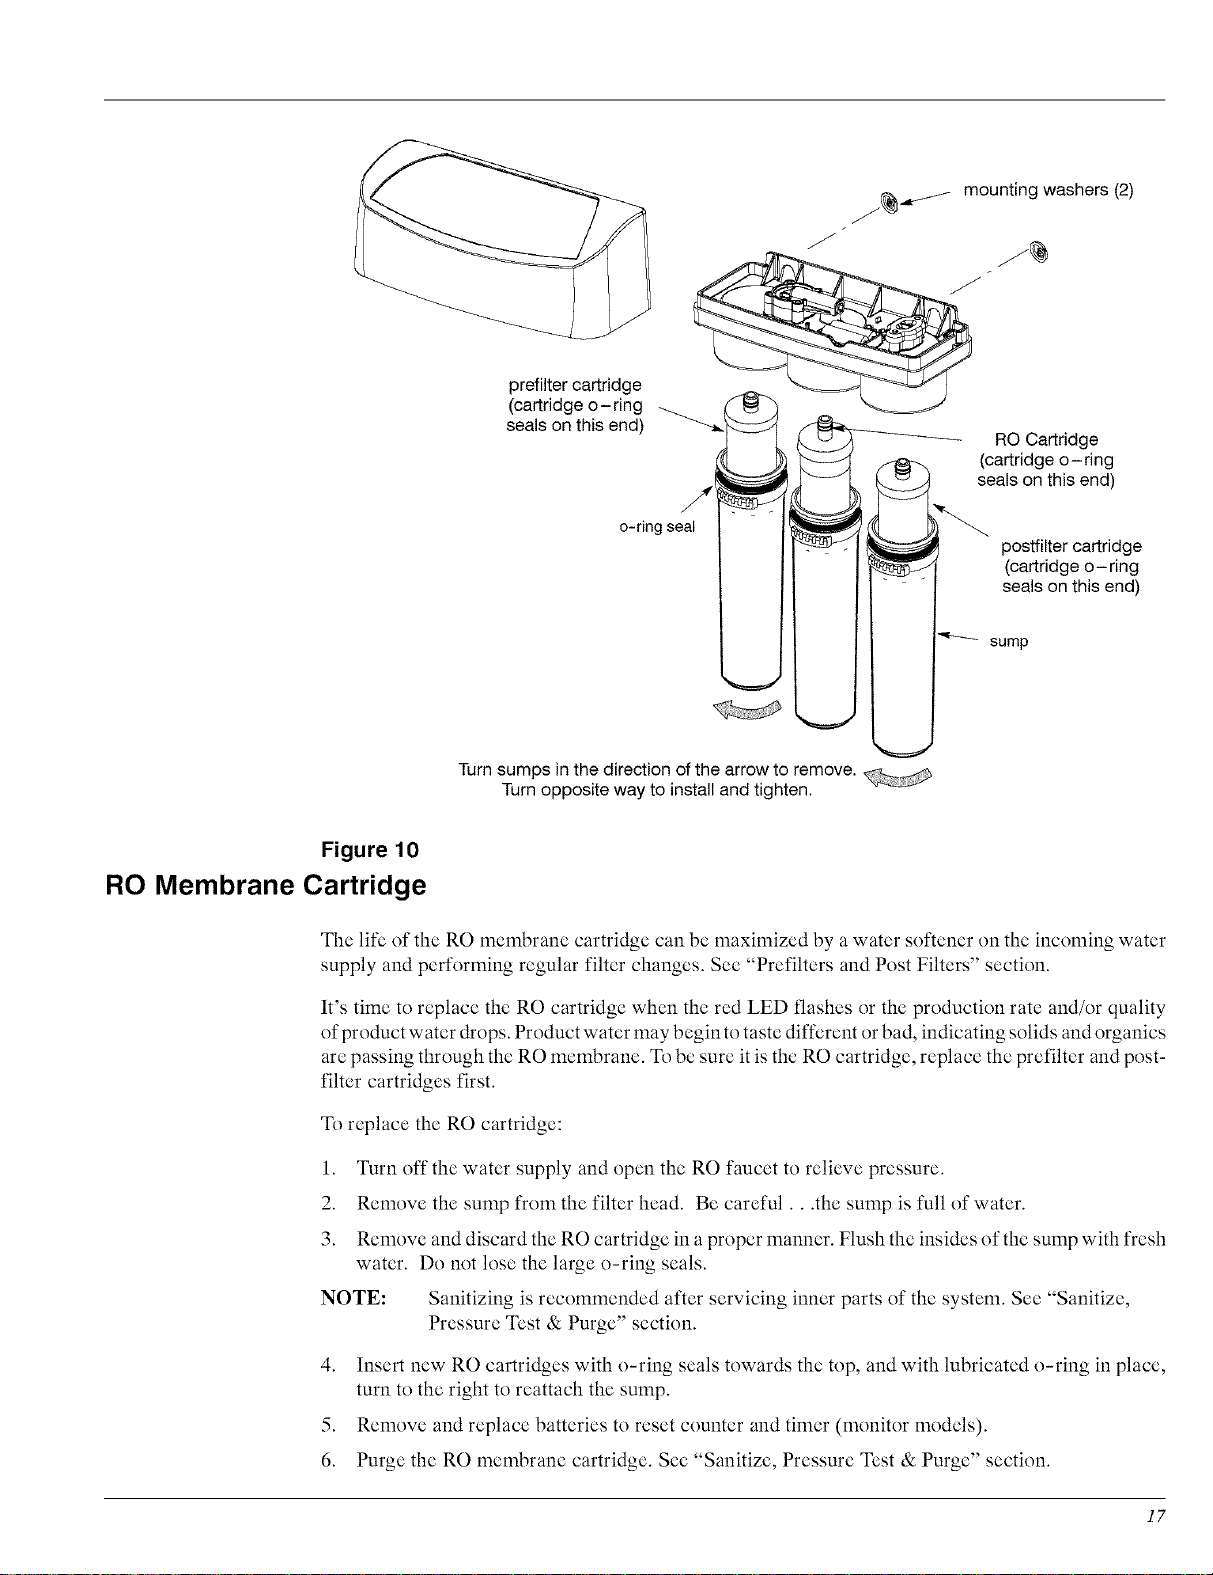
(_j- mounting washers (2)
prefilter cartridge
(cartridge o-ring
seals on this end)
RO
Cartridge
(cartridge o-ring
/ _ _ seals on this end)
o-ring seal
postfilter cartridge
(cartridge o- ring
seals on this end)
sump
Turn sumps in the direction of the arrow to remove.
Turn opposite way to install and tighten.
Figure 10
RO Membrane Cartridge
The life of the RO membrane cartridge can be maximized by a water softener on the incoming water
supply and performing regular filter changes. See "Prefilters and Pc st Filters seem n.
It's time to replace the RO cartridge when the red LED flashes or the production rate and/or quality
of product water drops. Product water may begin to taste different or bad, indicating solids and organics
are passing through the RO membrane. To be sure it is the RO cartridge, replace the prefilter and post-
filter cartridges first.
To replace the RO cartridge:
1.
2.
3.
NOTE:
Turn off the water supply and open the RO faucet to relieve pressure.
Remove the sump from the filter head. Be careful...the sump is full of water.
Remove and discard the RO cartridge in a proper manner. Flush the insides of the sump with fresh
water. Do not lose the large o-ring seals.
Sanitizing is recommended after servicing inner parts of the system. See "Sanitize,
Pressure Test & Purge" section.
4. Insert new RO cartridges with o-ring seals towards the top, and with lubricated o-ring in place,
turn to the right to reattach the sump.
5. Remove and replace batteries to reset counter and timer (monitor models).
6. Purge the RO membrane cartridge. See "Sanitize, Pressure Test & Purge" section.
I7
Loading ...
Loading ...
Loading ...