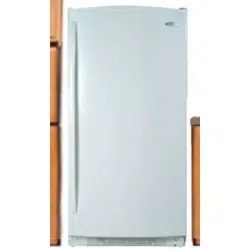
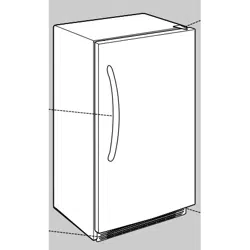
REFRIGERATOR USE
Openning and Closing Doors
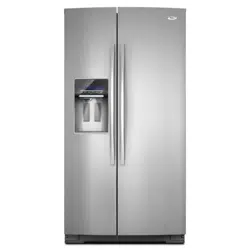
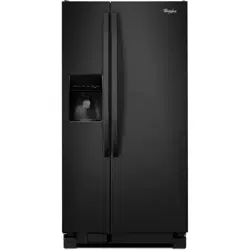
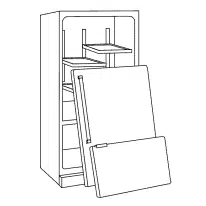
There are two refrigerator compartment doors. The doors can be opened and closed either separately or together. There is a vertically-hinged seal on the left refrigerator door.
• When the left side door is opened, the hinged seal automatically folds inward so that it is out of the way.
• When both doors are closed, the hinged seal automatically forms a seal between the two doors.
Using the Controls
The temperature controls are located at the top front of the refrigerator or freezer compartments.
Temperature Controls
For your convenience, the temperature controls are preset at the factory. When you first install your refrigerator, make sure the controls are still set to the recommended setting as shown.
IMPORTANT:
• The recommended setting should be correct for normal household refrigerator use. The controls are set correctly when milk or juice is as cold as you like and when ice cream is firm.
• Wait 24 hours for your refrigerator to cool completely before adding food. If you add food before the refrigerator has cooled completely, your food may spoil.
NOTE: Adjusting the refrigerator and freezer temperature controls to a colder than recommended setting will not cool the compartments any faster.
If the temperature is too warm or too cold in the refrigerator or freezer, first check the air vents to be sure they are not blocked before adjusting the controls.
To Turn Off/On:
- Style 1 Press the freezer down arrow touch pad until a dash (-) appears in both the refrigerator and freezer displays. Neither compartment will cool.
- Style 2 Turn the freezer control to the word OFE Neither compartment will cool when the freezer is set to OFF
Humidity Control (on some models)
The humidity control turns on a heater to help reduce moisture on the door hinge seal. Use in humid environments or when you notice moisture on the door hinge seal. The refrigerator uses more energy when Humidity Control is on.
• Press the control to ON when the environment is warm and more humid, or if you notice moisture on the door hinge seal.
• Press the control to OFF to save energy when the environment is less humid.
Adjusting Controls
If you need to adjust the temperature in either the refrigerator or freezer compartment, use the settings listed in the chart below as a guide.
For (Style 1) controls press the up or down arrow touch pads,
or for (Style 2) controls turn the dial to adjust the temperature. Except when starting the refrigerator, do not adjust either control more than one setting at a time. Wait 24 hours between adjustments for the temperature to stabilize.
Crisper Humidity Control
You can control the amount of humidity in the moisture-sealed crisper. Depending on your model, adjust the control to any setting between FRUIT and VEGETABLES or LOW and HIGH.
- FRUIT / LOW (open) for best storage of fruits and vegetables with skins.
- VEGETABLES / HIGH (closed) for best storage of fresh, leafy vegetables.
Ice Maker
Turning the Ice Maker On/Off
To turn the ice maker ON, simply lower the wire shutoff arm. To manually turn the ice maker OFF, lift the wire shutoff arm to the OFF (arm up) position and listen for the click.
NOTE: Your ice maker has an automatic shutoff. As ice is made, the ice cubes will fill the ice storage bin and the ice cubes will raise the wire shutoff arm to the OFF (arm up) position. Do not force the wire shutoff arm up or down.
Ice Production Rate
• The ice maker should produce a complete batch of ice approximately every 3 hours.
• To increase ice production, lower the freezer and refrigerator temperature. See "Using the Controls." Wait 24 hours between adjustments.
Remember
- Allow 24 hours to produce the first batch of ice. Discard the first three batches of ice produced.
- The quality of your ice will be only as good as the quality of the water supplied to your ice maker. Avoid connecting the ice maker to a softened water supply. Water softener chemicals (such as salt) can damage parts of the ice maker and lead to poor quality ice. If a softened water supply cannot be avoided, make sure the water softener is operating properly and is well maintained.
- Do not store anything on top of the ice maker or in the ice storage bin.
Water Dispenser
IMPORTANT:
• After connecting the refrigerator to a water source, flush the water system. Press the button on the dispenser for 5 seconds, then release it for 5 seconds. Repeat until water begins to flow. Once water begins to flow, continue depressing and releasing the dispenser button (5 seconds on, 5 seconds off) for an additional 2 minutes. This will flush air from the filter and water dispensing system. Additional flushing may be required in some households. As air is cleared from the system, water may spurt out of the dispenser.
NOTE: After 5 minutes of continuous dispensing, the dispenser will stop dispensing water to avoid flooding. To continue dispensing, press the dispenser button again.
• Allow 24 hours for the refrigerator to cool down and chill water. Dispense enough water every week to maintain a fresh supply.
Dispensing Water
- 1. Hold a container under the dispenser while pressing the button.
- 2. Release the button to stop dispensing.
REFRIGERATOR CARE
Cleaning
WARNING Explosion Hazard Use nonflammable cleaner. Failure to do so can result in death, explosion, or fire.
Both the refrigerator and freezer sections defrost automatically. However, clean both compartments about once a month to avoid buildup of odors. Wipe up spills immediately.
IMPORTANT:
• Because air circulates between both sections, any odors formed in one section will transfer to the other. You must thoroughly clean both sections to eliminate odors. To avoid odor transfer and drying out of food, wrap or cover foods tightly.
• For stainless steel models, stainless steel is corrosionresistant and not corrosion-proof. To help avoid corrosion of your stainless steel, keep your surfaces clean by using the following cleaning instructions.
To Clean Your Refrigerator:
NOTE: Do not use abrasive or harsh cleaners such as window sprays, scouring cleansers, flammable fluids, muriatic acid, cleaning waxes, concentrated detergents, bleaches or cleansers containing petroleum products on exterior surfaces (doors and cabinet), plastic parts, interior and door liners or gaskets. Do not use paper towels, scouring pads, or other harsh cleaning tools.
1. Unplug refrigerator or disconnect power.
2. Hand wash, rinse, and dry removable parts and interior surfaces thoroughly. Use a clean sponge or soft cloth and a mild detergent in warm water.
3. Clean the exterior surfaces. Painted metal: Wash painted metal exteriors with a clean, soft cloth or sponge and a mild detergent in warm water. Rinse surfaces with clean, warm water and dry immediately to avoid water spots. Stainless steel: Wash stainless steel surfaces with a clean, soft cloth or sponge and a mild detergent in warm water. Rinse surfaces with clean, warm water and dry immediately to avoid water spots. NOTE: When cleaning stainless steel, always wipe with the grain to avoid cross-grain scratching.
4. Clean the condenser coils regularly. Coils may need to be cleaned as often as every other month. This may help save energy.
• Pull refrigerator out away from the wall. See "Unpack the Refrigerator."
• Vacuum coils when they are dusty or dirty.
• Roll refrigerator back into place. Make sure to leave 1" (2.5 cm) between the cabinet back and the wall.
• Check to see that the refrigerator is level.
5. Plug in refrigerator or reconnect power.
Changing the light bulb
NOTE: Not all appliance bulbs will fit your refrigerator. Be sure to replace the bulb with an appliance bulb of the same size, shape, and wattage (no greater than 40 watts).
1. Unplug the refrigerator or disconnect power.
2. Remove the light shield, if necessary.
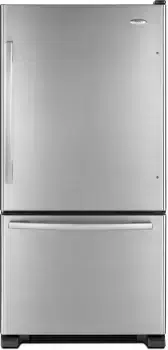
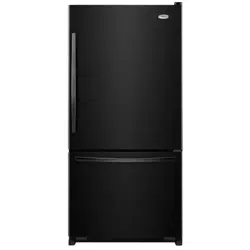
Freezer drawer models
• Top of the refrigerator compartment - Slide the light shield toward the back of the compartment to release it from the light assembly.
• Top of freezer compartment - The light shield opens from the back. Firmly press forward on the notches in the back of the shield and pull the shield down.
NOTE: You may need to remove the upper freezer shelf or basket to access the light assembly.
Freezer door models
Top of the refrigerator compartment - Slide the shield toward the back to release it from the light assembly.
Top of freezer compartment - Squeeze and pull rear of light shield toward you to release the tabs, then pull down.
3. Replace the burned-out bulb(s) with an appliance bulb(s) no greater than 40 watts.
4. Replace the light shield.
Freezer drawer models
- Top of the refrigerator compartment - Insert the tabs on the shield into the liner holes on each side of light assembly. Slide the shield toward the front until it locks into place.
NOTE: To avoid damaging the light shield, do not force the shield beyond the locking point.
- Top of the freezer compartment - Insert the front tabs of the shield into the liner and snap the back portion of the shield over the light assembly.
Freezer door models
- Top of the refrigerator compartment - Insert the tabs on the shield into the liner holes on each side of the light assembly. Slide the shield toward the front until it locks.
NOTE: To avoid damaging the light shield, do not force the shield beyond the locking point.
- Top of freezer compartment - Insert front tabs of light shield into liner and snap the back of the shield over light assembly.
5. Plug in refrigerator or reconnect power.