11
Supported models
• C4-T4T8 8" Tabletop Touchscreen (black or white)
• C4-T4T10 10" Tabletop Touchscreen (black or white)
Introduction
The Control4® T4 Series Tabletop Touchscreens oer complete
system control in an elegant, compact, and portable design. The
touchscreens are equipped with a full capacitive screen, audio
and video Intercom (with the built-in camera) using SIP, and
more.
This touchscreen can be located anywhere, and the convenient
recharging station enables it to be used as either a tabletop or
portable interface. The touchscreen uses an AC power adapter
for power and Wi-Fi for network connectivity.
Note: 802.11b is not recommended for video intercom.
We recommend using Wireless-N. See “Specifications”
for more information.
Box contents
• Tabletop Touchscreen
• Recharging station
• Recharging station power cord
Accessories available for purchase
• Tabletop Permanent Mount Kit (C4-T4PMNT)
• T4 Touchscreen Tabletop 8" Base (C4-T4TBS8)
• T4 Touchscreen Tabletop 10" Base (C4-T4TBS10)
Warnings
Caution! Do not place the touchscreen near sources of
heat or expose to direct sunlight for an extended time.
Avertissement ! Ne placez pas l’unité près des sources
de chaleur ou exposition pour diriger la lumière du soleil
pendant une période prolongée.
Caution! This product generates heat. The room must
have adequate ventilation or the ability to dissipate heat
eectively.
Avertissement ! Ce produit produit de la chaleur. La salle
doit avoir à ventilation proportionnée ou la capacité
d’absorber la chaleur ecacement.
Caution! Use this product only in dry locations.
Avertissement ! Employez ce produit seulement dans
des endroits secs.
Caution! Do not use pens or sharp objects to navigate
or make selections on the touchscreen. To select an item
or scroll through a list, use your fingertip.
Avertissement ! N’employez pas les stylos ou les objets
pointus pour diriger ou pour faire des choix sur l’écran.
Pour choisir un article ou un rouleau par une liste,
employez votre bout du doigt.
Caution! Improper use or installation can cause
DAMAGE OF PROPERTY.
Avertissement ! L’utilisation ou l’installation inexacte
peut causer DAMAGE DE PROPRIÉTÉ.
Important! Using this product in a manner other than
outlined in this document voids your warranty. Further,
Control4 is NOT liable for any damage incurred with the
misuse of this product. See “Warranty.”
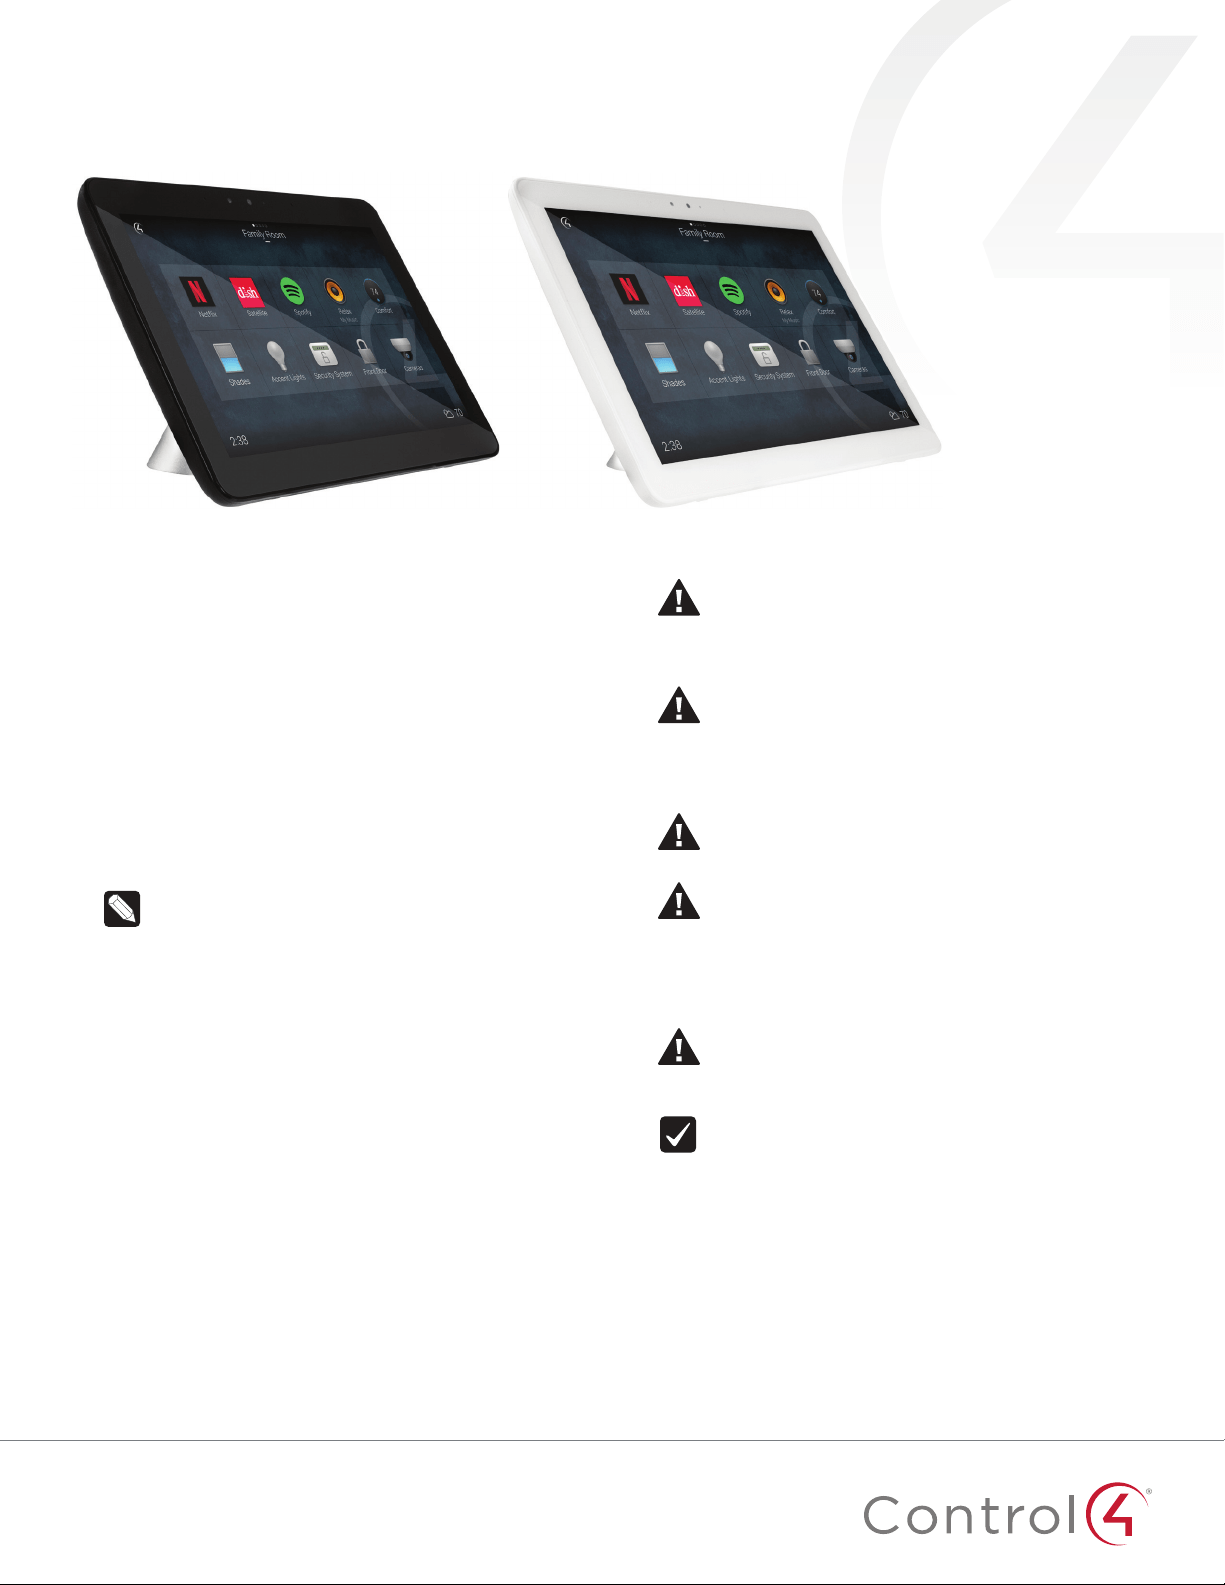
T4 Series Tabletop Touchscreens
Installation Guide

2
Specifications and requirements
Specifications
Model Numbers
C4-T4T10-BL, C4-T4T10-WH
C4-T4T8-BL, C4-T4T8-WH
Screen
Resolution: 1920 × 1200
Capacitive touch
Camera: 720p
Wireless network
802.11b/g/n 2.4 GHz
802.11a/n/ac 5 GHz
Security: WEP, WPA/WPA2 PSK, 802.1x EAP, PEAP
Notes: (1) While technically the touchscreen can use 802.11b,
802.11b is not supported. (2) 802.11n is recommended for
best performance. Even with 802.11n, broadcasting to
several devices will degrade Video Intercom response time
and images. Broadcasting to additional devices will further
degrade performance. See “Wireless Network Limitations.”
Power supply
100-240V AC, 50/60 Hz
International adapters included
Charging base connections: 5V DC power
Dimensions
(W×H×D)
8" Touchscreen: 200 × 144 × 23 mm (7.9 × 5.7 × 0.9")
8" Base: 106 × 79 × 56 mm (4.17 × 3.11 × 2.21")
10" Touchscreen: 245 × 172 × 23 mm (9.65 × 6.77 × 0.9")
10" Base: 115 × 102 × 66 mm (4.53 × 4.02 × 2.60")
Weight
8" Touchscreen: 1.05 lb (0.47 kg)
8" Charging base: 1.4 lb (0.64 kg)
10" Touchscreen: 1.35 lb (0.60 kg)
10" Charging base: 1.05 lb (0.46 kg)
Operating
temperature
0 to 40 ˚C (32 to 104 ˚F)
Storage
temperature
-20 to 70 ˚C (-4 to 158 ˚F)
Requirements
• A controller fully installed and configured with Control4
OS3.2.1 or newer.
• A wireless network (IEEE 802.11b/g/n) must be installed and
available with a wireless access point (WAP). Security can be
WEP, WPA/WPA2 PSK, 801.1x EAP, or PEAP.
• For AC power, you must have access to an AC power outlet
(AC power adapter included).
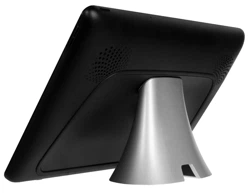
Views
Front
E
A B C
D
A Camera
B Camera LED
C Light sensor
D Stereo microphones
E 8" or 10" diagonal, capacitive 1920 × 1200 display
Back (with charging station)
H
K
F G
I
J
L
F Power button. Press to enter or exit battery saving mode,
press and hold to turn off or restart, or press and hold for 10
seconds to power off.
G Reset pinhole. Press to reset, or press and hold to reset and
restore factory defaults.
H Docking connector
I Volume buttons
J Speakers
K Charging station base
L 5V DC power connector
3
Touchscreen placement
Place the touchscreen’s charging station on any level surface
near a power outlet. You can also use PoE to supply power to an
active PoE splitter’s DC jack. For more information on mounting
the touchscreen, see “Portable” under “Mounting options” below.
Note: Consider the angle of the touchscreen’s camera
and the sitting or standing position of the people who
will use it while it’s on the charging station.
Connect power and Wi-Fi
The touchscreen uses a Wi-Fi network connection, so it can be
positioned anywhere in the home with a strong WiFi signal and
access to a power outlet.
To connect power and Wi-Fi:
1 Place the touchscreen’s charging station near a power outlet.
2 Connect the AC power adaptor to a power outlet and the
charging station.
3 Make sure you have Wi-Fi working in the home.
If a home requires a large number of Wi-Fi video intercom
devices, ensure that you have a robust Wi-Fi network
(possibly consisting of multiple access points).
Connection notes: This device supports 802.11b/g/n/
ac. We recommend Wireless-N or Wireless-AC for best
video intercom performance.
Wireless network limitations: Many Wi-Fi access points
handle Multicasts (Wi-Fi simultaneously sent to multiple
devices, for example, when the touchscreen broadcasts
video to all stations) by slowing down transmission
speed to the 1 Mb basic rate. This can cause overall
Wi-Fi congestion in the Wi-Fi network during the
broadcast. Video Intercom response times and images
may degrade at each device.
Connect to Wi-Fi
To set up Wi-Fi on the touchscreen:
1 After the touchscreen starts up, tap Network. The network
configuration page opens.
2 Under Wi-Fi, make sure Wi-Fi is enabled, then tap the Wi-Fi
field to open a list of available networks.
3 Tap the network name you want to connect to.
4 Tap the Password field, then use the on-screen keyboard to
type the password (if required).
Note: If you need to enter a static IP address, follow the
instructions under “To set a wireless static IP address”
below before proceeding.
5 Tap Connect.
If you don’t see the network you want:
1 Tap +, then tap the Network SSID field and type the SSID
(name) of the network by using the on-screen keyboard.
2 Tap the Security field, then select the type of security to use.
3 Tap the Password field, then use the on-screen keyboard to
type the password (if required).
Note: If you need to enter a static IP address, follow the
instructions under “To set a wireless static IP address”
below before proceeding.
4 Tap Save. The new network is added to the bottom of the
network list.
To set a wireless static IP address:
1 Scroll down and tap Show advanced options.
2 Tap IPsettings, then tap Static.
3 Select each box one at a time and use the on-screen
keyboard to type the:
• IP address
• Gateway
• Network prefix length
• DNS 1 (preferred)
• DNS 2 (alternate)
Add and configure in Composer Pro
After the touchscreen is installed and appears on the home
network, use Composer Pro to add it to the Control4 system and
configure it.
Use the Composer Pro System Design and Connections views to
add and configure this device.
To add and configure a T4 touchscreen to a project:
1 Add the T4 Tabletop Touchscreen driver to your project.
2 Identify the device to the project, select the touchscreen in
Composer Pro’s Connections > Network view, click Identify,
then tap Identify on the touchscreen.
3 To configure the properties, select the touchscreen in the
System Design view, then view and change the properties in
the Properties pane as needed.
Properties include:
• Network Connection—Reports the touchscreen’s current
network connection type.
• Back Light—Click the arrows or type numbers to set the
light level, then click Set.
Advanced properties include:
• Enable Camera—Allows you to enable or disable the
camera.
Intercom properties (nested under the touchscreen):
• Appearance—Select to hide the touchscreen from
appearing in Navigators as an available device.
• Behavior—Select the modes you want this touchscreen to
support.
• Audio Control—Select the volume of individual audio
settings.

4
• Sip Information—Information for integrating the
touchscreen into your SIP/VoIP system.
• Custom Buttons—Select to enable and label the two
available custom buttons.
• Alternate Camera—Select to use an external camera for
the video associated with the touchscreen, for example, a
security camera mounted to the side of the entrance and
pointing at the door.
Mounting
Place the charging station on any level surface. While positioning
the touchscreen, consider the angle of the touchscreen’s camera
and the position of the people who will use it while it’s on the
charging station.
Portable use
You can set the touchscreen onto the charging station for
recharging and tabletop use, and lift the screen from the
charging station for portable use (like a tablet).
Tip: For easy and smooth separation of the touchscreen from the
charging station, slightly rotate the touchscreen while lifting it.
Permanent mount
You can mount a touchscreen permanently to a surface, such
as a table, using the optional T4 Tabletop Permanent Mount Kit
(C4-T4PMNT).
1 Peel o the plastic cover on the touchscreen’s docking
connector recess.
2 Use the Phillips-head flat screws provided in the kit to
install the permanent-mount adapter into the touchscreen’s
docking connector recess.
3 Remove the charging station’s bottom cover by removing
the two screws shown.
Base
screws
4 Save the cover and screws.
5 Using a #2 Phillips screwdriver inserted from the base of
the charging station, remove the two screws that secure
the charging station’s top docking connector cover (do not
remove the screw holding the PCB), then discard the two
screws you removed.
6 Screw the base to the back of the touchscreen as shown
using the new threaded, black screws provided. DO NOT
ATTEMPT TO USE THE ORGINAL SCREWS REMOVED
IN STEP 5 OR YOU WILL PERMANANTLY DAMAGE THE
THREADS ON THE TOUCHSCREEN.
7 Reinstall the base bottom cover.
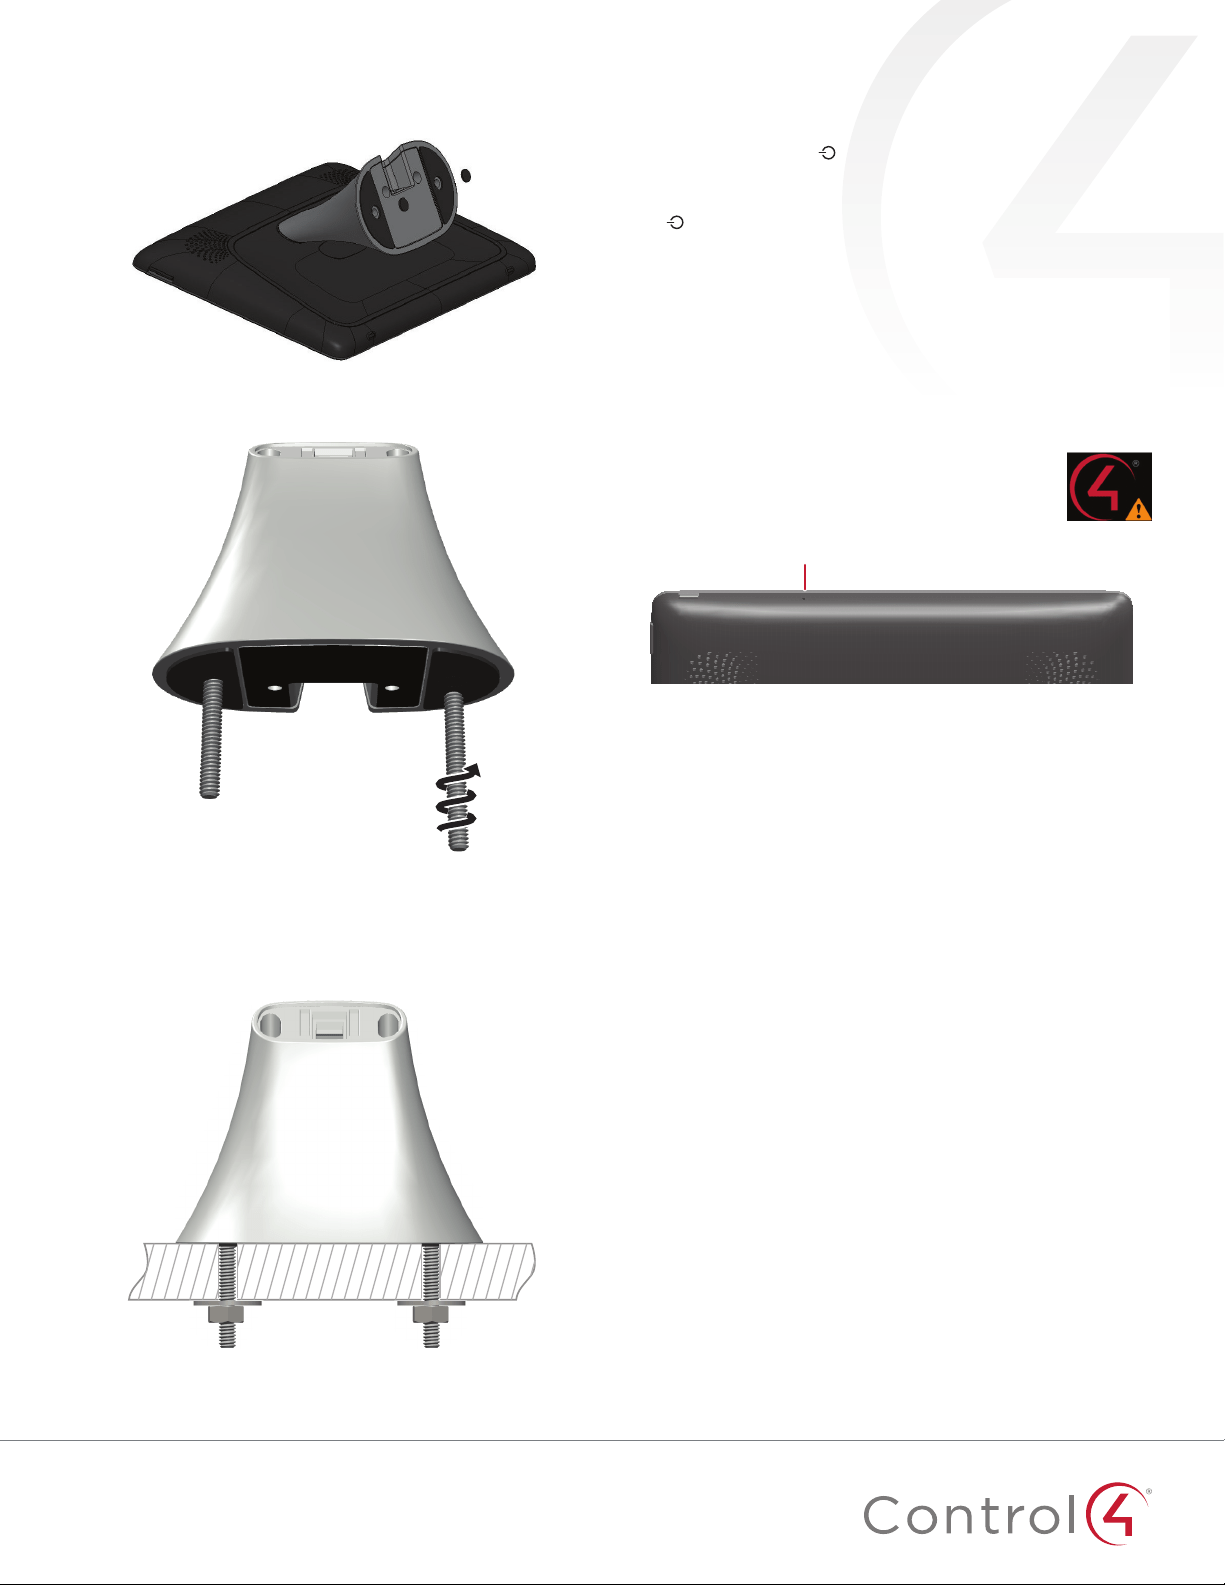
5
8 To install the charging station permanently into a table
or countertop, remove the small rubber discs covering the
threaded holes in the base.
9 Install the threaded posts (all thread) into the base of the
charging station.
10 Using the template and a 1/4" drill, drill two holes into the
surface where you are mounting the touchscreen. Maximum
surface thickness is 32 mm (1.25").
11 Mount the charging station assembly into the mounting
holes and secure it in place using a washer and nut.
Troubleshooting
To power cycle the touchscreen:
1 Press and hold the
(power) button for at least 10 seconds
until the touchscreen turns o.
2 If it doesn’t turn back on automatically, press and release the
(power) button again to turn it on.
To perform a factory data reset:
1 On the touchscreen’s main screen, tap Settings, System Info,
then Factory data reset.
- OR -
If the touchscreen has not yet been configured, tap About,
then Factory data reset.
- OR -
To restore defaults without using the display
screen, press and hold the reset pinhole button
until “Erasing” appears on the screen.
Reset hole
control4.com | 888.400.4070
Additional resources
The following resources are available for more support.
• Knowledgebase and forums on Tech Community
• Technical Support
• Control4 website:
www.control4.com
• Composer documentation available at
ctrl4.co/docs
.
Warranty and legal notices
Find details of this product’s 2-Year Limited Warranty at
snapav.com/warranty
, or request a paper copy from Customer
Service at (866) 424-4489. Find other legal resources, such as
regulatory notices and patent information, at
snapav.com/legal
.
More help
For the latest version of this document, open this URL or scan
the QR code on a device that can view PDFs.
200-00683-B
2020-11-11 MS
Copyright ©2020, Wirepath Home Systems, LLC. All rights reserved. Control4 and Snap AV and their respective logos are registered trademarks or trademarks of
Wirepath Home Systems, LLC, dba “Control4” and/or dba “SnapAV” in the United States and/or other countries. Snap AV and Wirepath are also registered trademarks
or trademarks of Wirepath Home Systems, LLC. Other names and brands may be claimed as the property of their respective owners. All specifications subject to change
without notice.
B
LATEST VERSION OF THIS DOCUMENT
ctrl4.co/t4-tabletop-ig
T4 DATA SHEET
ctrl4.co/t4-ds