User Manual for Neff S155HVX15G
Table of Contents
- Safety
- General information
- Intended use
- Restriction on user group
- Safe installation
- Safe use
- Damaged appliance
- Risk to children
- Preventing material damage
- Safe installation
- Safe use
- Environmental protection and saving energy
- Disposing of packaging
- Saving energy
- AquaSensor
- Installation and connection
- Scope of supply
- Installing and connecting the appliance
- Drainage connection
- Drinking water connection
- Electrical connection
- Familiarising yourself with your appliance
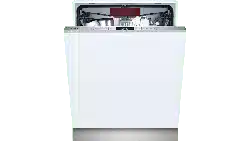
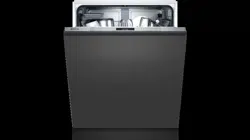
- Appliance
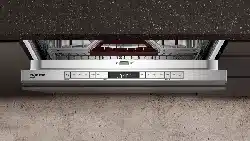
- Controls
- Programmes
- Information for test institutes
- Favourite
- Additional functions
- Features
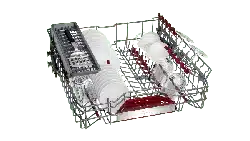
- Top basket
- Bottom basket
- Cutlery drawer
- Etagere
- Folding prongs
- Baking sheet spray head
- Basket heights
- Before using for the first time
- Performing the initial configuration
- Water softening system
- Overview of water hardness settings
- Setting the water softening system
- Special salt
- Switching off the water softening system
- Regeneration of the water softening system
- Rinse aid system
- Rinse aid
- Setting the amount of rinse aid
- Switching the rinse aid system off
- Detergent
- Suitable detergents
- Unsuitable detergents
- Information on detergents
- Adding detergent
- Tableware
- Damage to glass and tableware
- Arrange tableware
- Removing tableware
- Basic operation
- Switching on the appliance
- Setting a programme
- Setting additional functions
- Setting timer programming
- Starting the programme
- Interrupting programme
- Terminate programme
- Switching off appliance
- Basic settings
- Overview of basic settings
- Changing basic settings
- Home Connect
- Home Connect quick start
- Home Connect settings
- Remote Start
- Remote Diagnostics
- Software update
- Data protection
- Cleaning and servicing
- Cleaning the tub
- Cleaning products
- Tips on appliance care
- Easy Clean
- Filter system
- Cleaning spray arms
- Troubleshooting
- Error code / Fault display / Signal
- Washing results
- Home Connect problem
- Information on display panel
- Malfunctions
- Mechanical damage
- Noise
- Clean wastewater pump
- Transportation, storage and disposal
- Removing the appliance
- Protect appliance from frost
- Transporting the appliance
- Disposing of old appliance
- Customer Service
- Product number (E-Nr.), production number (FD) and consecutive numbering (Z-Nr.)
- AQUA-STOP guarantee
- Technical specifications
- Information regarding Free and
- Open Source Software
- Declaration of Conformity
Before using for the first time
Performing the initial configuration
On initial start-up or after a reset to the factory settings, you will need to make settings.
Tip: Connect your appliance to a mobile device. You can conveniently change all settings via the Home Connect app. → "Home Connect quick start", Page 37
Requirement: "The appliance has been installed and connected." → Page 11
1. "Add special salt." → Page 25
2. "Add rinse aid." → Page 27
3. "Switch on the appliance." → Page 32
4. "Setting the water softening system." → Page 25
5. "Set the amount of rinse aid to be dispensed." → Page 27
6. "Add detergent" → Page 28.
7. Start the Programme with the highest cleaning temperature without tableware. To remove any marks from water or other residues, we recommend you operate the appliance without tableware before using it for the first time.
Tip: You can change these settings and other "Basic settings" → Page 35 at any time.
Water softening system
Water softening system Hard water leaves limescale on the tableware as well as the washing tank and parts of the appliance may become blocked. To ensure good dishwashing results, you can treat the water with special salt and the water softening system. To avoid damage to the appliance, water with a hardness above 9 °E must be softened.
Overview of water hardness settings
You can find an overview of the water hardness values that can be selected here. You can find out how hard your water is from your local water company or by using a water hardness tester.
Note: Set the water hardness determined on your appliance. → "Setting the water softening system", Page 25 With a water hardness of 0 - 8 °E you can dispense with special salt for dishwashers and switch off the water softening system. → "Switching off the water softening system", Page 26
Setting the water softening system
Set the water hardness on your appliance.
1. Determine the water hardness and the appropriate setting value. → "Overview of water hardness settings", Page 24
2. Press .
3. To open the basic settings, press for 3 seconds.
- The display shows Hxx.
- The display shows .
4. Press repeatedly until the right water hardness has been set. The value H04 is set at the factory.
5. To save the settings, press for 3 seconds.
Special salt
You can use special salt to soften water.
Adding special salt
If the special salt refill indicator lights up, add special salt to the dispenser for special salt just before the programme starts. The consumption of special salt depends on the water hardness. The higher the water hardness, the greater the consumption of special salt.
ATTENTION!
Detergent may damage the water softening system.
▶ Only fill the dispenser of the water softening system with special dishwasher salt.
Special salt for dishwashers can damage the tub due to corrosion.
▶ To make sure that any special salt that escapes is washed out of the tub, add the special salt to the dispenser for special salt immediately before the programme starts.
1. Unscrew the lid of the dispenser for special salt and remove.
2. On initial start-up: Fill the dispenser right up with water.
3. Note: Only use special salt for dishwashers. Do not use salt tablets. Do not use table salt. Add the special salt to the dispenser. Fill the dispenser right up with special salt. The water in the dispenser is displaced and forced out.
4. Place the lid back on the dispenser and turn to close.
Switching off the water softening system
If you find the special salt refill indicator irritating, e.g. when using combined detergents with salt replacement substances, you can switch the indicator off.
Note To avoid damage to the appliance, only switch off the water softening system in the following cases:
- The water hardness is max. 26 °E and you are using combined detergents with salt replacement substances. According to manufacturers, combined detergents with salt replacement substances can generally only be used up to a water hardness of 26 °E without adding special salt.
- The water hardness is 0 - 8 °E. You do not need to use special salt.
1. Press .
2. To open the basic settings, press for 3 seconds. a
- The display shows Hxx. a
- The display shows .
3. Press repeatedly until the display shows H00.
4. To save the settings, press for 3 seconds.
- The water softening system is switched off and the salt refill indicator is deactivated.
Regeneration of the water softening system
In order to obtain fault-free function of the water softening system, the appliance performs regeneration of the water softening system at regular intervals. Regeneration of the water softening system takes place before the end of the main rinse cycle in all programmes. It will increase the run time and consumption values, e.g. water and electricity.
Rinse aid system
Rinse aid
For optimum drying results, use rinse aid. Only use rinse aid for domestic dishwashers. Adding rinse aid If the rinse aid refill indicator lights up, top up with rinse aid. Only use rinse aid for domestic dishwashers.
1. Press the catch on the lid of the dispenser for rinse aid and lift .
2. Add rinse aid up to the max mark. max
3. If rinse aid spills out, remove it from the tub. Spilled rinse aid can cause excessive frothing during the wash cycle.
4. Close the lid of the dispenser for rinse aid.
- The lid clicks into position.
Setting the amount of rinse aid
If there are streaks or water marks on tableware, change the amount of rinse aid.
1. Press .
2. To open the basic settings, press for 3 seconds.
- The display shows Hxx.
- The display shows .
3. Press repeatedly until the display shows the value set at the factory r05.
4. Press repeatedly until the right amount of rinse aid has been set.
– A low setting adds less rinse aid during the wash cycle and reduces streaking on tableware.
– A higher setting adds more rinse aid during the wash cycle, reduces water marks and improves the drying result.
5. To save the settings, press for 3 seconds.
Switching the rinse aid system off
If you find the rinse aid refill indicator irritating, e.g. when using combined detergents with a rinse aid component, you can switch the rinse aid system off.
Tip: The function of rinse aid is limited with combined detergents. You will generally get better results using rinse aid.
1. Press .
2. To open the basic settings, press for 3 seconds. a
- The display shows Hxx.
- The display shows .
3. Press repeatedly until the display shows the value set at the factory r05.
4. Press repeatedly until the display shows r00.
5. To save the settings, press for 3 seconds.
- The rinse aid system is switched off and the rinse aid refill indicator is deactivated.
Basic operation
Switching on the appliance
▶ Press .
The Eco 50° programme is set by default. The Eco 50° programme is especially environmentally friendly and ideal for normally soiled tableware. It is the most efficient programme for the combination of energy/water consumption for this type of tableware and evidences conformity with the EU Ecodesign Directive. If you do not perform any actions on the appliance for 10 minutes, the appliance will automatically switch off.
Setting a programme
To adjust the wash cycle to the soiling level of the tableware, select a suitable programme.
▶ Press the right programme button. → "Programmes", Page 18
- The programme is set and the programme button flashes.
- The remaining running time of the programme appears on the display.
Setting additional functions
You can set additional functions to complete the washing programme selected.
Note: The additional functions which can be used depend on the programme selected. → "Programmes", Page 18
▶ Press the button for the relevant additional function. → "Additional functions", Page 20
- The additional function is set and the additional function button flashes.
Setting timer programming
You can delay the start of the programme by up to 24 hours.
1. Press . a "h:01" appears in the display.
2. Use to set the required start time for the programme.
3. Press .
- This activates timer programming.
Tip: To deactivate timer programming, press repeatedly until "h:00" appears in the display.
Starting the programme
▶ Press .
The programme has ended when the display shows "0h:00m".
Notes
- If you want to add more tableware while the appliance is running, do not use the tablet collecting tray as a handle for the top basket. You might touch the partially dissolved tablet.
- You can only change a programme when running if you cancel it. → "Terminate programme", Page 34
- The appliance switches off automatically 1 minute after the end of the programme to save energy. If you open the appliance door immediately after the programme has ended, the appliance will switch off after 4 seconds.
Interrupting programme
Note: When you open the appliance door once the appliance has heated up, leave the door slightly ajar for a few minutes and then close it. This will help prevent excess pressure building up in the appliance and stop the appliance door bursting open.
1. Open the appliance door carefully.
2. Press .
- The programme is saved and the appliance switches off.
3. Press to resume the programme.
4. Close the appliance door.