Loading ...
Loading ...
Loading ...
-8-
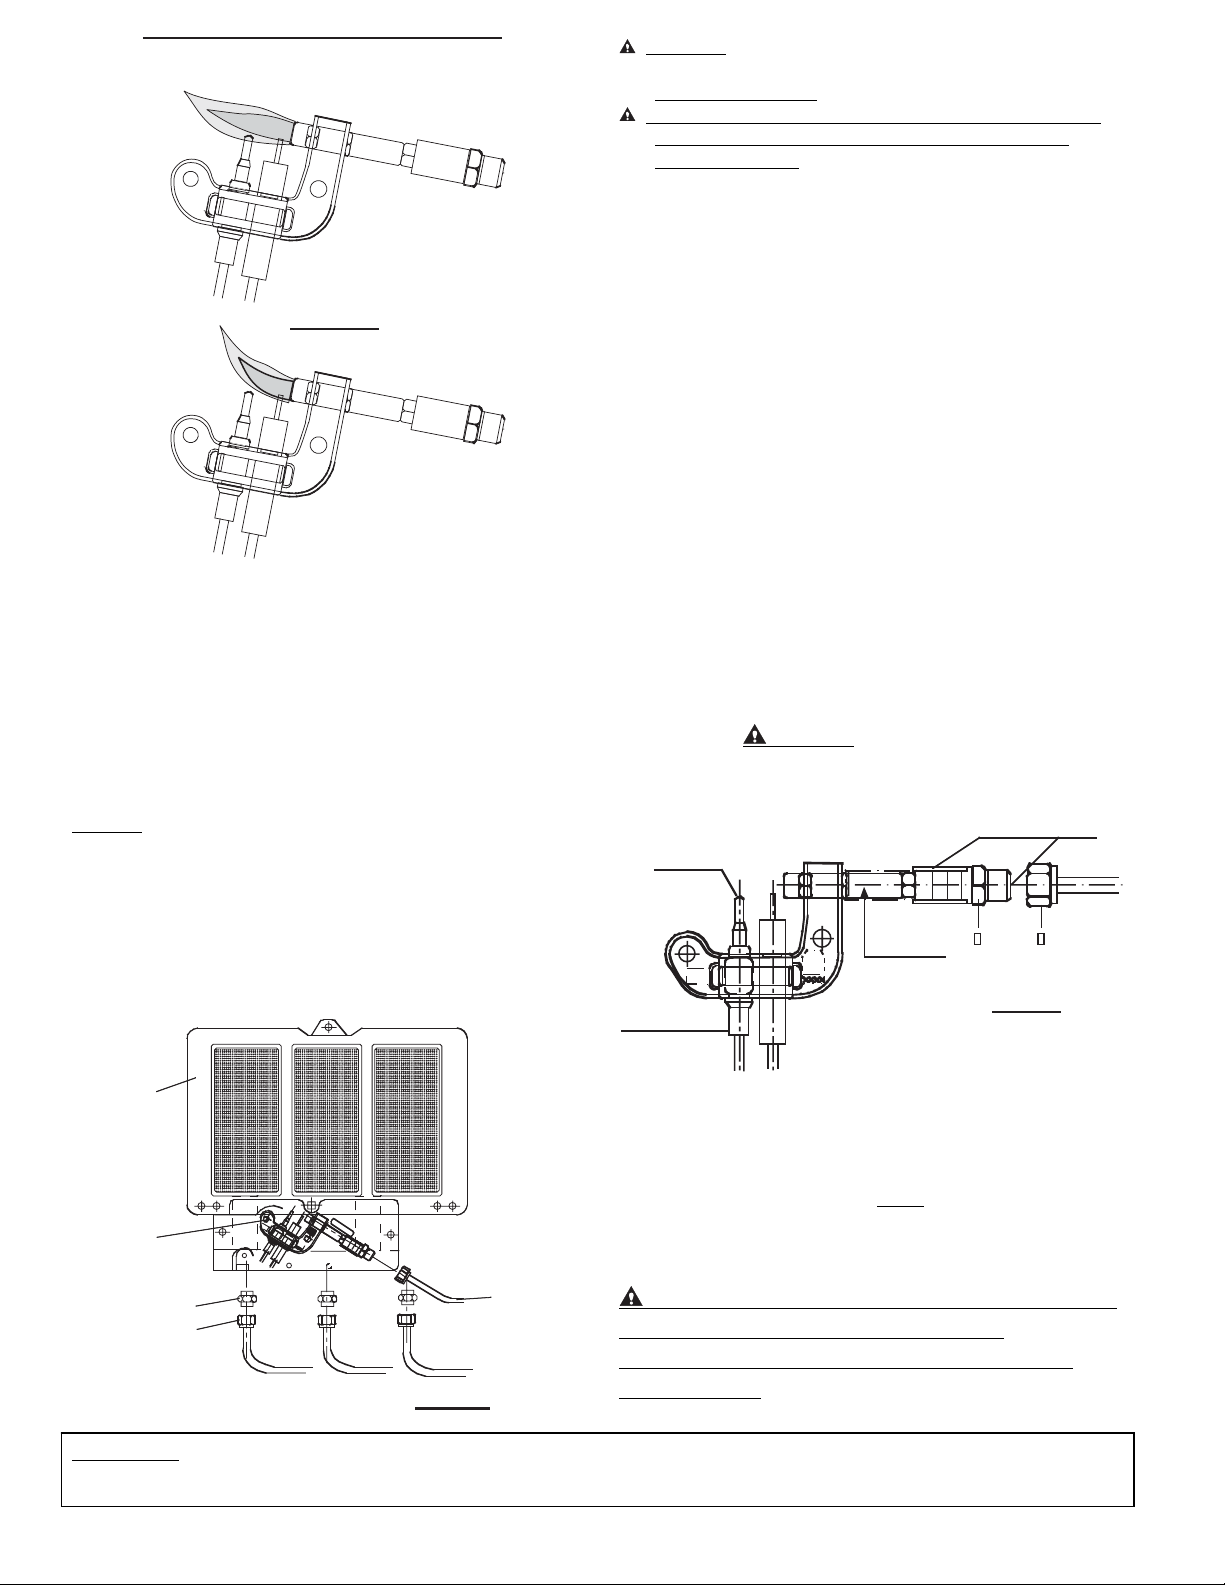
Figure 4
Satisfactory Proper Burning
Unsatisfactory
HEATER SERVICE
To service the heater, turn off the gas supply and disconnect the
gas piping at the union. Unscrew the two screws located in the
lower front part of the unit. By sliding the panels upwards and
toward the front, the functional elements of the unit are uncovered.
Periodic cleaning of the unit is required. Dust the surface of the
unit and vacuum clean burner surfaces and the control
compartment.
BURNER
If this heater has an optional blower, disconnect the electrical
connection before servicing the heater (e.g., unplug the blower).
Keep the heater area clear and free from combustible materials,
gasoline and other flammable vapors and liquids.
If you need to replace the burner assembly, loosen screws A and B,
unscrew the tubing fittings C, and disconnect the assembly, see
Figure 5 (18,000 Btu/hr input model shown).
Figure 5
A
B
C
D
E
WARNING: FAILURE TO KEEP THE PRIMARY AIR OPENING(S)
OF THE BURNER(S) CLEAN MAY RESULT IN SOOTING AND
PROPERTY DAMAGE.
WARNING: DO NOT ALLOW FANS TO BLOW DIRECTLY INTO
THE FIREPLACE. AVOID DRAFTS THAT ALTER BURNER
FLAME PATTERNS.
OXYGEN DEPLETION SENSOR (ODS) SERVICING
Dust and dirt may effect heater performance.
This heater draws air into the bottom of it during normal
operation. In the process, dust and dirt will also be drawn
into the heater. The frequency of cleaning will depend on
how and where the heater is used. At a minimum, you
should clean the heater at least once a year, at the beginning
of the heating season.
If your pilot will not stay lit, try cleaning it. Use a can of
compressed air, such as is used to clean a computer, to blow
dust out of the pilot assembly. Sometimes just blowing air
back through the pilot will get rid of the dirt.
If that fails to solve the problem, remove the wire clip that
holds the metal strip onto the pilot assembly. Remove the
cover and blow any dust out. Reassemble and check for
proper operation.
If that fails, the pilot assembly should be removed and air
blown through the assembly and gas line as shown in
Figure 6. To prevent damage to this assembly, follow the
instructions below for disassembly and assembly of the ODS
for cleaning.
WARNING: Never use needles, wires, or
similar cylindrical objects to clean the pilot orifice. This will
only damage the calibrated ruby orifice (about the size of the
head of a pin) which controls the pilot gas flow.
Figure 6
A B
PILOT B URNER
THERMOCOUPLE
ELECTRODE
TO B LOW
Grab Nut A with an open-end wrench and loosen Nut B from
the pilot tubing. Blow air pressure through the holes as
indicated in Figure 6. This should blow out any foreign
materials. To reassemble, tighten Nut B by grabbing Nut A
with the open-end wrench. NOTE
: When the heater is
reassembled, always check for gas leaks as outlined in the
Gas Supply section of these instructions.
WARNING: DO NOT USE A BLOWER INSERT,
HEAT EXCHANGER INSERT OR OTHER
ACCESSORY NOT APPROVED FOR USE WITH
THIS HEATER.
WARNING
: This vent-free heater is approved for use only with the type of gas indicated on the heater nameplate. Field
conversion is not permitted. Contact our Technical Service Department at (704) 372-3486 if you have any problems.
Loading ...
Loading ...
Loading ...