Loading ...
Loading ...
Loading ...
12 13
WARNING
[1] 13 pcs ST4 x 30 Wood Screws + 13 Wall Anchors for Wood Mounting
[2] 8 pcs M6x50 Expansion Bolts for concrete Mounting
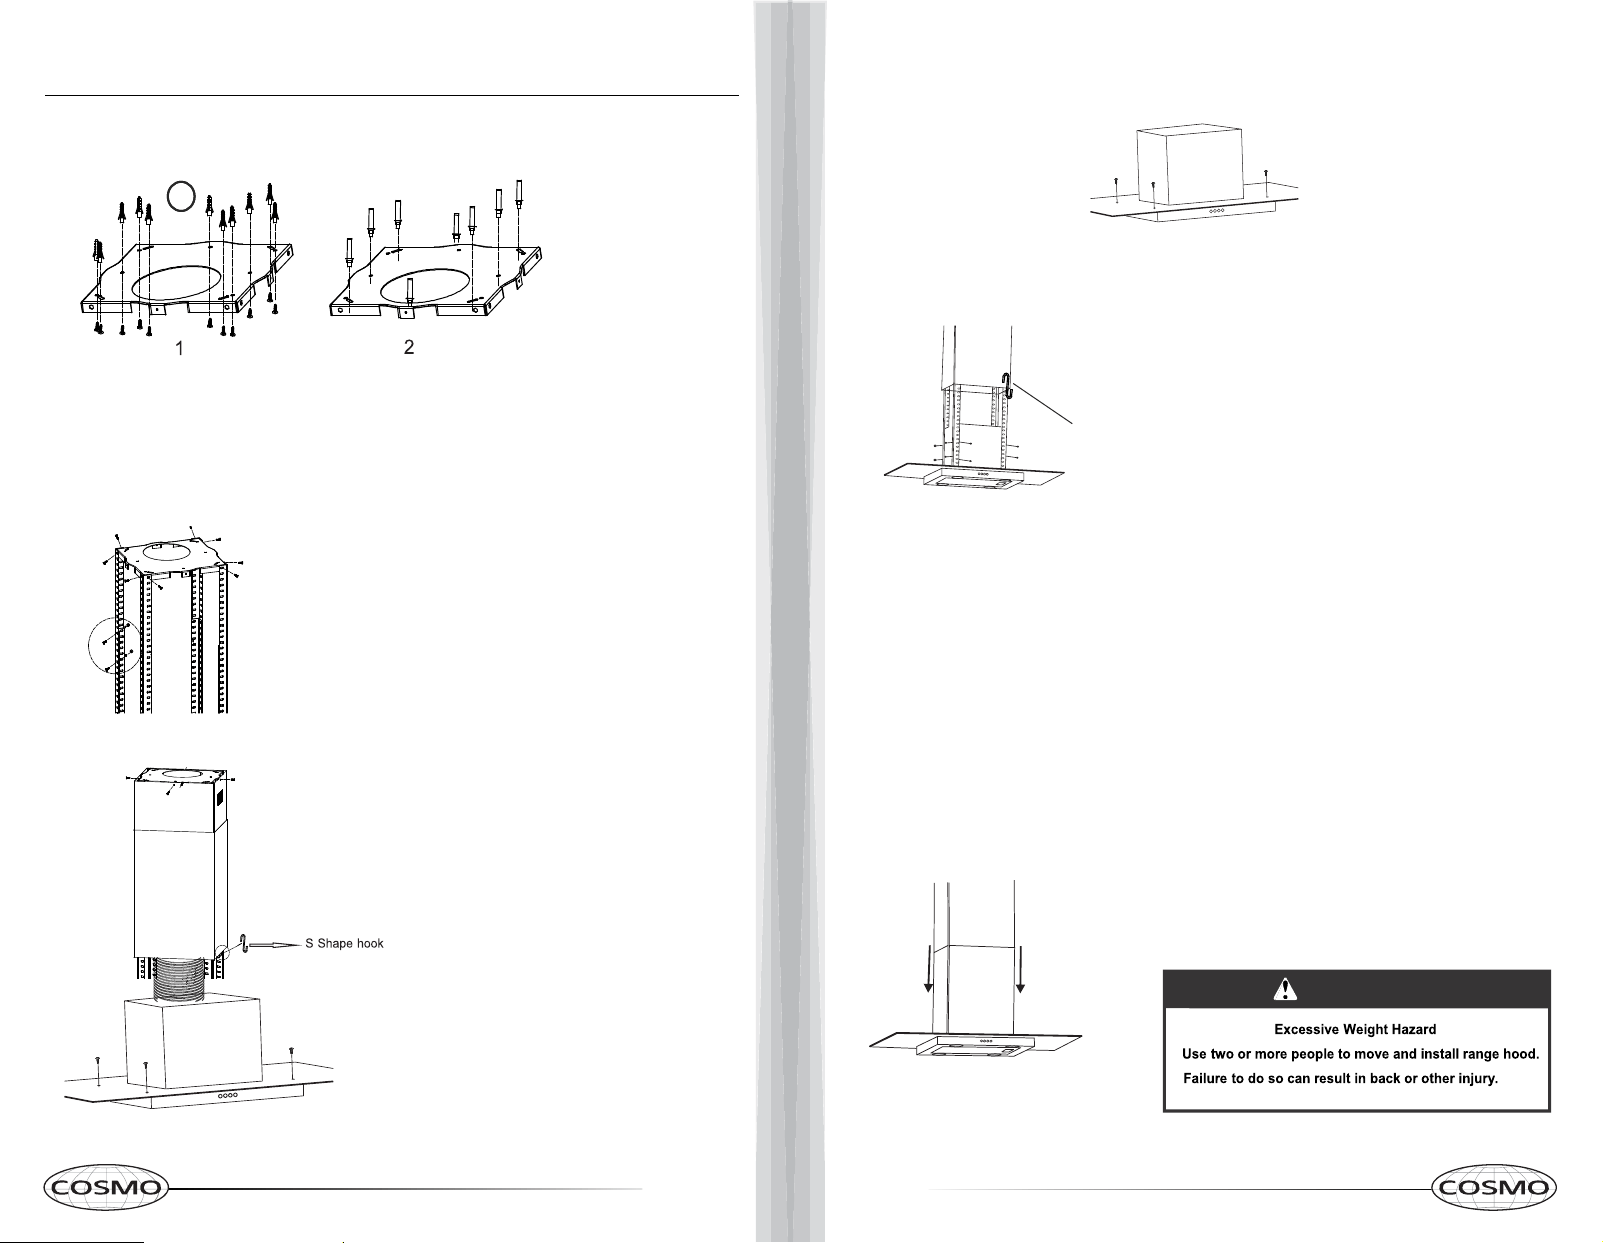
2. Attach the Angle Bars to the Ceiling Mount (A) using (8) M5 screws. Extend the
Angle Bars to the required height and secure them using (16) M5 screws with nuts &
metal washers.
A
B
C
D
E
4. If the glass canopy has not been pre-assembled by the factory, then it should
be attached to the top of the main body of the range hood at this stage.
5. Lift the main body (G/H) of the range hood onto the support frames (D/E)
and fix into position using [16] M5 screws.
IMPORTANT: This stage of the installation process
MUST be completed by two people.
The screws MUST be securely tightened.
6. If you are going to be using the hood in extraction mode (ducted), you should
attach the ducting hose to the ceiling.
The electrical connection must correspond to the electrical requirements noted
on the rating plate which is inside the range hood. The appliance should now be
connected to the power supply.
Check that the appliance is operating correctly by selecting each speed and
switching the lights on and off.
Remove the hanging hook and slide the lower chimney section down until it rests
against the main body of the range hood.
Use a stainless steel cleaner to clean your hood after successful installation.
3. If your Island Range Hood is going
to be used in ducted mode, connect
the ducting hose (F) to the Ceiling
Mount (A) at this point.
Fix the Upper Chimney (B) to the
Ceiling Mount (A) using (4) ST4x6 self
tapping screws.
Slide the Lower Chimney (C) onto the
Support Frames (D/E) and raise it
until it sits just below the Upper
Chimney (B) section.
F
G
H
1. Position the (A) Ceiling Mount on the ceiling and mark the position of the
screw holes. The mount should be securely attached to the ceiling.
AA
RANGE HOOD INSTALLATION
IMPORTANT: The angle bars must have an overlap
of AT LEAST 100mm/4"
The "S" hook Holds the lower chimney
up while the main body is lifted and
fixed to the support frame in step 5.
* One end hooks onto the support
frame, and the other end (bottom of
the S) holds the the lower chimney up
Use the S hook to keep the lower chimney in place by
attaching it to the support frame for this step.
Loading ...
Loading ...
Loading ...