Loading ...
Loading ...
Loading ...
18
English
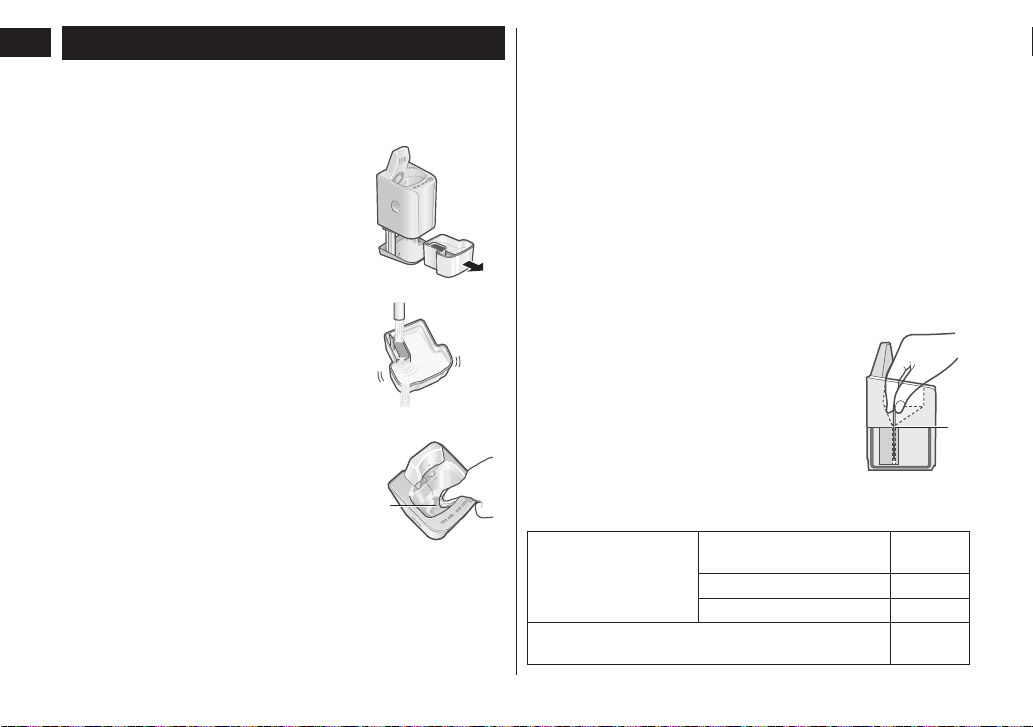
Replacing the cleaning liquid
If the STATUS lamp glows for 5 seconds when the SELECT button
is pressed, the cleaning liquid needs to be replaced.
• Even if the STATUS lamp does not light up, replace the cleaning
liquid after 6 months have passed.
1
Remove the AC adaptor and
remove the cleaning liquid unit.
(See page 12.)
2
Wash away the old cleaning
liquid.
• It can be drained as sewage.
1
3
Rinse the cleaning liquid unit.
• Pour water as illustrated while tilting the
cleaning liquid unit and shaking it gently.
• You can clean with the cleaning liquid
filter removed.
After washing, be sure to attach the
cleaning liquid filter.
4
Gently wipe off any beard
trimmings attached to the inside
of the cleaning tray (a) with a
cloth or tissue paper dampened
with water.
• Clean the corners and uneven parts of
the cleaning tray with a cotton swab
dampened with water.
5
Prepare the new cleaning liquid.
(See page 12.)
Notes
• The cleaning liquid will decrease every time it is used, but do not
add detergent and water except when replacing the cleaning liquid.
Doing so may deteriorate the cleaning function.
• Do not wash the self‑cleaning recharger unit with water.
• Do not wipe with thinners, benzine, alcohol etc.
Doing so may cause malfunction, or cracking or discoloration of
the parts.
Wipe with diluted soapy water.
• Some cleaning liquid components and skin oil may separate and
adhere to the cleaning liquid unit and cleaning liquid filter. This
does not indicate a problem.
►When the water does not drain from the cleaning tray
• Do not tilt the self‑cleaning recharger to pour out water. Doing so
may cause the cleaning liquid in the cleaning liquid unit to spill or
cause the self‑cleaning recharger to malfunction.
• Beard trimmings may clog the drain at the
bottom of the cleaning tray.
In this case, you cannot clean or dry the shaver.
1. Be sure to remove the AC adaptor from the
self‑cleaning recharger.
2. Place the self‑cleaning recharger on a flat
surface, and push the beard trimmings down
through the drain (b) with a toothpick etc.
►Replacement parts
Replacement parts are available at your dealer or Service Center.
Replacement parts for
ES‑LV9N
System outer foil and inner
blades
WES9034
System outer foil WES9175
Inner blades WES9170
Special Detergent for Shaver Cleaning & Charging
System
WES4L03
Loading ...
Loading ...
Loading ...