Loading ...
Loading ...
Loading ...
©2016 Hestan Commercial Corporation ©2016 Hestan Commercial Corporation
32 33
ENEN
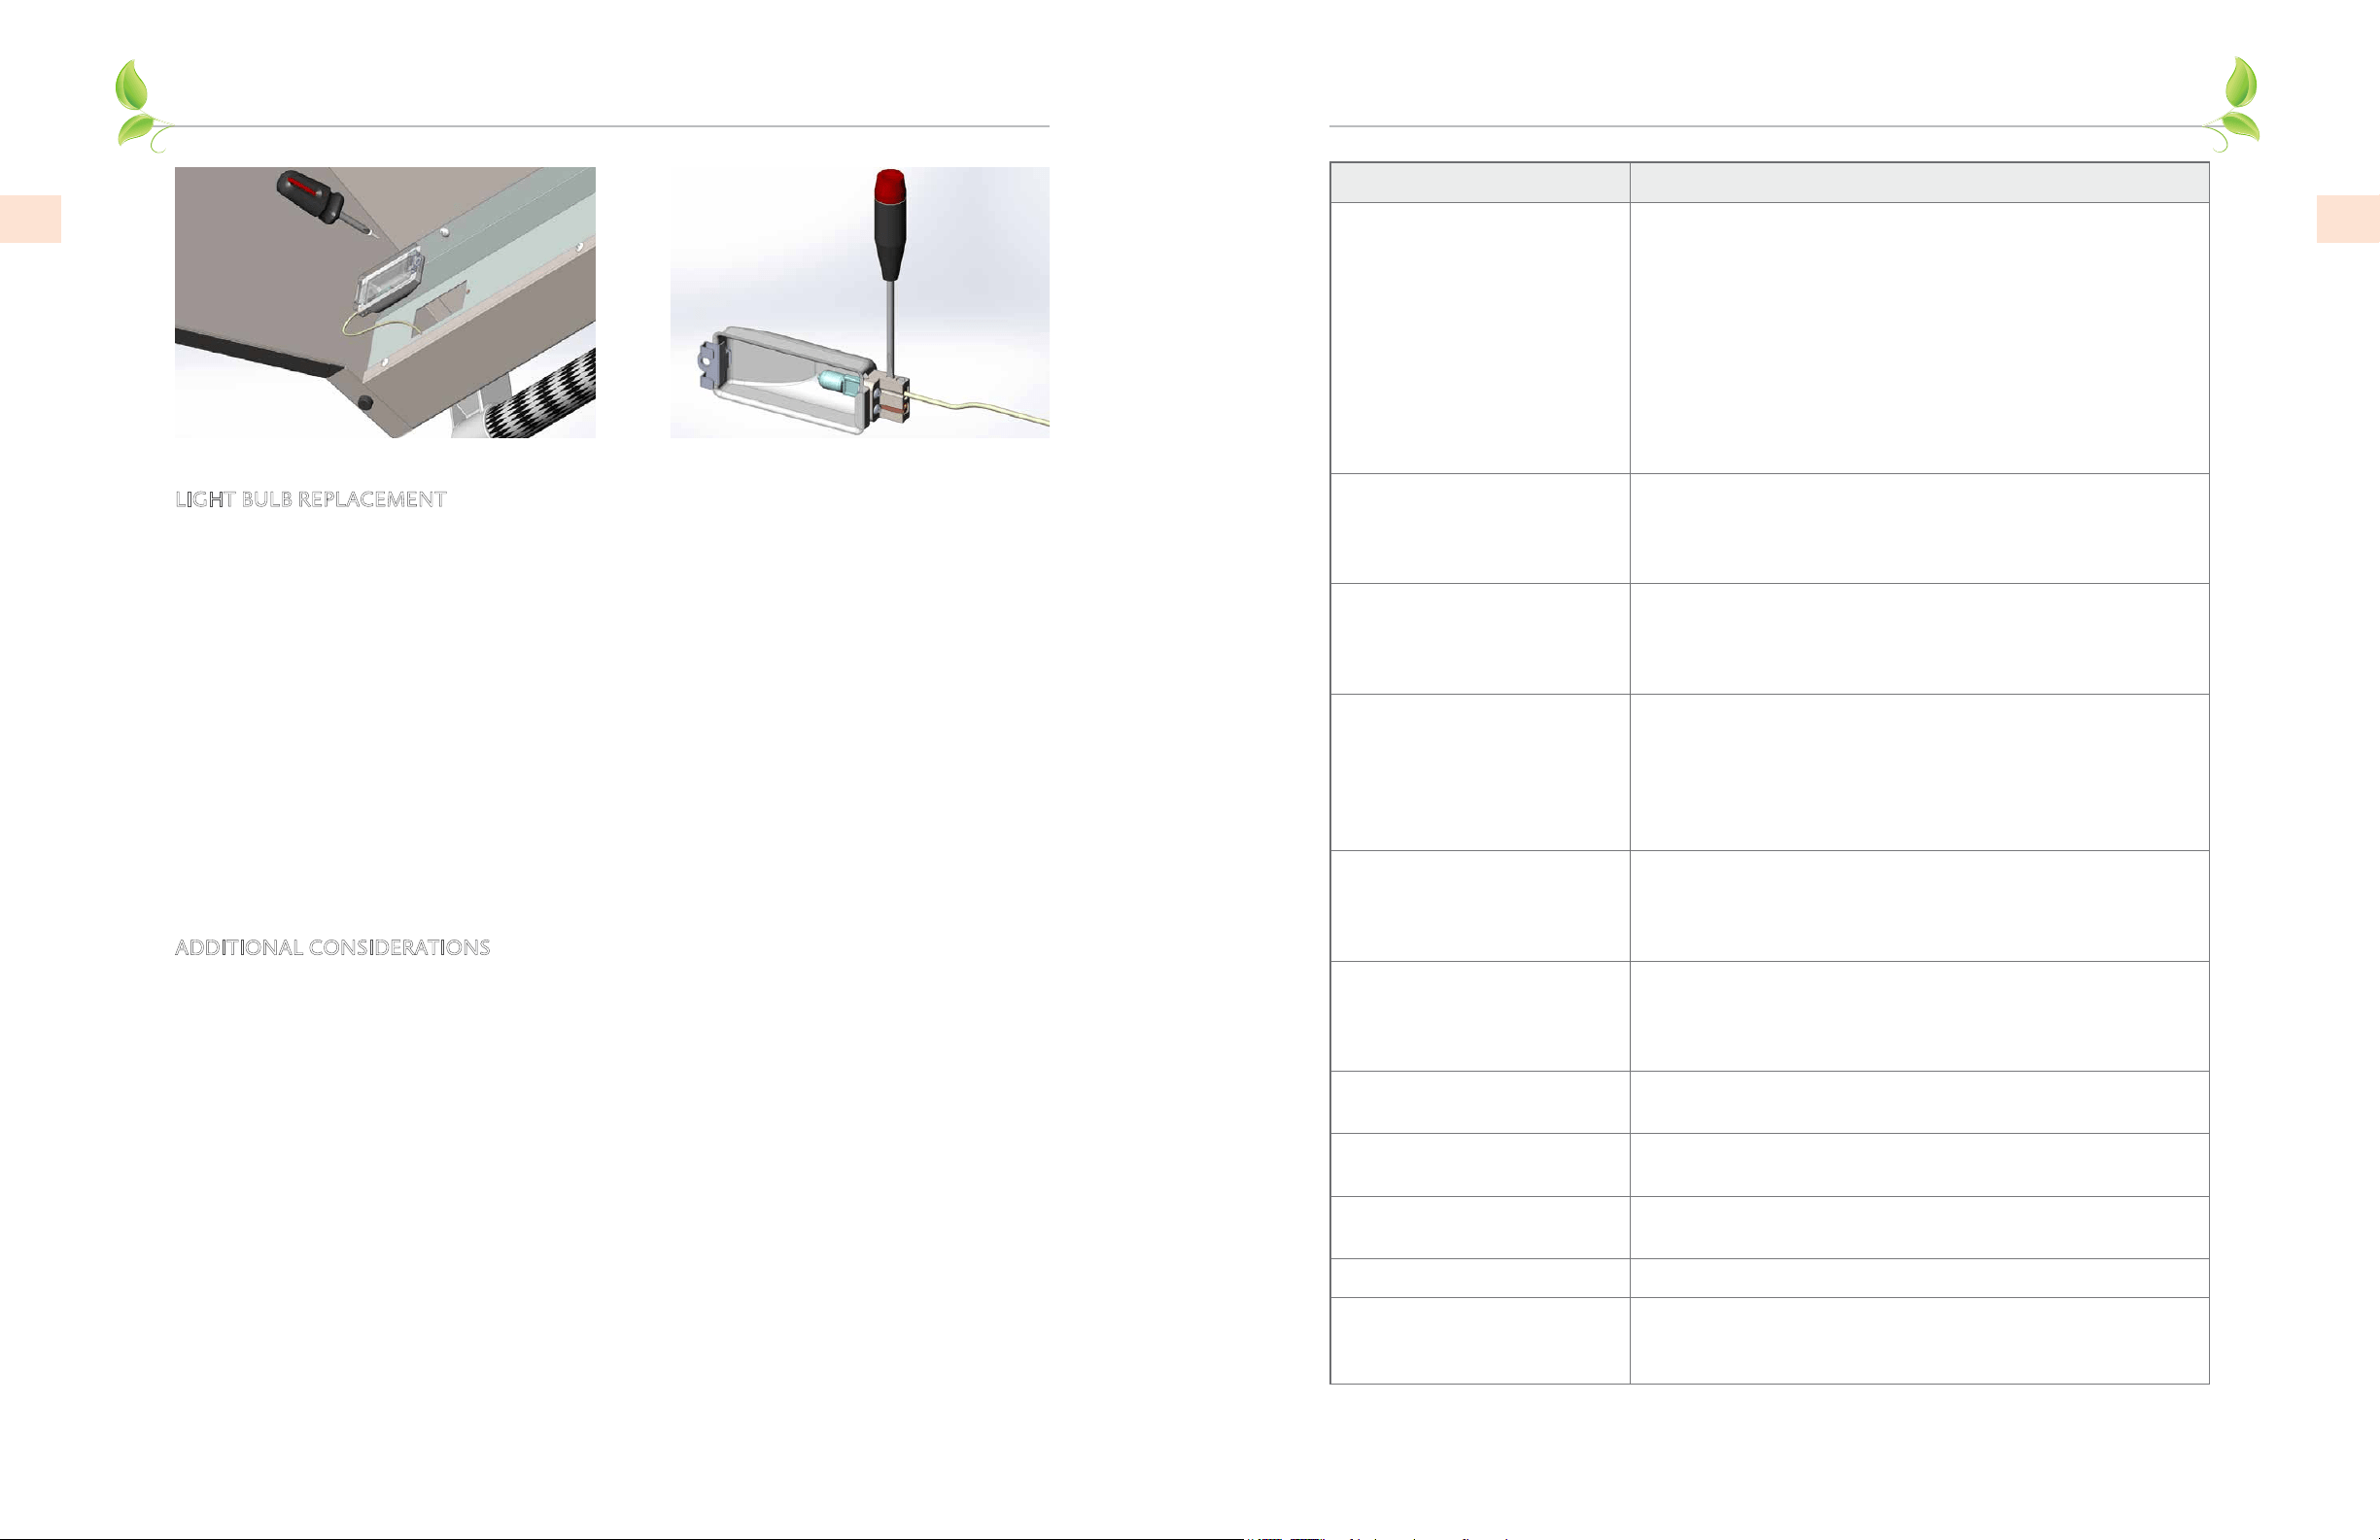
Figure 10 Figure 11
LIGHT BULB REPLACEMENT
1. Disconnect the power to your grill before any service or light bulb replacement. Be sure the
grill and the lights are completely cool. Halogen lights get extremely hot.
2. Open hood and remove the small screw holding the lamp assembly in place (Fig. 10). Remove
the lamp assembly, being careful not to drop the glass lens.
3. If needed, use a small flat-blade screwdriver to carefully pry off the lens and set aside. Loosen
the 2 screws closest to the lamp housing (Fig. 11). These screws hold the bulb in place. The
bulb should come out easily.
4. Before installation, it is very important to clean the new bulb carefully with a clean, soft
cloth, or tissue paper. Grease, fingerprints, or oils in your skin can leave a residue on the glass
surface of the bulb which will create a hot-spot. The bulb will eventually crack at this hot-
spot.
5. While still using a cloth or tissue paper, install the new bulb in the housing and tighten the
screws. Check that the other tiny screws are tight as well.
6. Re-install the lens and return the lamp assembly to the hood. Carefully install the screw to
secure the assembly to the hood.
ADDITIONAL CONSIDERATIONS
Always keep the area around the grill free of obstructions and debris. Maintain at least 12”
(30 cm) of space around the grill to ensure proper airflow, and keep all ventilation openings clear
and free of debris. Clean appliance after each use, and check for blockages, especially at the
burner orifices, after periods of prolonged non-use. To maintain the appearance of your Hestan
grill for many years, keep it covered when not in use. Backyard environments are harsh on your
grills’ finish. Long exposure to sun, water, yard chemicals and the elements could diminish the
appearance of the stainless steel. This is very evident in ocean-front locations.
Our appliance materials have been tested in saline solutions with higher salinity than seawater.
They have also been tested by exposure to highly acidic foods. During and after these tests, we
found these materials were able to withstand exposure over prolonged periods of time. However,
the above-mentioned corrosive substances, along with neglect, can lead to a situation whereby
conditions might combine to cause some damage to occur. Therefore, we suggest that you always
keep your grill clean, dry and covered when not in use. This is even more important when long
term storage is required. Always store the grill clean, dry and covered with your Hestan Grill
Cover. A dirty grill will attract insects and rodents which is highly unsanitary. In addition, rodents
are known to chew on the insulation of wiring which will cause permanent damage to the wiring
and possibly electrical components.
For those in desert communities, wind-driven sand is highly abrasive and constant exposure will
eventually pit and scratch the surface. Another reason to keep your grill covered when not in use.
CLEANING AND MAINTENANCE
(continued)
TROUBLESHOOTING GUIDE
Symptom Check
Burner will not light Gas supply not on / shutoff valve closed
LP gas cylinder empty
Power cord not plugged in, or no power to receptacle, or blown
fuse
Low gas pressure to unit
Burner ports near igniter are obstructed or dirty
Burner not installed correctly on orifice
Defective or clogged burner valve
Incorrect orifice or clogged orifice
Igniter defective (not glowing)
Defective regulator or regulator installed improperly
Burner will not stay lit Burner ports obstructed or dirty
Vent plugged on regulator or regulator installed improperly
Windy conditions
Low gas pressure
Slow to heat up Low gas pressure or low LP cylinder
Burner ports are obstructed or dirty
Defective or clogged burner valve
Incorrect orifice or clogged orifice
Gas Odor Burner went out or did not light
Loose or broken gas line
Ruptured pressure regulator
Burner not installed correctly on orifice
Poor combustion, air-fuel mixture not adjusted properly
Obstructed/dirty burner ports
Burner not working well / lazy
or yellow flame
Burner ports are obstructed or dirty, check for spider webs
Poor combustion, air-fuel mixture not adjusted properly
Gas pressure incorrect / incorrect regulator
Orifice sized incorrectly for gas type
Rotisserie will not light or will
not stay lit
Not holding in the control knob long enough
Windy conditions
Igniter defective (not glowing)
Power cord not plugged in, or no power to receptacle
Interior halogen lights not
working
Power cord not plugged in, or no power to receptacle
Check for burned-out bulb
Control panel LED lights not
working
Power cord not plugged in, or no power to receptacle
Check fuse on electrical box.
Rotisserie motor not working Power cord not plugged in, or no power to receptacle
Obstruction or broken chain-drive mechanism – call for service
Side burner will not light See “Burner will not light” above
Nuisance clicking of side
burner
Windy conditions
Flame too low
Food debris on electrode
Loading ...
Loading ...
Loading ...