Loading ...
Loading ...
Loading ...
IMPORTANT:IfthisproductisconnectedtoaGFCI(Ground
FaultCircuitInterrupter)protectedoutlet,nuisancetrippingofthe
powersupplymayoccur,resultinginlossofcooling.Icequality
maybeaffected.Ifnuisancetrippinghasoccurred,andifthe
conditionoftheiceappearspoor,disposeofit.
Recommendedgroundingmethod
Foryourpersonalsafety,thisappliancemustbegrounded.This
applianceisequippedwithapowersupplycordhavinga3prong
groundingplug.Tominimizepossibleshockhazard,thecord
mustbepluggedintoamating,3prong,grounding-typewall
receptacle,groundedinaccordancewiththeNationalElectrical
Codeandlocalcodesandordinances.Ifamatingwallreceptacle
isnotavailable,itisthepersonalresponsibilityofthecustomerto
haveaproperlygrounded,3prongwallreceptacleinstalledbya
qualifiedelectrician.
Acoldwatersupplywithwaterpressureofbetween30and
120psi(207and827kPa)isrequiredtooperatetheicemaker.If
youhavequestionsaboutyourwaterpressure,callalicensed,
qualifiedplumber.
ReverseOsmosisWaterSupply
IMPORTANT:Thepressureofthewatersupplycomingoutofa
reverseosmosissystemgoingtothewaterinletvalveoftheice
makerneedstobebetween30and120psi(207and827kPa).
Ifareverseosmosiswaterfiltrationsystemisconnectedtoyour
coldwatersupply,thewaterpressuretothereverseosmosis
systemneedstobeaminimumof40to60psi(276to414kPa).
Thereverseosmosissystemmustprovide1gal.(3.79L)ofwater
perhourtotheicemakerforpropericemakeroperation.
Ifthewaterpressuretothereverseosmosissystemislessthan
40to60psi(276to414kPa):
• Checktoseewhetherthesedimentfilterinthereverse
osmosissystemisblocked.Replacethefilterifnecessary.
• Allowthestoragetankonthereverseosmosissystemtorefill
afterheavyusage.
Ifyouhavequestionsaboutyourwaterpressure,callalicensed,
qualifiedplumber.
Itisimportantfortheicemakertobelevelinordertowork
properly.Dependinguponwhereyouinstalltheicemaker,you
mayneedtomakeseveraladjustmentstolevelit.Youmayalso
usethelevelinglegstolowertheheightoftheicemakerfor
undercounterinstallations.
Tools needed:
Gather the required tools and parts before starting installation.
• 9" level
• Adjustable wrench
NOTE: It is easier to adjust the leveling legs if you have another
person to assist you.
1. Move the ice maker to its final location.
NOTE: If this is a built-in installation, move the ice maker as
close as possible to the final location.
2. Place a carpenter's level on top of the product to see if the ice
maker is level from front to back and side to side.
3.
4.
Push up on the top front of the ice maker, and then locate the
leveling screws that are on the bottom front of the ice maker.
Using an adjustable wrench, change the height of the legs as
follows:
• Turn the leveling leg to the right to lower that side of the
ice maker.
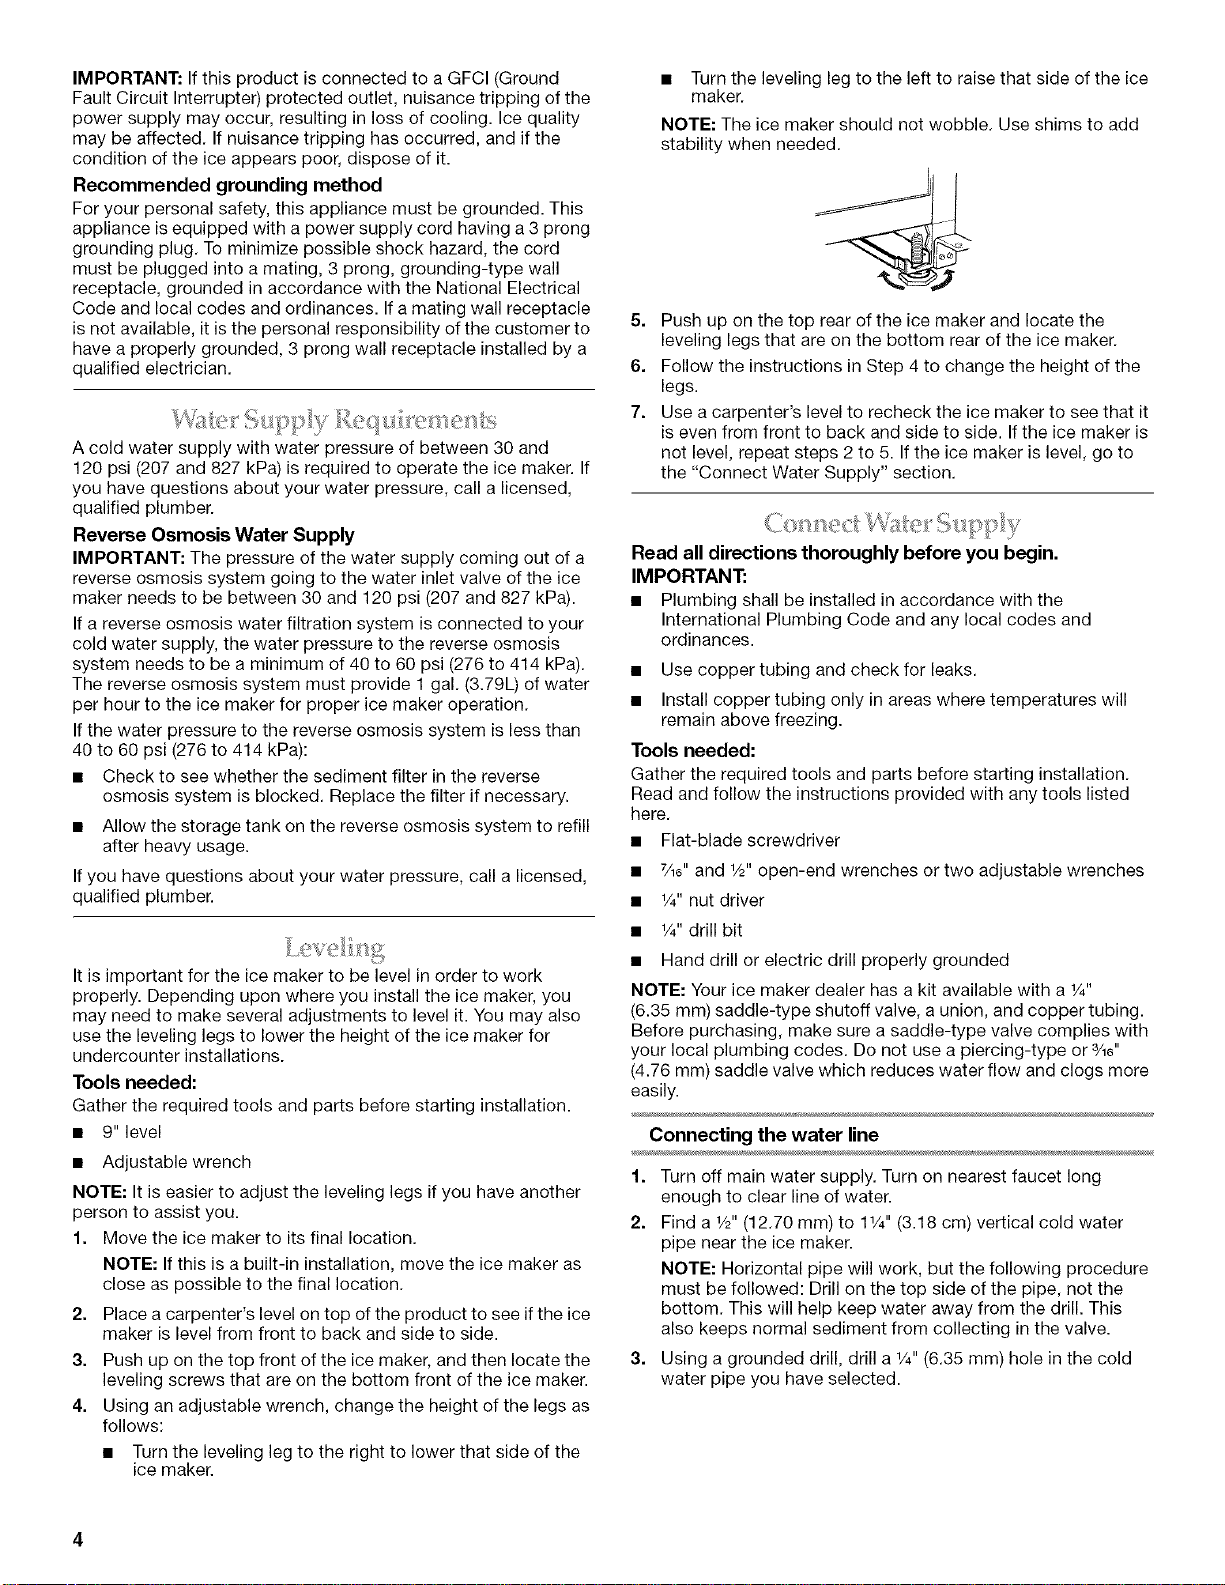
• Turn the leveling leg to the left to raise that side of the ice
maker.
NOTE: The ice maker should not wobble. Use shims to add
stability when needed.
5. Push up on the top rear of the ice maker and locate the
leveling legs that are on the bottom rear of the ice maker.
6. Follow the instructions in Step 4 to change the height of the
legs.
7. Use a carpenter's level to recheck the ice maker to see that it
is even from front to back and side to side. If the ice maker is
not level, repeat steps 2 to 5. If the ice maker is level, go to
the "Connect Water Supply" section.
Read all directions thoroughly before you begin.
IMPORTANT:
• Plumbing shall be installed in accordance with the
International Plumbing Code and any local codes and
ordinances.
• Use copper tubing and check for leaks.
• Install copper tubing only in areas where temperatures will
remain above freezing.
Tools needed:
Gather the required tools and parts before starting installation.
Read and follow the instructions provided with any tools listed
here.
• Flat-blade screwdriver
• 7/_6"and _/2"open-end wrenches or two adjustable wrenches
• _/4"nut driver
• _/4"drill bit
• Hand drill or electric drill properly grounded
NOTE: Your ice maker dealer has a kit available with a _/4"
(6.35 mm) saddle-type shutoff valve, a union, and copper tubing.
Before purchasing, make sure a saddle-type valve complies with
your local plumbing codes. Do not use a piercing-type or 3/_6"
(4.76 ram) saddle valve which reduces water flow and clogs more
easily.
Connecting the water line
1.
2.
Turn off main water supply. Turn on nearest faucet long
enough to clear line of water.
Find a W' (12.70 mm) to 1V4" (3.18 cm) vertical cold water
pipe near the ice maker.
NOTE: Horizontal pipe will work, but the following procedure
must be followed: Drill on the top side of the pipe, not the
bottom. This will help keep water away from the drill. This
also keeps normal sediment from collecting in the valve.
3. Using a grounded drill, drill a _/4"(6.35 mm) hole in the cold
water pipe you have selected.
Loading ...
Loading ...
Loading ...