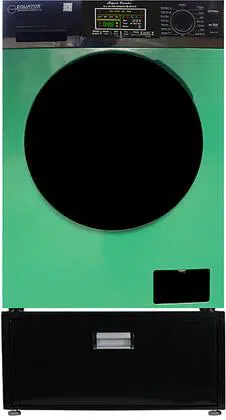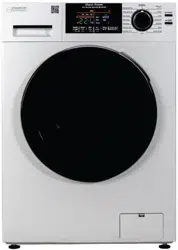
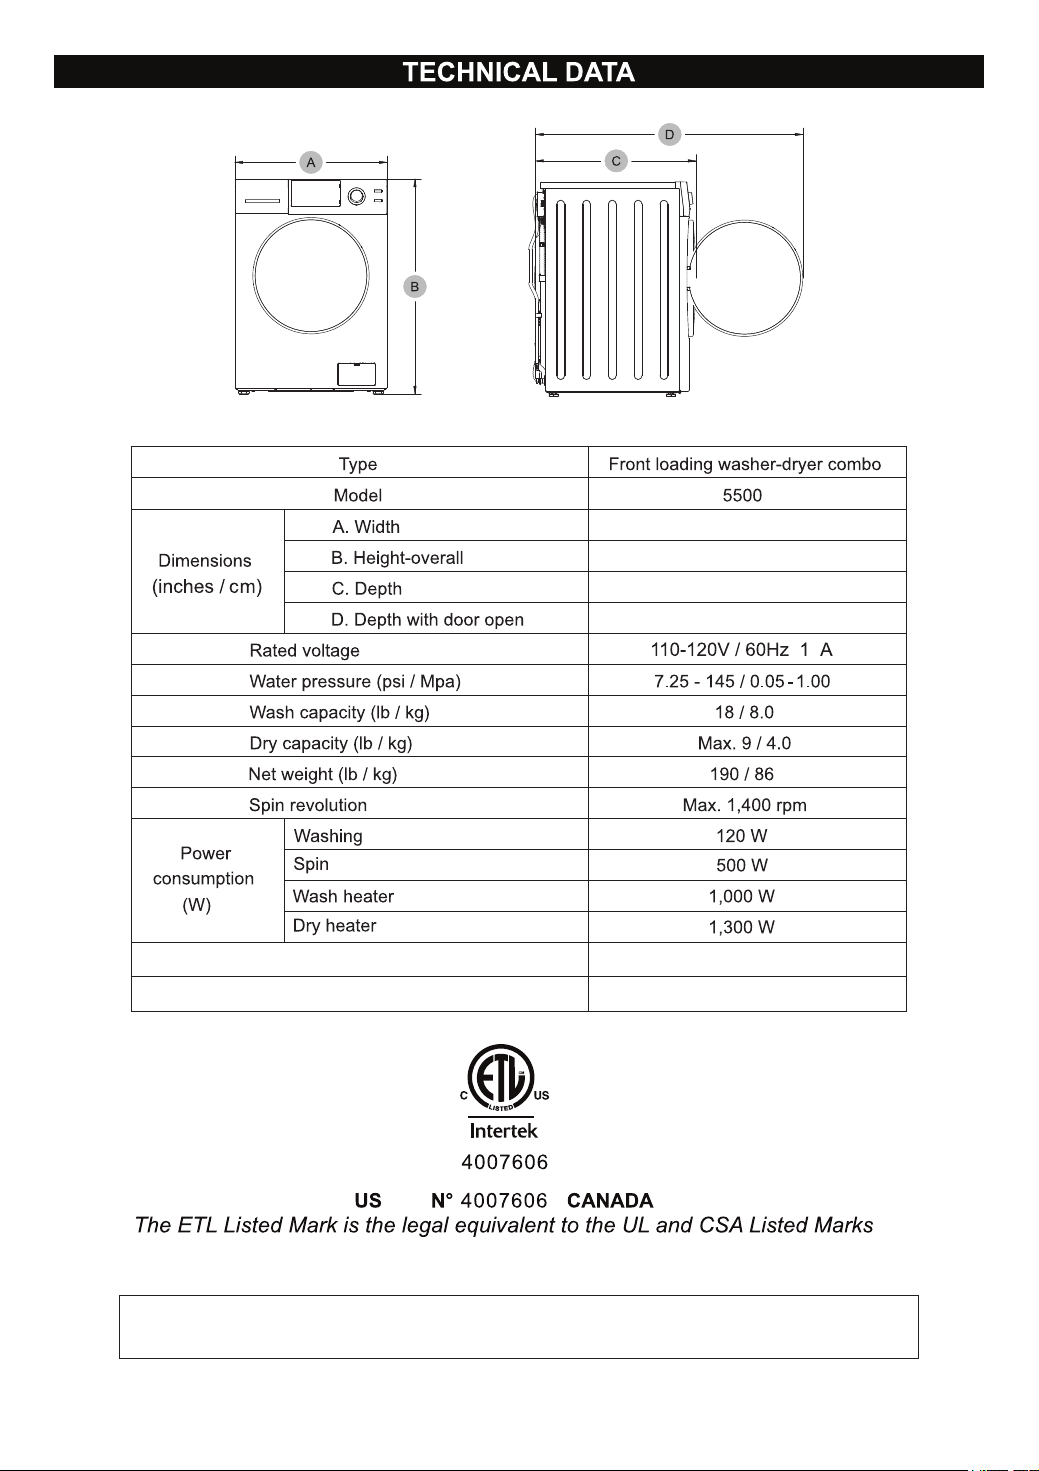
Model: 5500
Super Combo
ALL-IN-ONE COMBO WASHER DRYER
+
Phone/Text: 1-800-776-3538
QUESTIONS / SERVICE
Email: [email protected]

Introduction .................................................................
Warranty ....................................................................
Technical Data ..............................................................
Important Safety Instructions..................................................
Helpful Hints ................................................................
Pre-installation ..............................................................
Diagram of the Combo .......................................................
Installation Instructions.......................................................
1
2
4
5
6
6
7
8
9
10
11
12
14
15
16
17
18
19
20
21
23
24
Unpacking and Leveling .....................................................
Electrical ...................................................................
Plumbing ...................................................................
Ventilation ..................................................................
Built-In, Recessed, Closet, Alcove Installation .................................
Program Selection Chart .....................................................
Operating Instructions .......................................................
Control Panel ...............................................................
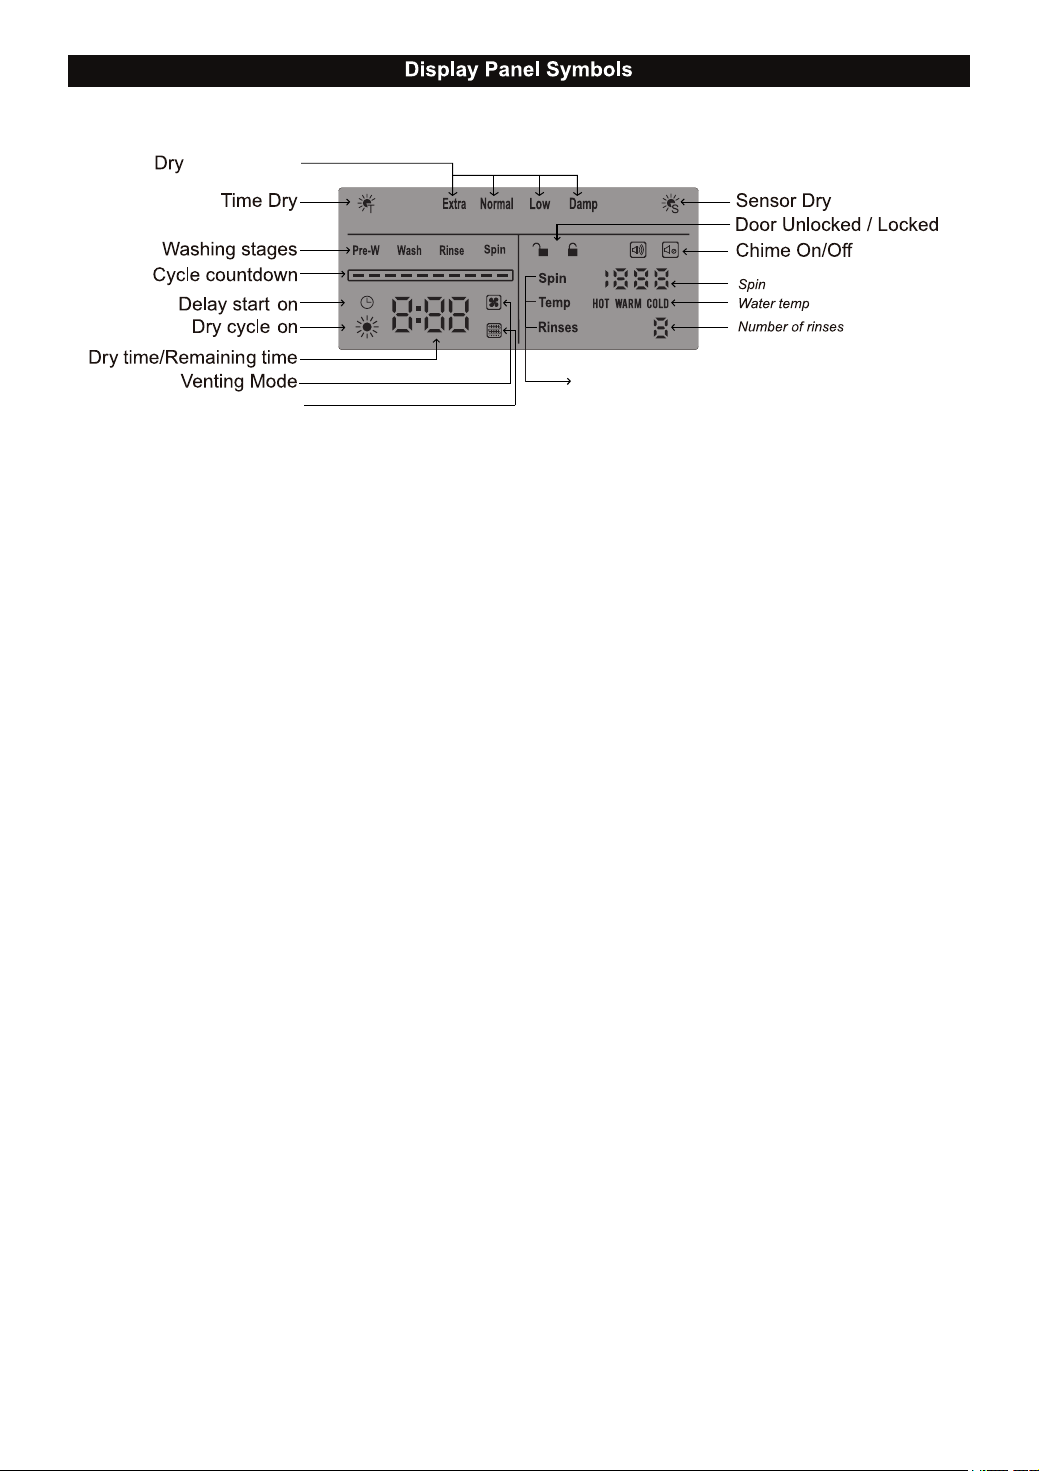
Display Panel ...............................................................
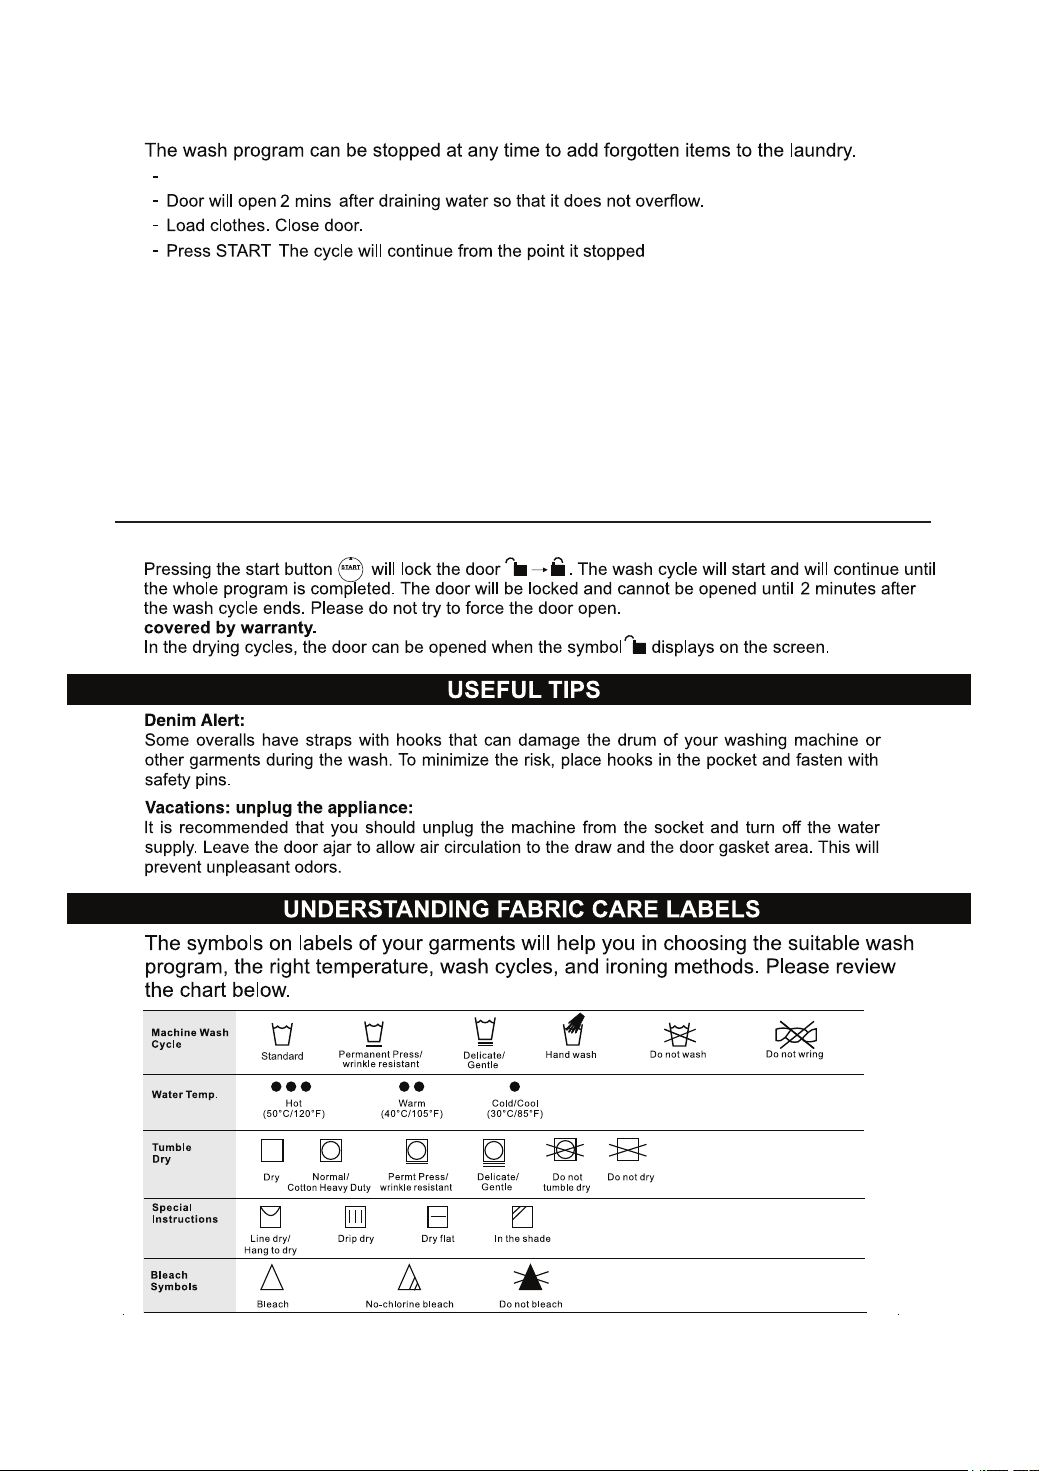
Understanding Fabric Care Label ............................................
Maintenance ................................................................
Stain Removal Chart ........................................................
Troubleshooting .............................................................
Diagnostic Menu ............................................................
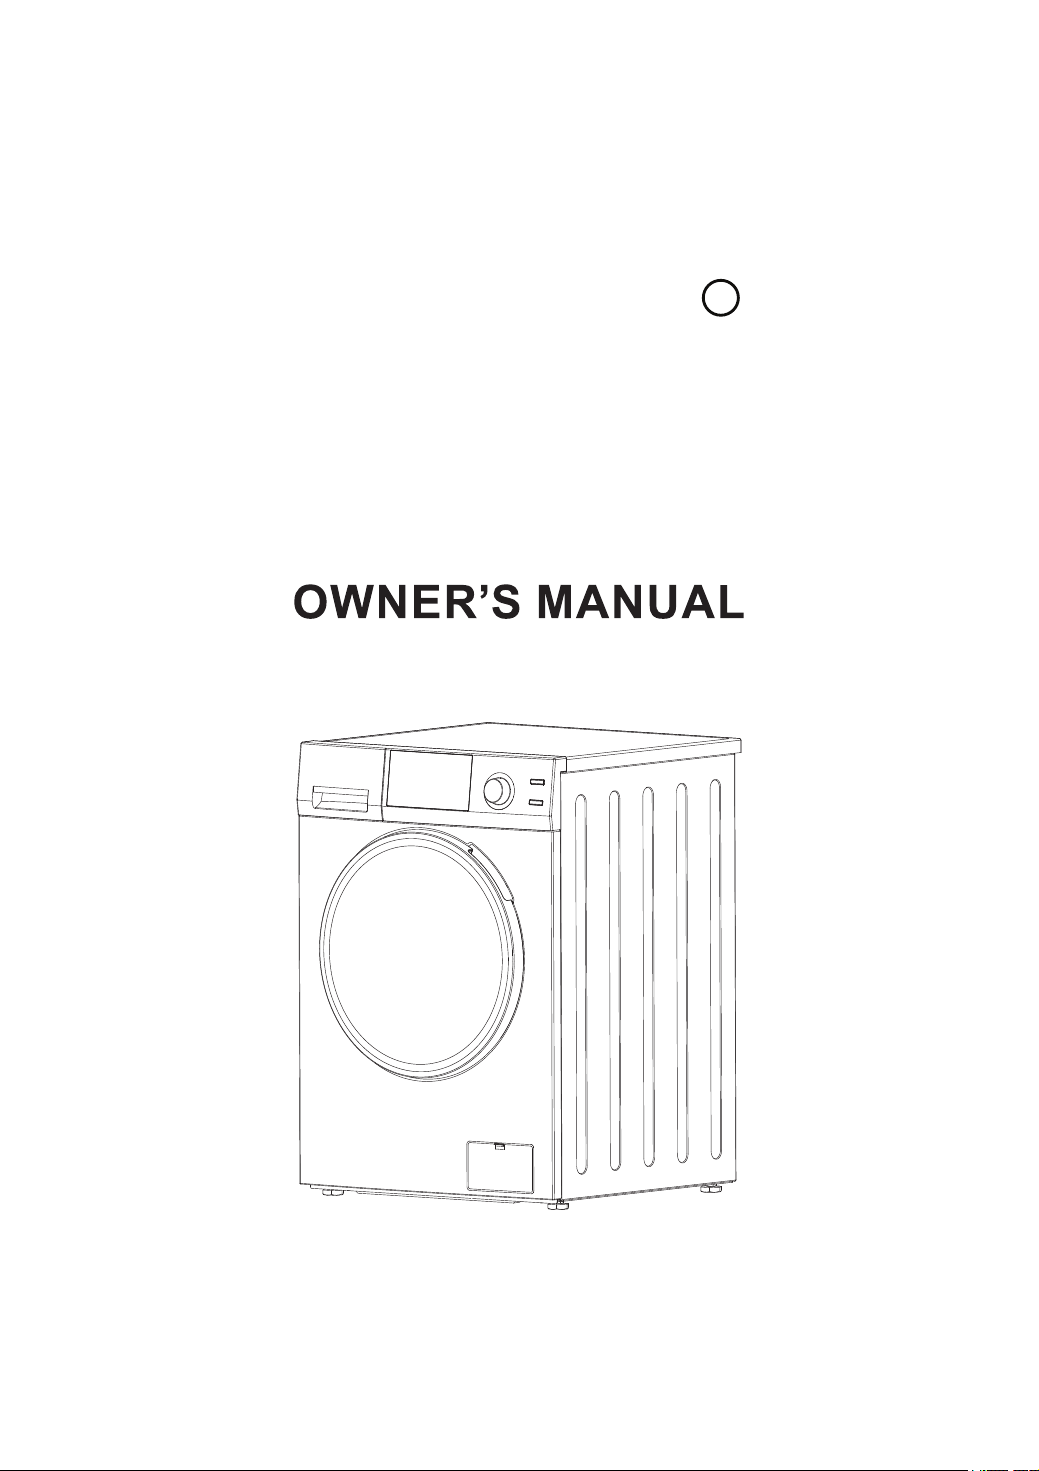
Please read the Owner’s Manual carefully before using your
ALL-IN-ONE COMBO WASHER DRYER
+
1
Congratulations on your new Super Combo! In addition to its contemporary design,
this is a highly sophisticated engineered product that will give you many years of satisfaction.
Lint Free Maintenance
The Washer + Dryer’s sleek and compact size design makes it a perfect appliance for any
kitchen or laundry room.
Refresh Function
and weather.
Here are some of the best reasons for buying your Super Combo
1400 rpm,
Specialized Wash Programs
There are special wash programs for Sanitize, Allergen, Winterize etc.
12.
Ventless Dry (Condensing)
Vented Dry
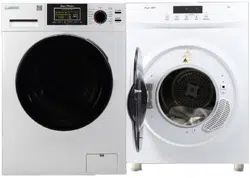
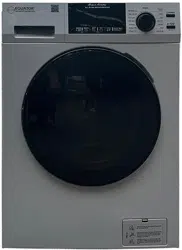
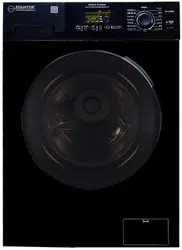
Washer + Dryer
Portability
T
he appliance can be permanently installed or made portable with the installation of the
portability kit (Accessory Part #1070 sold separately) where needed.

2
Your appliance is protected by this warranty under normal, personal,
family or household use for 1 Year Parts & Labor and limited
commercial use (90 days) in USA and Canada.
WARRANTY
Consolidated Brands undertakes to the consumer/owner to repair or, at our option, to replace any
part of this product which proves to be defective in workmanship or material under normal personal,
family or household use in USA and Canada, for a period of one years parts & labor
from the date of original purchase. For commercial use, the product is warranted for a period of
90 days. During this period, we will provide all labor and parts necessary to correct such defect,
free of charge, if the appliance has been installed and operated in accordance with the written
instructions provided with the appliance. Ready access to the appliance, for service, is the
responsibility of the consumer/owner. We may require return of products or parts to our warranty
department for which the shipping charges are to be incurred by the consumer. If a return or
replacement is required, allow 3-4 weeks to process. All repairs or replacements are warranted
only for the remainder of the original warranty period. Charges may incur if warranty coverage is
not applicable. Service would be provided from Monday to Friday between normal business hours.
WARRANTY INFORMATION
Consolidated Brands
10216 Georgibelle Drive, Suite 900D
Houston, TX 77043-5249
Since it is the responsibility of the consumer/owner to establish the warranty period by verifying the
original purchase date, Consolidated Brands recommends that a receipt, delivery slip or some other
appropriate payment record be kept for that purpose. This warranty gives you specific legal rights,
and you may also have other rights which vary
from State to State.
You can register your Warranty by any of the following methods:
1. Mail in the Warranty Registration Card
2. Register online at www.ApplianceDesk.com
3. Take a picture of the bar code and text it to Appliance Desk
4. Scan the QR Code
QUESTIONS / SERVICE
Phone/Text: 1-800-776-3538
Email: Service@ApplianceDesk.com
Web: www.ApplianceDesk.com

3
Installation
1. Non-removal of shipping bolts, causing vibration / internal damage.
2. Non-adjustment of feet to level machine, causing vibration / internal damage.
3. Non-removal of exhaust vent plate at the back while using Venting Dry mode, causing excess
heat and resulting in damage to internal components.
4. Using incorrect length of venting i.e. more than 10 feet unless used with a booster fan.
5. Not conforming to minimum space requirements for built-in installation, causing excess heat
and resulting in damage to internal components.
6. Installation in a corrosive environment.
7. Incorrect water pressure i.e below 7.25 psi or above 145 psi
8. Incorrect water inlet hose installation (use only factory supplied hoses with metric threads on
the L shaped side to fit water valve)
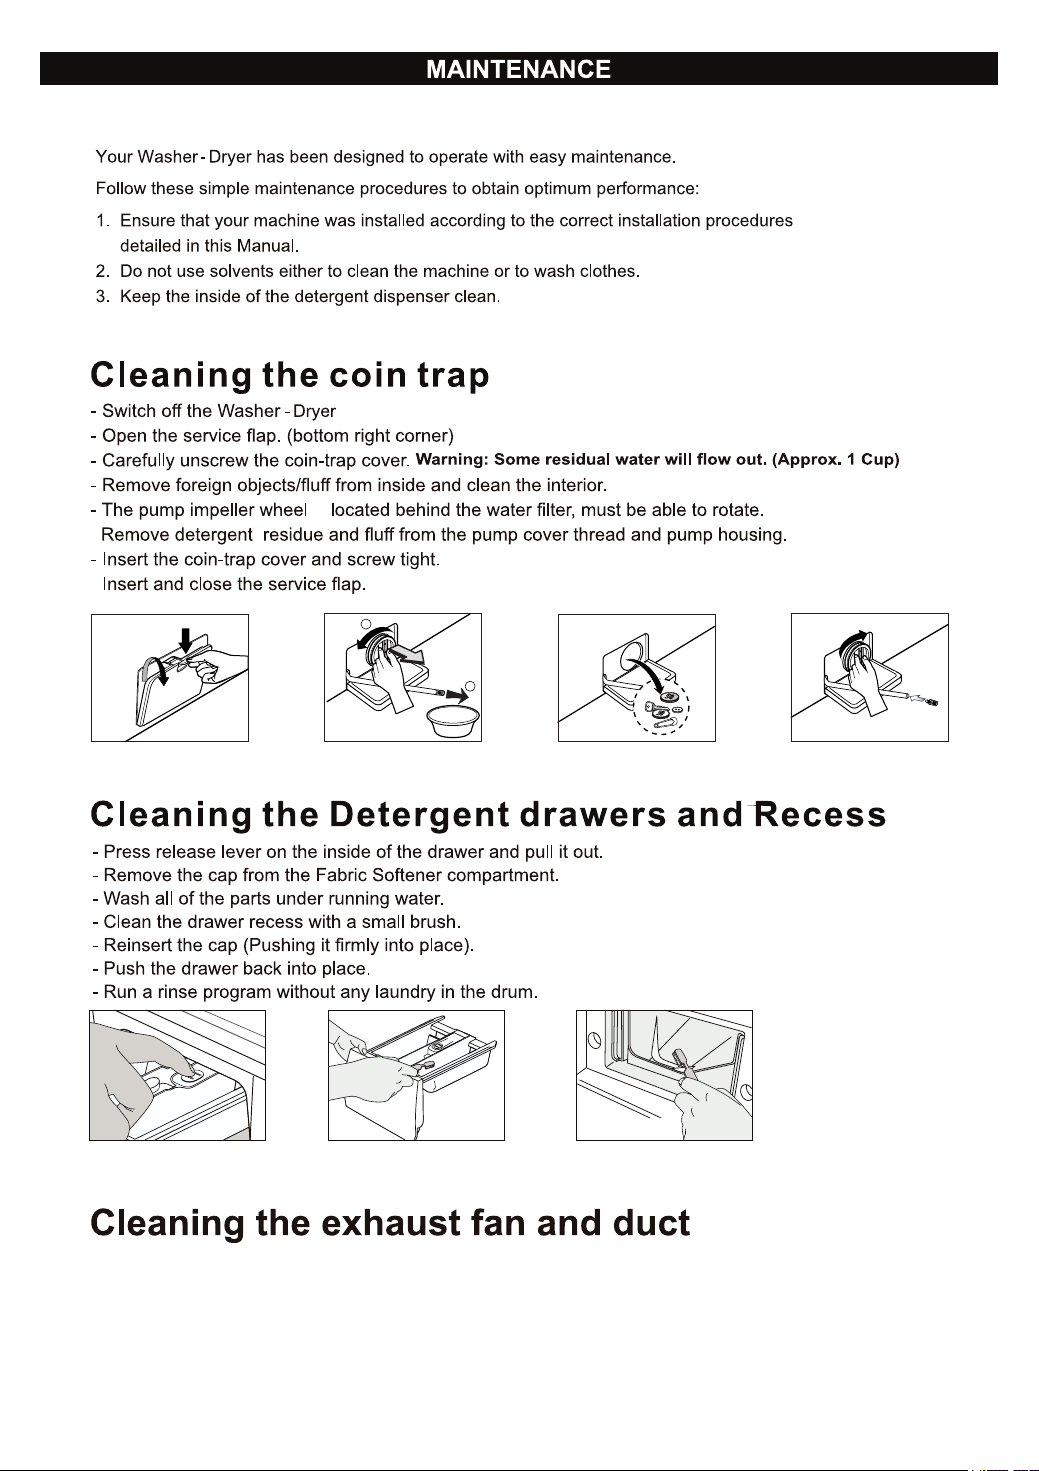
Maintenance
1. Non-cleaning of coin trap for debris, causing the unit to not drain out water and resulting in
drain pump malfunction.
2. Non-cleaning of vent fan & exhaust hose for lint, causing the unit to not dry properly.
3. Improper maintenance (such as, but not limited to, scale build-up, freeze damage, or vent
blockage).
Damage
1. Breakage of cosmetic parts e.g., door handle, knob.
Other
1. Accident, abuse or misuse.
2. Using solvents to clean the machine or wash clothes, causing damage.
3. Misapplication of this product e.g., use in a non household/commercial environment.
4. Any other cause not due to defects in materials or workmanship.
5. Problems or damage due to fires, flooding, electrical surges, freezing or any acts of God.
6. Any damage caused by poor water quality.
7. Operating the appliance with anything other than potable water at all times.
8. Force majeure.
THE FOLLOWING WORK ARE NOT COVERED UNDER WARRANTY:
EXCLUSIONS
In no event shall Consolidated Brands be liable for incidental or consequential damages or for
damages resulting from external causes such as abuse, operation misuse, neglect, alterations,
normal wear and tear, incorrect voltage or acts of God. This warranty does not cover service
calls which involve defective workmanship, damage due to other products while combined use
with this product or materials covered by this warranty. Accordingly, diagnosis and repair costs for
a service call which involves defective workmanship or materials will be the responsibility of the
consumer-owner.
Most work is covered. The defining factor is has the machine malfunctioned (Consolidated Brands
is responsible) or has the customer omitted or done something to cause malfunction (customer is
responsible).
4
Note: All rights reserved.
Designs, Specifications and Manual subject to change without notice.
Inlet and Drain Hose length
Power cable length
6 Feet
6 Feet
23.6 / 60
33.5 / 85
24 / 61
41.3 / 105
3
5
To reduce the risk of fire due to contaminated loads, the final part of a tumble dryer cycle occurs
without heat (cool down period). Avoid stopping a tumble dryer before the end of the drying cycle
unless all items are quickly removed and spread out so that the heat is dissipated.
16.
Your Combo Washer + Dryer has been built in compliance with safety regulation
to protect you and your family.
6
The unit must be installed on a strong leveled surface in a protected, dry and well-ventilated area,
with a power and water supply of sufficient capacity and a sufficient outlet in close proximity.
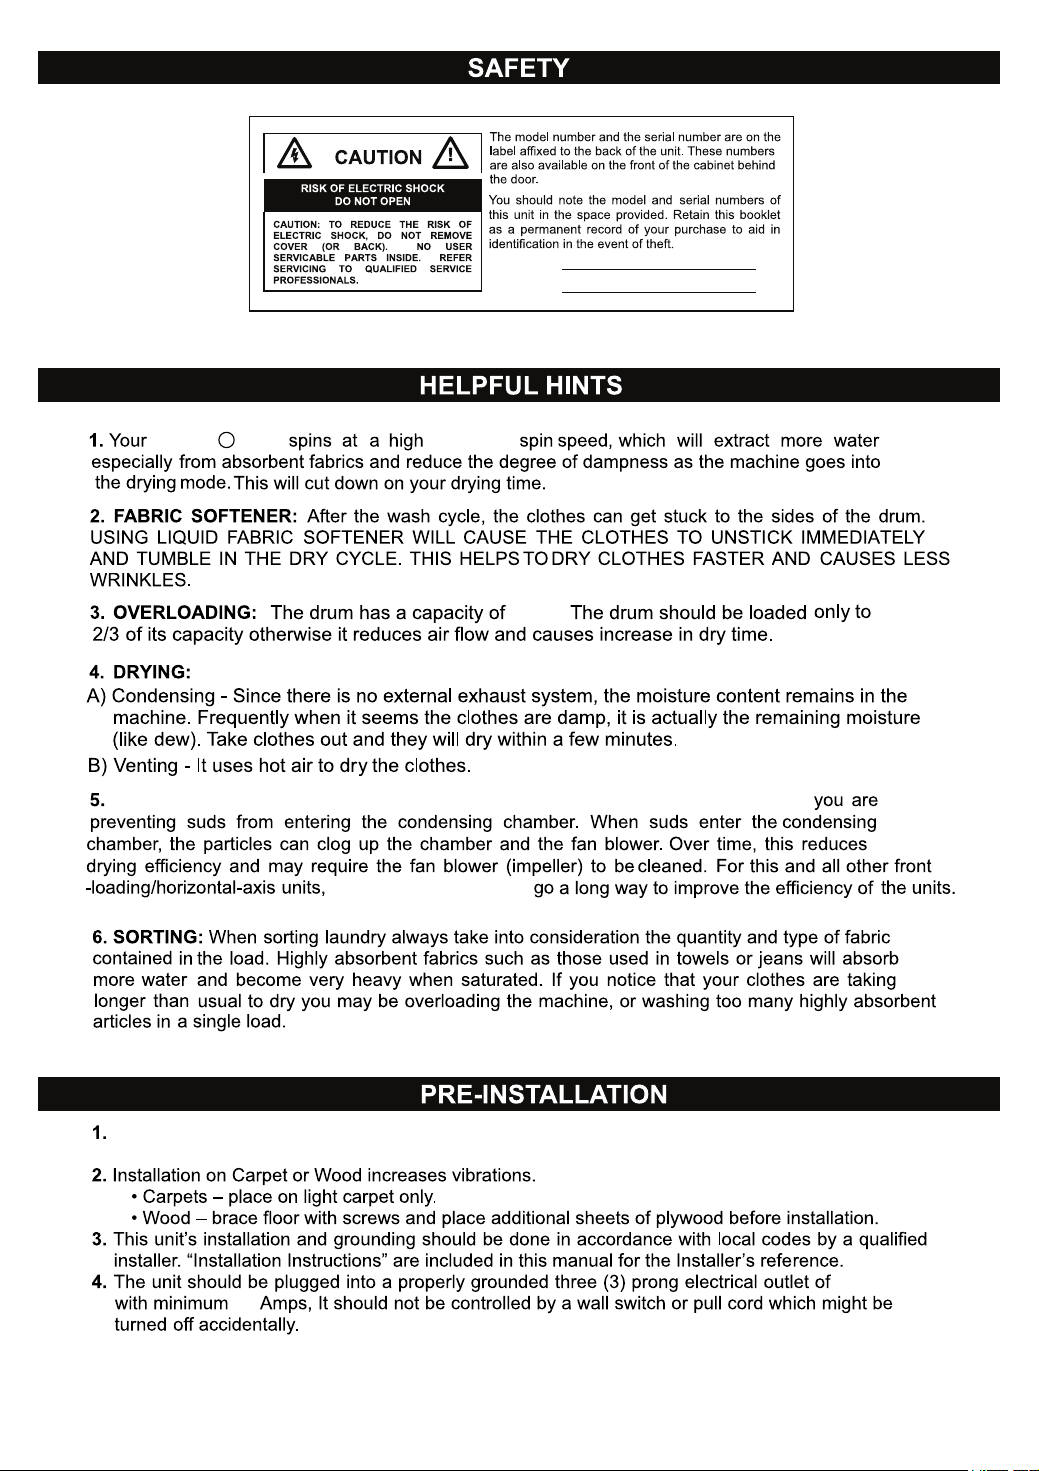
MODEL No:
SERIAL No:
By using High Efficiency (HE) detergent,
Front Loading detergents
19 lbs.
1400 rpm
USE HIGH EFFICIENCY (HE) DETERGENT:
110V/60Hz
15
Washer + Dryer
7
Venting Fan
and Cover
Drain Hose
U-Connector
Power Cord
Shipping
Bolts
Drum
Top Panel
Control Panel
Detergent
Dispenser
Drawer
Door
Leveling Feet
Pump Filter
Door Release
Lever
Drain Tube
Tube Cap
Cold Water
Inlet Valve
Hot Water
Inlet Valve
Blanking Caps - 3
(To cover shipping bolts hole)
Vent Adapter
(To connect vent hose to exhaust fan)
U-Connector
(For drain hose)
Water Inlet Hoses
+
8
Disposing of the packing
The shipping package has protected your
new appliance on its way to your home.
All packaging materials are non-polluting and
recyclable. Please dispose of packing material
according to local environmental regulations.
Handling
Please handle the machine carefully and use
appropriate means while lifting and moving the
machine so that it does not get damaged. Do not
drag the machine on your floor. Do not hold on
to protruding parts when lifting.
Keep children away from the shipping carton
and packing components. Danger of suffocation
from plastic foil and folding cartons.
Disposing of your old appliance
Old Appliances are not worthless trash! Valuable
raw material can be recycled from old appliances.
To prevent children from locking themselves in the
appliances, remove the door. Please dispose of
your old appliance according to local environmental
regulations.
Factory - supplied equipment
Inside the drum there is a packet of accessory
parts supplied with your appliance. Check that
all the accessory parts supplied for your model
are there. If any parts are missing contact
customer service.
Any residual moisture inside the drum is due to
the final testing which every appliance
undergoes before leaving the factory.
Appliance stability is very important otherwise
washing machine could “wander” during the
spin cycles.
Do not install the appliance outdoor
or in an area exposed to freezing condition.
frozen hoses can tear / burst.
The installation area must be solid and even.
Soft floor surfaces such as carpets or surfaces
with foam backing are not suitable.
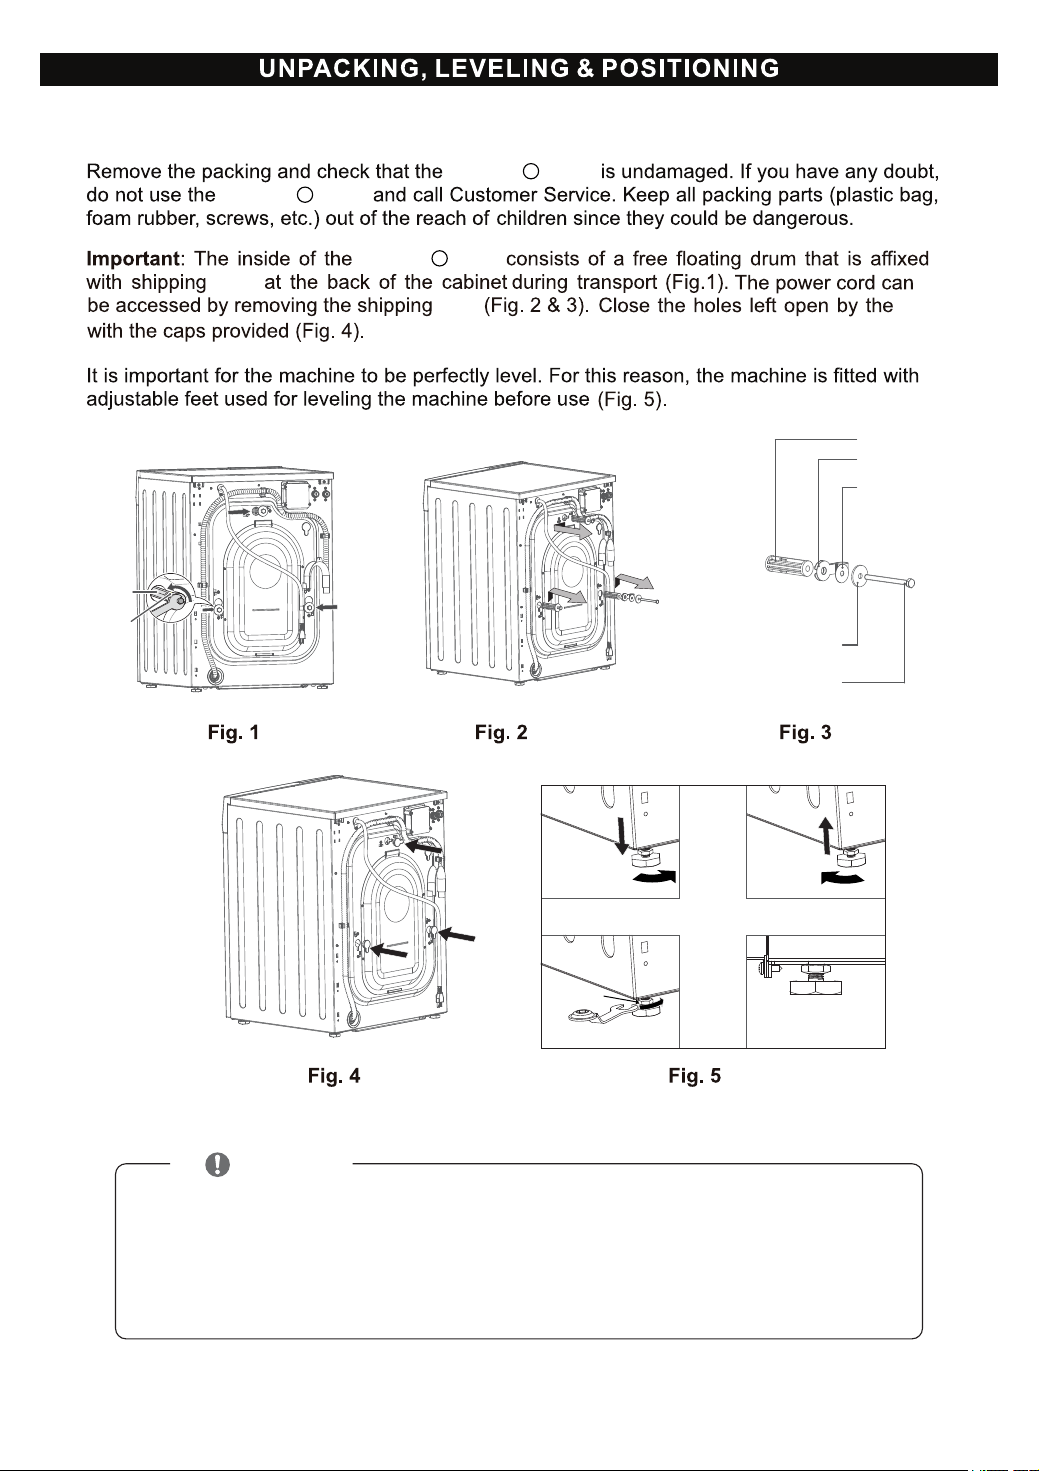
Removing the shipping rods
If the appliance is located in a room which
will be exposed to temperatures below freezing
point, or if it is located in a cabin that is being
shutdown for the winter, any residual water
in the pump or water inlet hoses must be drained.
The shipping rods must be removed before
using the appliance for the first time and must
be retained for any future transport.
(e.g when moving)
Installation area
bolts
bolts
bolts
NOTE
Save the bolt assemblies for future use. To prevent damage to internal components, DO NOT transport
the washer-dryer combo without reinstalling the shipping bolts.
Failure to remove shipping bolts and retainers may cause severe vibration and noise, which can lead to
permanent damage to the combo.
The cord is secured to the back of the combo by a clamp with a shipping bolt to help prevent operation
with shipping bolts in place.
·
·
·
9
Washer + Dryer
Washer + Dryer
Washer + Dryer
Shipping
bolt
Retainer
Shipping bolts(3)
Retainer(3)
Washer(3)
Lower
Raise
Lock nut
Tighten all 4
locknuts securely
Bush(3)
P Clamp(1)

10
110V/60Hz15
Washer + Dryer
12
VENTLESS (CONDENSING) DRY
VENTED (HOT AIR) DRY
1. ENSURE METAL VENT COVER (1) IS INSTALLED OVER
EXHAUST FAN AS SHOWN IN FIG.8
2. Power on the machine
3. Press "Dry Only" button to set the machine on drying cycle.
4. Hold Vented/Ventless button for 5 seconds
5. symbol will appear on the screen which confirms that the
machine is in Ventless mode.
6. Press START to run dryer in Ventless mode.
Ventless dry (condensing) uses cold water to dry the clothes. The cold water mixes with the
hot air in a condensing chamber within the machine. Please ensure the cold water faucet is
open during ventless dry mode.
Note: Slight condensation can occur at soap dispenser and will evaporate.
This is a normal feature.
Use dryer in Ventless Mode:
1. ENSURE METAL VENT COVER OVER THE EXHAUST FAN IS REMOVED.
2. Press "Dry Only" button to set the machine on drying cycle.
3. Hold Vented/Ventless button for 5 seconds.
4. symbol will appear on the screen which confirms that the machine is in vented mode.
5. Press START to run dryer in vented mode.
Use dryer in Vented mode:
Icon for VentlessIcon for Vented
as shown in Fig.9
, with screws provided for
vent cover.
Washer-Dryer.
!
Fig.9
For venting function the machine vents the moist hot air out of
the unit and requires a vent hose (standard 4" diameter) to
be installed.
Dryer can be used in Ventless or Vented mode
Ring plate
Guide plate
Latch plate
1. Unscrew the adapter ring plate and the 4 adapter retaining screws.
2. Remove the guide plate if the tap is
too large to fit the adapter.
3. Push the adapter onto the end of
the tap so that the rubber seal forms
a watertight connection. Tighten the adapter ring plate and
the 4 screws.
4. Pull the connector latch plate down,push the inlet hose onto the adapter,
and release the connector latch plate. Make sure the adapter locks into place.
CONNECTING TO THE MACHINE
Make sure that there are no kinks in the hose and that they are not crushed.
After connecting inlet hose to
water tap, turn on the water taps
substances (dirt, sand or sawdust) in the water lines. Let water drain into a bucket
and check the water temperature.
After completing connection, if water leaks from the hose, repeat the same steps.
Use the most conventional type of faucet for water supply. In case the faucet is square
or too big, remove the spacing ring before inserting the faucet into the adaptor.
to flush out foreign
11
24" - 40"
1.6"
Height difference between the installation location of
the washing machine and the drainage point:
Minimum 24" to Maximum 40"
Attach water drain hose to U-Connector.
Hook the U-Connector over the side or stand pipe (Fig 7.)
When the water is being drained, check that the water flow
out of the hose is adequate.
white

13
o
For each 90 turn, deduct 33 feet (10 meters) from maximum length.
4"
12"
3 feet (1 meter)
3 feet (1 meter)
10 feet (3 meters)
MAXIMUM LENGTH OF THE VENT HOSE IS 10 FEET WITH THE 0.5 AMPS ORIGINAL EXHAUST
FAN. USING LONGER VENT HOSE MAY DAMAGE INTERNAL COMPONENTS. FOR LONGER
VENT HOSE USE 1.5 AMPS EXHAUST FAN, WHICH IS AVAILABLE AS AN ACCESSORY.
14
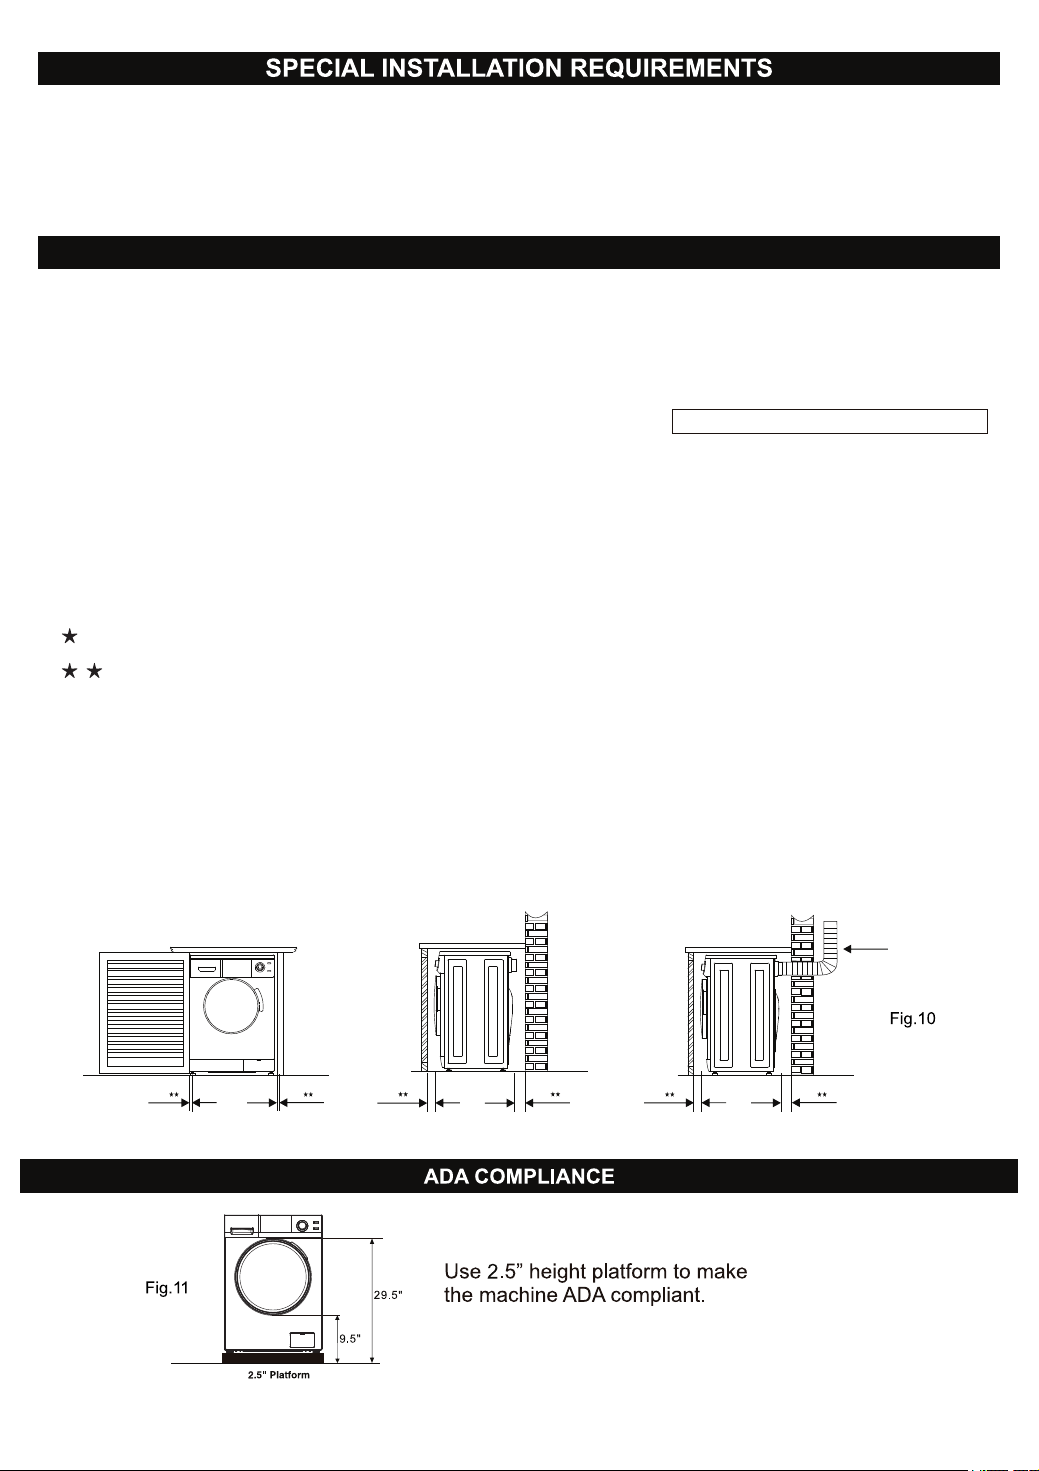
BUILT-IN, RECESSED, CLOSET AND ALCOVE INSTALLATION
MINIMUM CLEARANCE OTHER THAN ALCOVE OR CLOSET INSTALATION
2"2"
3"3"
3"3"
Maximum Length of
Exhaust Duct is 10 feet
Minimum clearances to combustible surfaces: 2" (5 cm) clearance both sides and 3" (7.5 cm) rear.
The Combo Washer-Dryer may be installed in a built-in, recessed area, closet or alcove.
The installation spacing is in inches and is the minimum acceptable.
Other installation must use the minimum dimension indicated.
Minimum clearance between dryer cabinet and adjustment walls are: 2" either side and 3" front and rear.
Minimum vertical space from floor to overhead cabinets, etc. is 52" (132 cm).
Closet door must be louvered or otherwise ventilated and must contain a minimum of 60 sq. in. of open
area equally distributed. If this closet contains both washer and a dryer, doors must contain a minimum
120 sq. in. of open area equally distributed.
No other fuel-burning appliance shall be installed in the same closet with dryer.
Additional clearances for wall, door and floor molding may be required.
Additional space is needed when an external exhaust elbow is used.
NOTE: If a door is installed that potentially encloses the unit while running, the door must allow for a
minimum of 20 sq. in. of air free movement. There must also be a 1" additional space in front of the
unit to the closed door and 1" from the back of the unit to the wall. Additional spacing should be
considered for easy installation, servicing and compliance with all applicable local, state and federal
codes.
VentlessVented

15
2. DRY CYCLES
Refresh Dry - 12 mins cycle blowing hot air onto the clothes before folding.
Time Dry 60 - 60 mins dry cycle.
3. OTHER CYCLES:
Rinse/Spin - 12 mins Spin cycle at 1000 RPM.
Winterize - 2 minute cycle to winterize your appliance.
(follow procedure on page 18)
o
Self-Clean - 9 mins cycle at 90 to clean the inner drum and tub of the machine
1. WASH & DRY, WASH ONLY, DRY ONLY
Wash Programs
Wash Features
Water Temp/Spin rpm/Duration
Drying Heat
& Approx Time
Description of
Load
Max heat - 1300W
90 mins
Warm / 1200 / 51 mins
Mixed Clothes
(Shirts, Trousers etc)
1. NORMAL
2. Prewash+Heavy
3. Heavy
Max heat - 1300W
80 mins
Cold / 800 / 31 mins
Cottons Blends
4. ECO
Max heat - 1300W
80 mins
Cold / 1200 / 20 mins
Light fabrics
5. Quick 20
Max heat - 1300W
120 mins
Cold+Hot / 1400 / 75 mins
Thick cottons
7. Wool
Max heat - 1300W
120 mins
Hot / 1400 / 61 mins
Cottons
(Towels, Jeans etc)
8. Quiet 60 dB
Max heat - 1300W
120 mins
Hot / 1200 / 59 mins
Bed Sheets etc
9. Allergen
Max heat - 1300W
120 mins
Hot / 1200 / 69 mins
Mixed Cottons
10. Sanitize
Max heat - 1300W
80 mins
Cold / 800 / 31 mins
Tumble only
NO HEAT
Cold / 500 / 36 mins
Woolens
Max heat - 750W
80 mins
Cold / 800 / 36 mins
Silk, Polyester etc
6. Delicate
Mixed Cottons
16
For small items such as socks, children’s garments and small towels please use a
Washing Net Bag.
Use Front Load detergent, .as per direction
If you are using Wash Only cycle, you can fill the drum.
If you are using Wash + Dry cycle, please do not load clothes more than 2/3 full.
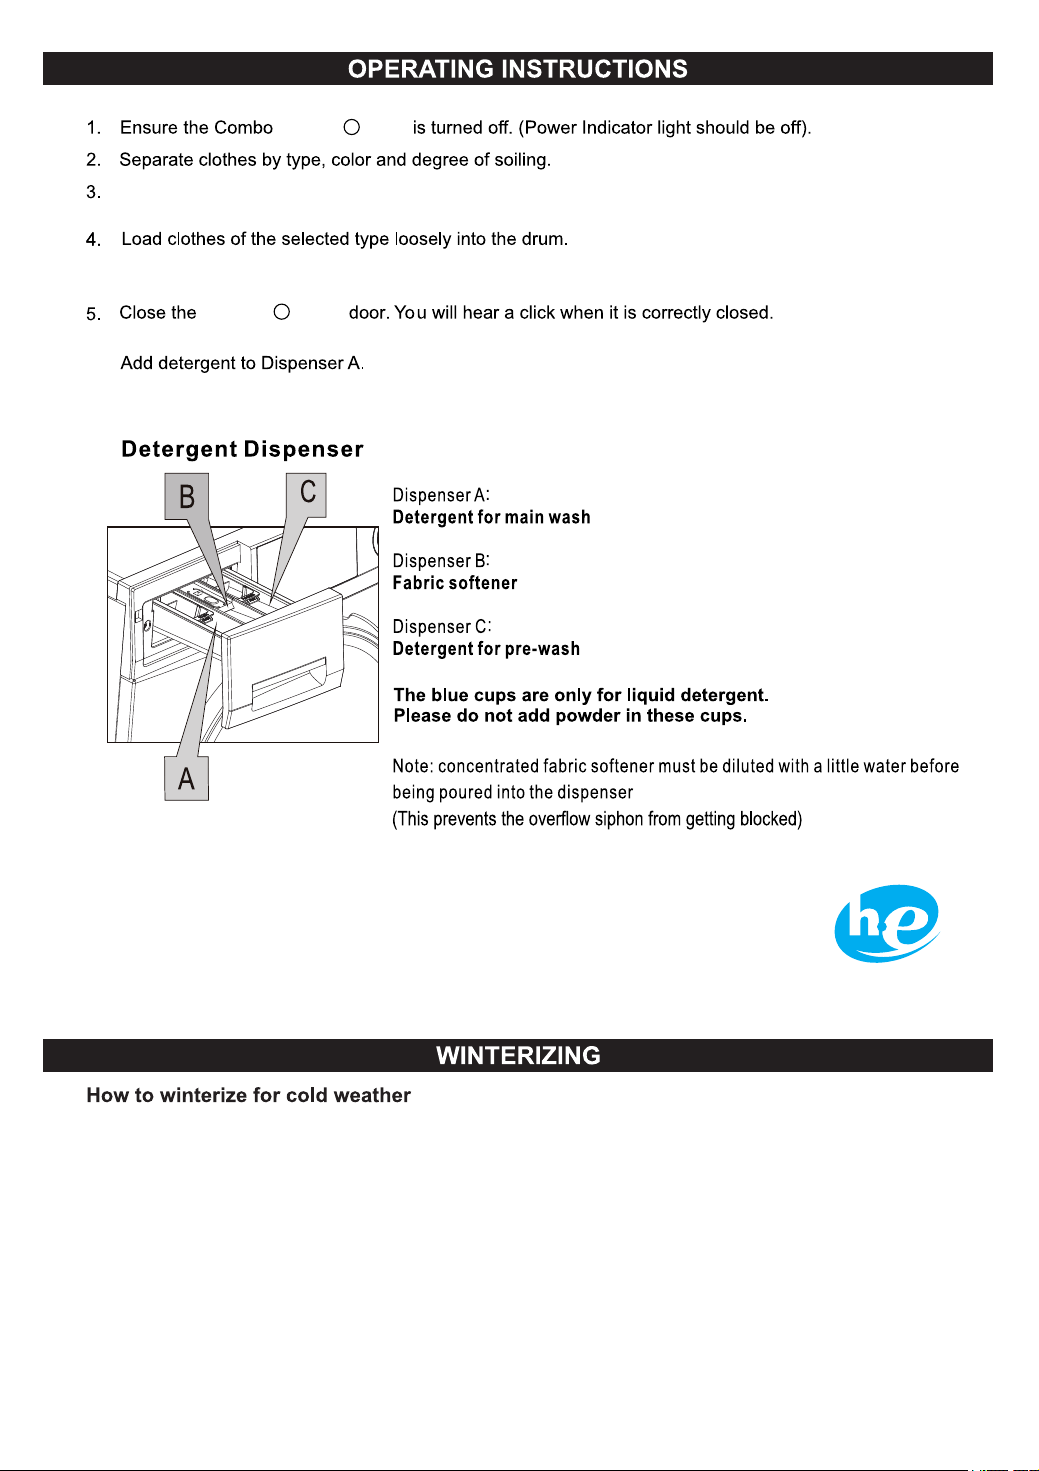
You can add fabric softener in Dispenser B & pre-wash detergent and bleach in Dispenser C (Fig.12)
Washer + Dryer
Washer + Dryer
Your washer/combo is designed to use a high efficiency (HE) detergent, which
reduces or eliminates suds and results in more efficient washing.
1. Pour 2 cups of RV type Antifreeze in soap dispenser.
4. Shut off water at both faucets and disconnect water inlet hoses from faucets and drain.
3. Open Coin trap once cycle is finished and drain out reaming water.
2. Select WINTERIZE cycle on knob and press START. Machine will Rinse & Spin.
Fig.12
and bleach
17
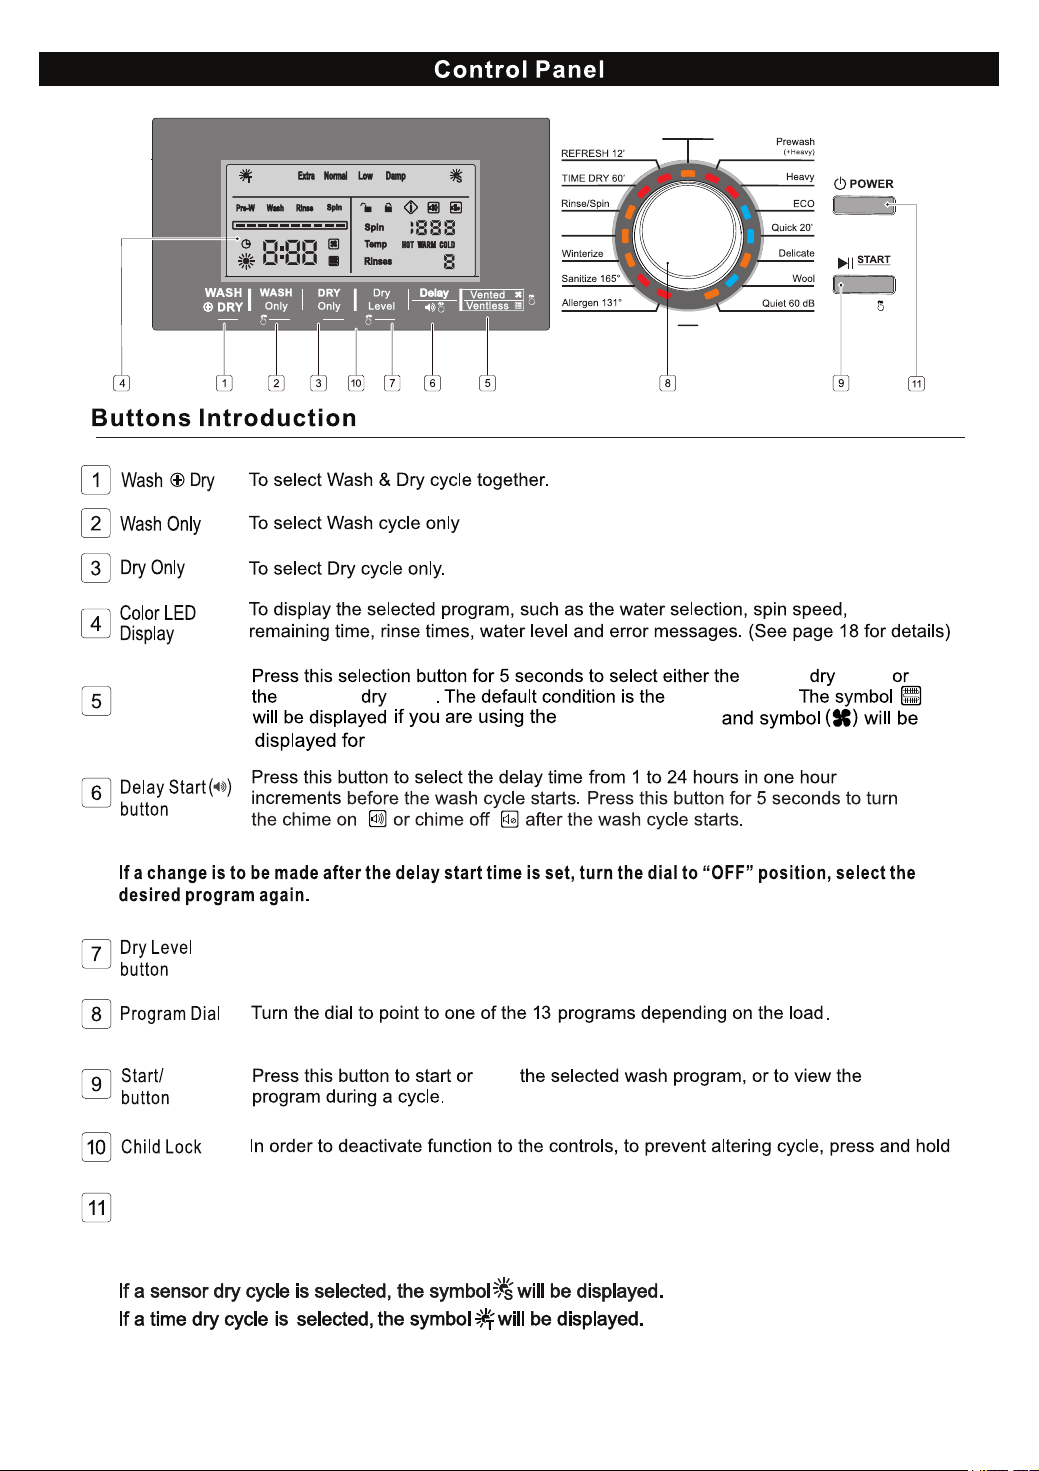
Vented /
Ventless
selection
button
mode
mode
Vented dry mode.
The default is Normal and you can select Extra, Low or Damp Dry.
Press this button to select the dry level for a Sensor Dry cycle.
Dry only and Dry level buttons for 5 seccods
Vented
Ventless
Ventless mode.
Ventless dry mode
Power
Press this button to turn the machine on.
. For extra rinse, press and hold 1 + 2 together.
stop
Pause
Self-
Clean
Child
Lock
Extra
Rinse
2s2s
5s
3s
Add-a-sock
3s
Drain
PAUSE
NORMAL
level options
18
A. How to run WASH + DRY Cycle
1. Press POWER button
2. Press START
Default cycle is NORMAL - If required you can change to desired washing cycle based on
type of clothes by rotating the Program Dial knob.
1. Press POWER button
2. Press WASH Only button
3. Press START
1. Press POWER button
2. Press DRY Only button
3. Press START
B. How to run WASH Only Cycle
C. How to run DRY Only Cycle
Default cycle is NORMAL - If required you can change to desired washing cycle based on
type of clothes by rotating the Program Dial knob.
Default cycle is NORMAL and Sensor Dry - You can select Damp, Low or Extra for the desired
dry level. You can also select Time Dry for 60 minutes.
Only for wash settings
Ventless Mode
(Condensing)
An extra rinse can be addedd
by pressing “Wash+Dry” and
“Wash Only” at the same time.
An Extra rinse and 9 minutes
will be added to the cycle.
4. At the end of the DRY cycle, if the clothes are not completely dry or if the clothes have been in the
drum for some time, you can press the Refresh button to dry the clothes and prevent wrinkles.
*
*
19
Understanding the door lock function
How to stop the wash cycle
How to stop the dry cycle
- The wash program can be stopped at any time.
- Press START/PAUSE for 5 seconds
- Press POWER button for 3 seconds to turn off the machine
Breakage of the door handle is not
How to turn on the display in energy saving mode?
- Machine display gets turned off automatically during operations to save energy.
- Press POWER button for 3 seconds to turn off the machine
Press START/PAUSE for 5 seconds.
Add-a-sock Feature
- Press any button to turn on display during this energy saving mode
PAUSE
20
2
1
Fig.16Fig.15Fig.14Fig.13
(Fig.14)
(Fig.15)
(Fig.16)
(Fig.13)
Fig.17
(Fig.17)
(Fig.18, Fig.19)
Fig.18Fig.19
is
- If Vent Dry mode is used, clean the exhaust fan and exhaust duct at least once a year
to prevent lint build-up.
21
22
Brush off surface growth to keep mold spores
form spreading. Dip article into solution of
1/2
cup bleach per 1 gallon (~3.8 Litres) of cool
sudsy water for 5 to 10 minutes. Rinse well.
Launder.
2 cups of water.
23
enough
Is the dryer button correctly pressed for the drying cycle?
Is drying cycle selected (Time Dry/Sensor Dry)?
Condensation at soap dispenser
Slight condensation can occur at soap dispenser and will evaporate. This is normal.
Front Load detergent
4"
Power
Front loading
bolts
Not drying
P
E
D
S
Drain pump clogged?
Drain hose kinked?
Coin trap clean?
Does selected program incorporate water draining?
Inlet hose kinked?
Faucet filter clean?
Sufficient
Water supply turned on?
Hose correctly connected to the faucet?
Machine levelled correctly?
Washer + Dryer
24
DIAGNOSTIC MENU
Door open
Drain failure
Water inlet failure
Water overfill
Motor failure
Washing heater failure
Dryer Malfunction
Dryer Malfunction
Water level failure
Dryer Malfunction
Dryer Malfunction
Dryer Malfunction
Communication between
display & electronic module
Door Switch
Drain Pump
Inlet Valves
Pressure Switch
Motor
+Electronic Module
Washing heater
Temp. sensor
(@rear-bottom of tub)
Temp. sensor
(@front of heater housing)
Water level sensor
Temp. sensor
(near the blow fan motor)
Fan Motor
Dying heater
Communication
Cable
E1
E2
E3
E4
E5
E7
E8
E9
E10
E11
E12
E13
E16
CodeDescriptionComponent
DIAGNOSTIC MENU