Loading ...
Loading ...
Loading ...
5
1886
Ceiling Bracket Hanging Fan Wiring Motor Housing Blades Light Control
Fan style may vary.
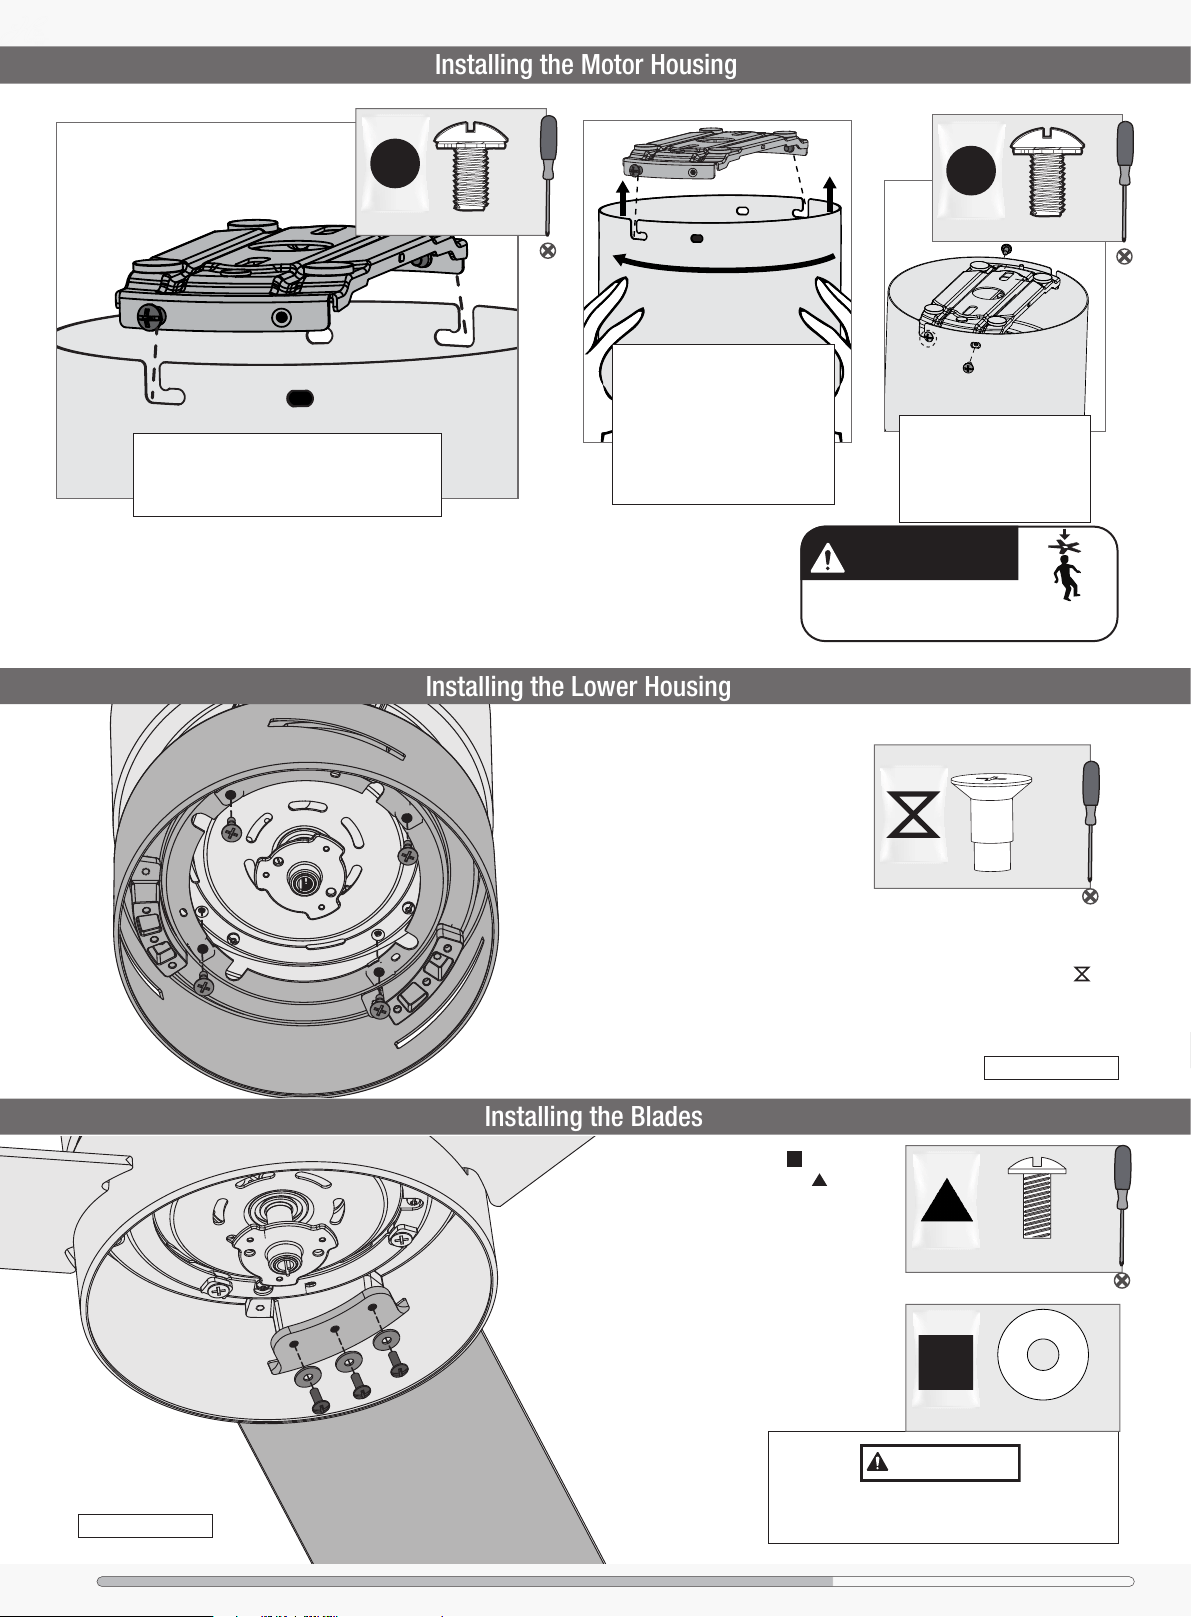
Note:
Partially install two of the canopy screws into
screw holes on opposite corners of the ceiling
plate as shown. Choose the two screw holes that
are aligned with the hanging slots in the fan body.
2 of 4
Canopy Screw
Installing the Motor Housing
2 of 4
Canopy Screw
Install the remaining two
canopy screws by holding the
fan body cover to the ceiling
mounting plate. Tighten all
four screws securely.
Align the hanging slots on both
sides of the fan body with the two
partially installed canopy screws.
Slide the two slots on both sides of
the fan body between the head of
the screws and rotate the fan body
counter clockwise so the screws
hold the fan body rmly in place.
WARNING
FAN FALL HAZARD
Make sure to secure the canopy.
There are four holes on the motor. Lift the lower housing and
align the grommet holes in the lower housing with the holes
of the motor. It does not matter which hole you choose. Install
the lower housing screws found in the hardware bag to
secure the lower housing to the fan.
Installing the Lower Housing
x4
Lower
Housing
Screw
BAG
BAG
BAG
Installing the Blades
Repeat x3
Put the blade washers found in the
hardware
bag onto the blade screws found in the
hardware bag. Then install the blade screws to
secure each blade to the fan.
Fan style may vary.
Note:
IMPORTANT
NOTE: Follow the instructions on the blade. Installing it
incorrectly could result in your fan not functioning.
x9
BAG
Blade Screw
x9
BAG
Blade Washer
Loading ...
Loading ...
Loading ...