Loading ...
Loading ...
Loading ...
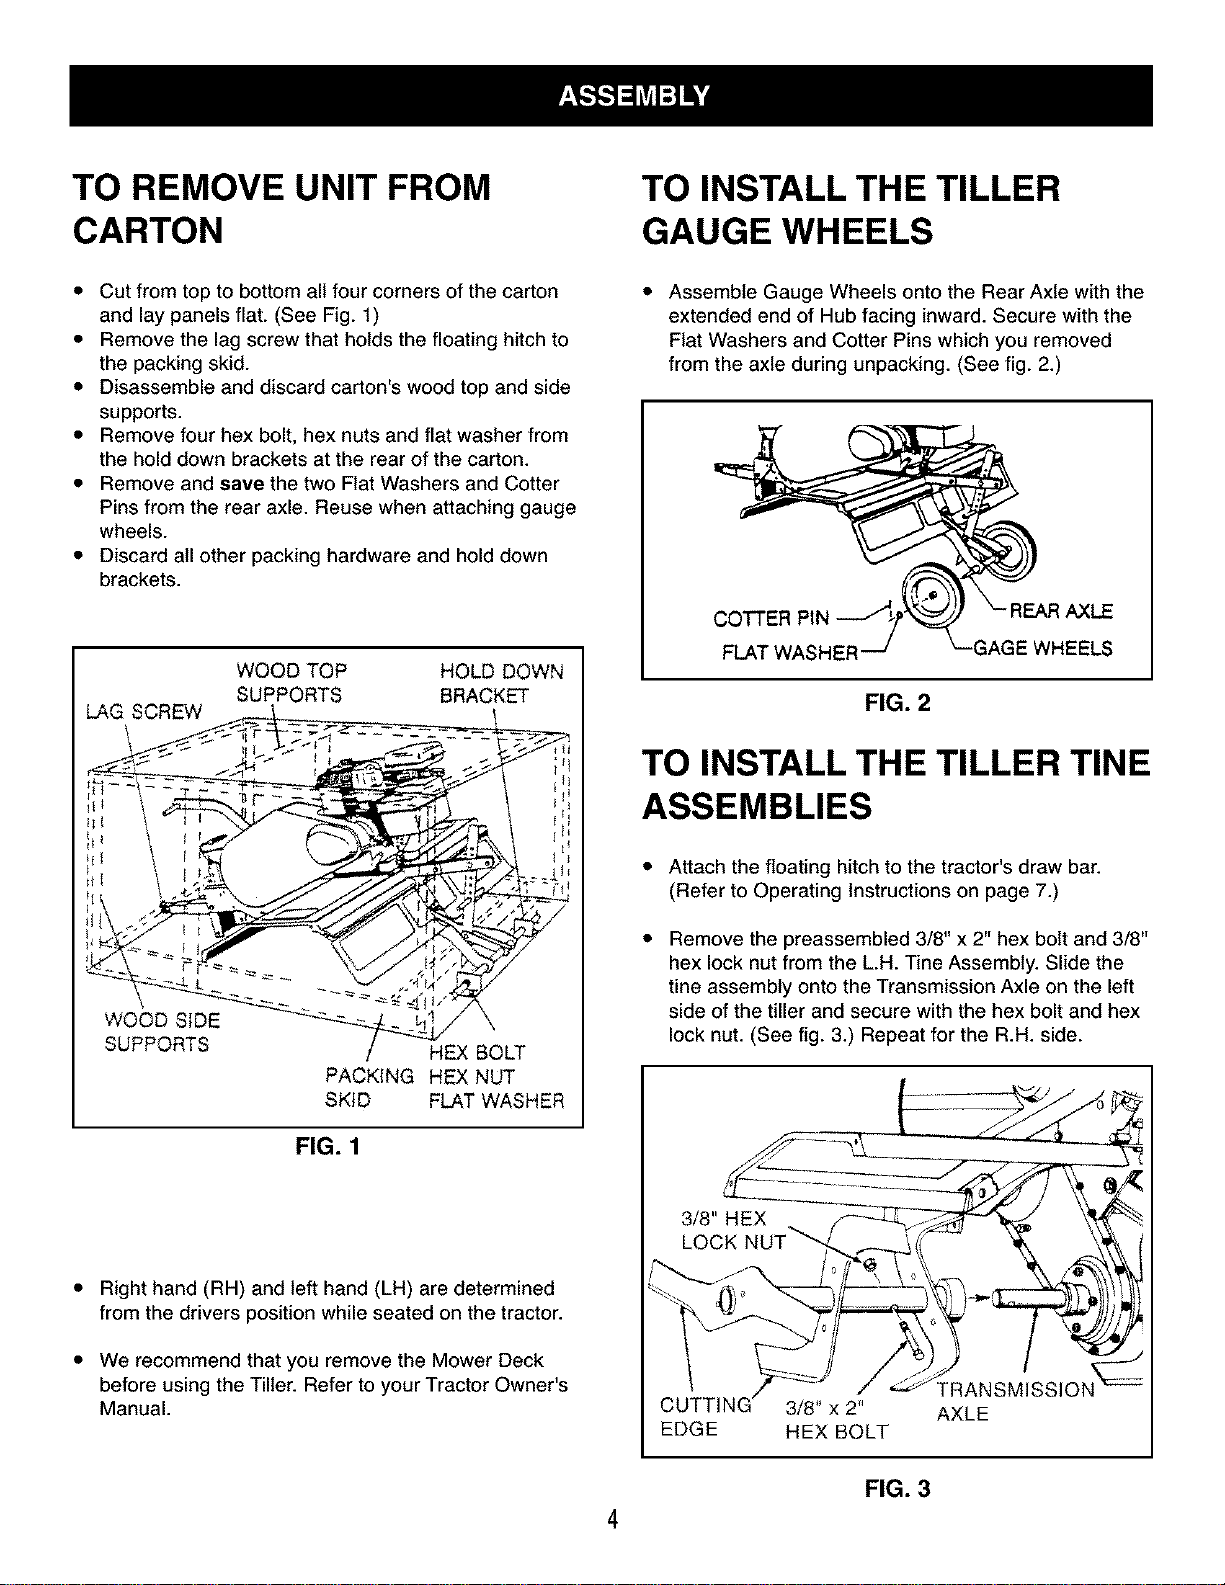
TO REMOVE UNIT FROM
CARTON
• Cut from top to bottom all four corners of the carton
and lay panels flat. (See Fig. 1)
• Remove the lag screw that holds the floating hitch to
the packing skid.
• Disassemble and discard carton's wood top and side
supports.
• Remove four hex bolt, hex nuts and flat washer from
the hold down brackets at the rear of the carton.
• Remove and save the two Flat Washers and Cotter
Pins from the rear axle. Reuse when attaching gauge
wheels.
• Discard all other packing hardware and hold down
brackets.
LAG SCREW
WOOD TOP HOLD DOWN
SUPPORTS BRACKET
WOOD SIDE
SUPPORTS
HEX BOLT
PACKING HE)( NUT
SKID FLAT WASHER
FIG. 1
• Right hand (RH) and left hand (LH) are determined
from the drivers position while seated on the tractor.
• We recommend that you remove the Mower Deck
before using the Tiller. Refer to your Tractor Owner's
Manual.
TO INSTALL THE TILLER
GAUGE WHEELS
Assemble Gauge Wheels onto the Rear Axle with the
extended end of Hub facing inward. Secure with the
Flat Washers and Cotter Pins which you removed
from the axle during unpacking. (See fig. 2.)
COTTER PIN { AXLE
FLAT WASHER ._LS
FIG. 2
TO INSTALL THE TILLER TINE
ASSEMBLIES
Attach the floating hitch to the tractor's draw bar.
(Refer to Operating Instructions on page 7.)
Remove the preassembled 3/8" x 2" hex bolt and 3/8"
hex lock nut from the L.H. "FineAssembly. Slide the
tine assembly onto the Transmission Axle on the left
side of the tiller and secure with the hex bolt and hex
lock nut. (See fig. 3.) Repeat for the R.H. side.
3/8" HEX
LOCK
3/8" x 2" AXLE
EDGE HEX BOLT
4
FIG. 3
Loading ...
Loading ...
Loading ...