Loading ...
Loading ...
Loading ...
OPERATING INSTRUCTIONS
BEFORE FIRST USE
• Read this guide, taking special note of the
“safety instructions” section.
• Remove any packaging, protective fi lms or
warning sticker that may be on the grill.
• Wipe the grill with a soft, dry cloth to remove
any dust.
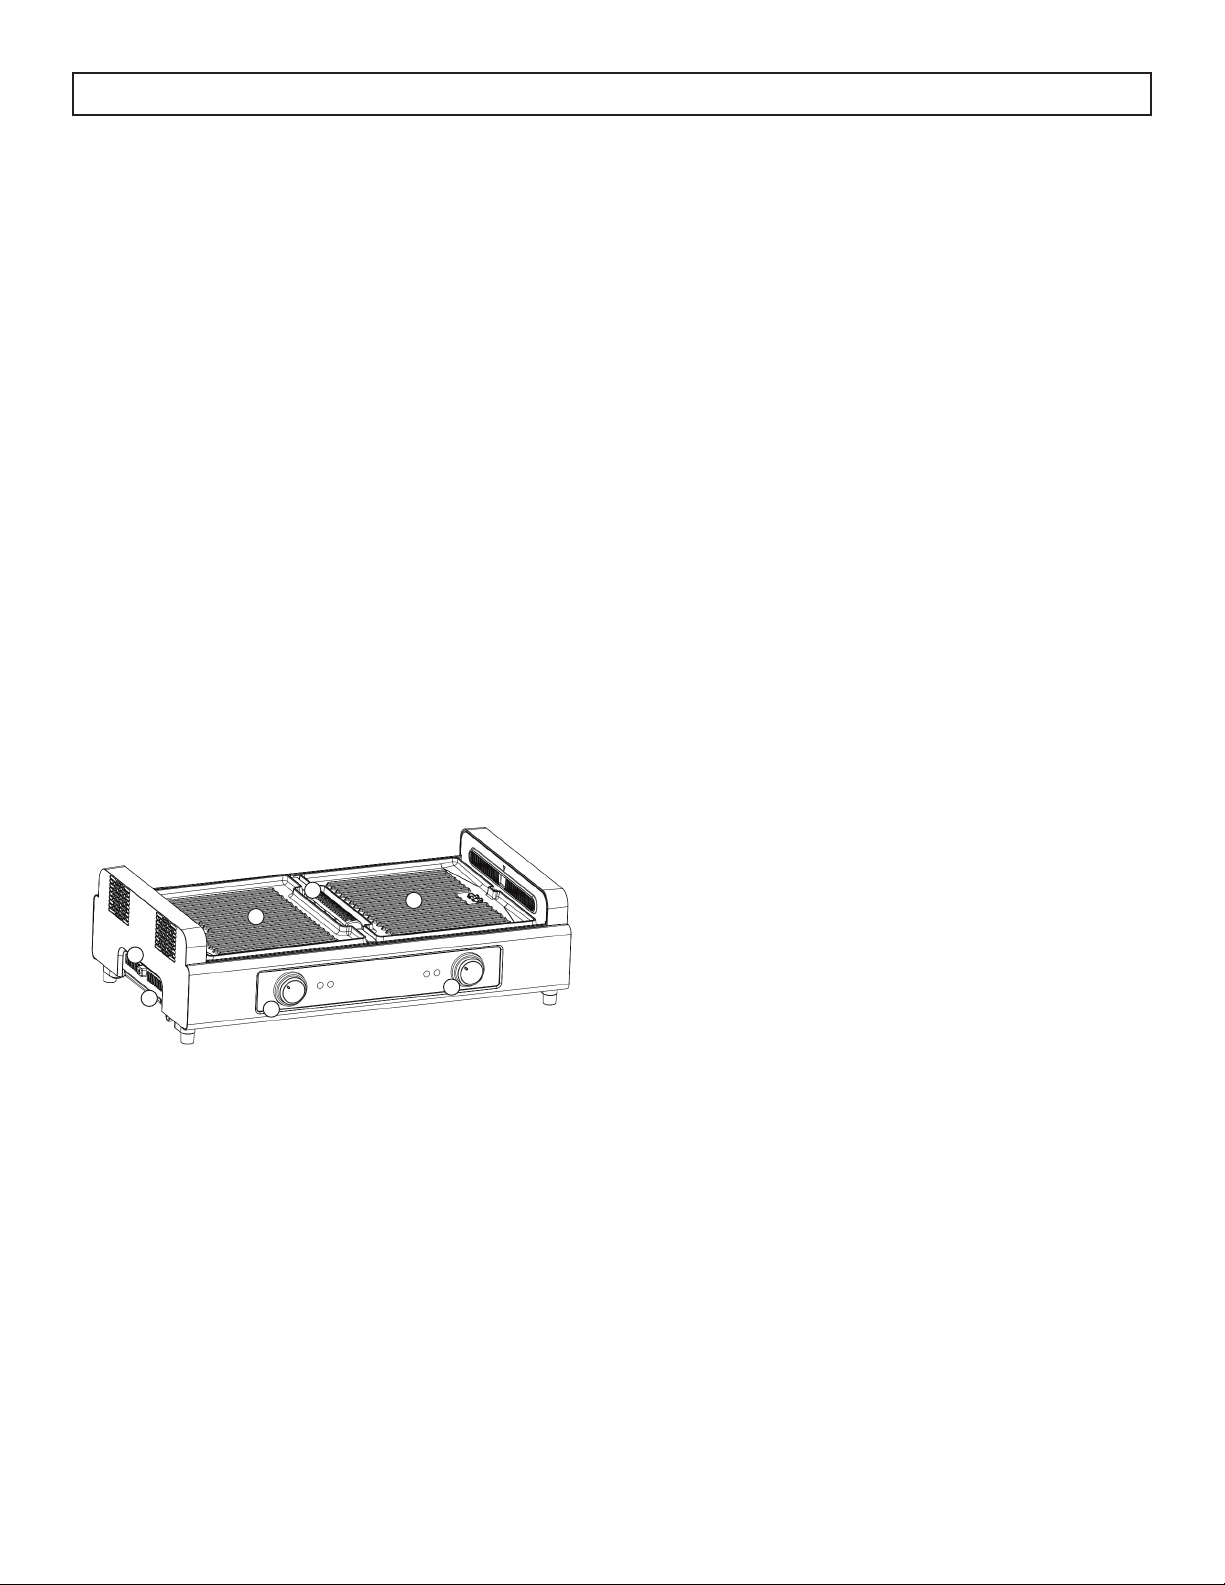
FEATURES
1. Release button
2. Drip tray
3. Grill surface
4. Air inlet
5. Temperature control knobs
Note: The left control knob will set the temperature
for the left grill. The right control knob will set the
temperature for the right grill.
1
2
3
3
4
5
5
DRIP TRAY
The drip tray will collect any oil or fat that is
generated during cooking.
Be careful when removing the drip try as the tray
and contents could be very hot. Gently pull the drip
tray to remove it from the grill. Empty and rinse the
drip tray before replacing in the grill.
OPERATION
1. Prepare the food you intented to grill before
turning the grill on. Cut the food to a maximum
2.5 cm (1 inch) thickness.
2. Connect the grill to the power outlet.
3. Add a thin coating of oil or butter while
preheating. Do not use low-fat oil as this may
cause burning.
4. Turn the temperature control knob to the desired
temperature. The power light will illuminate to
indicate the grill is heating.
5. The light will turn off when the grill reaches the
selected temperature. Food can be placed on the
grill once preheating is complete.
WARNING: ALWAYS USE A MEAT THERMOMETER
TO ENSURE THAT MEAT, POULTRY AND FISH ARE
COOKED THOROUGHLY BEFORE EATING.
Important Temperature Note
The USDA recommends that meats should be
cooked to the following internal temperatures to
ensure food is cooked thoroughly.
• Beef / lamb: 145°F
• Pork: 160°F
• Poultry: 170 - 180°F
• Reheating poultry: 165°F
3
Loading ...
Loading ...
Loading ...