Loading ...
Loading ...
Loading ...
ENGLISH
4
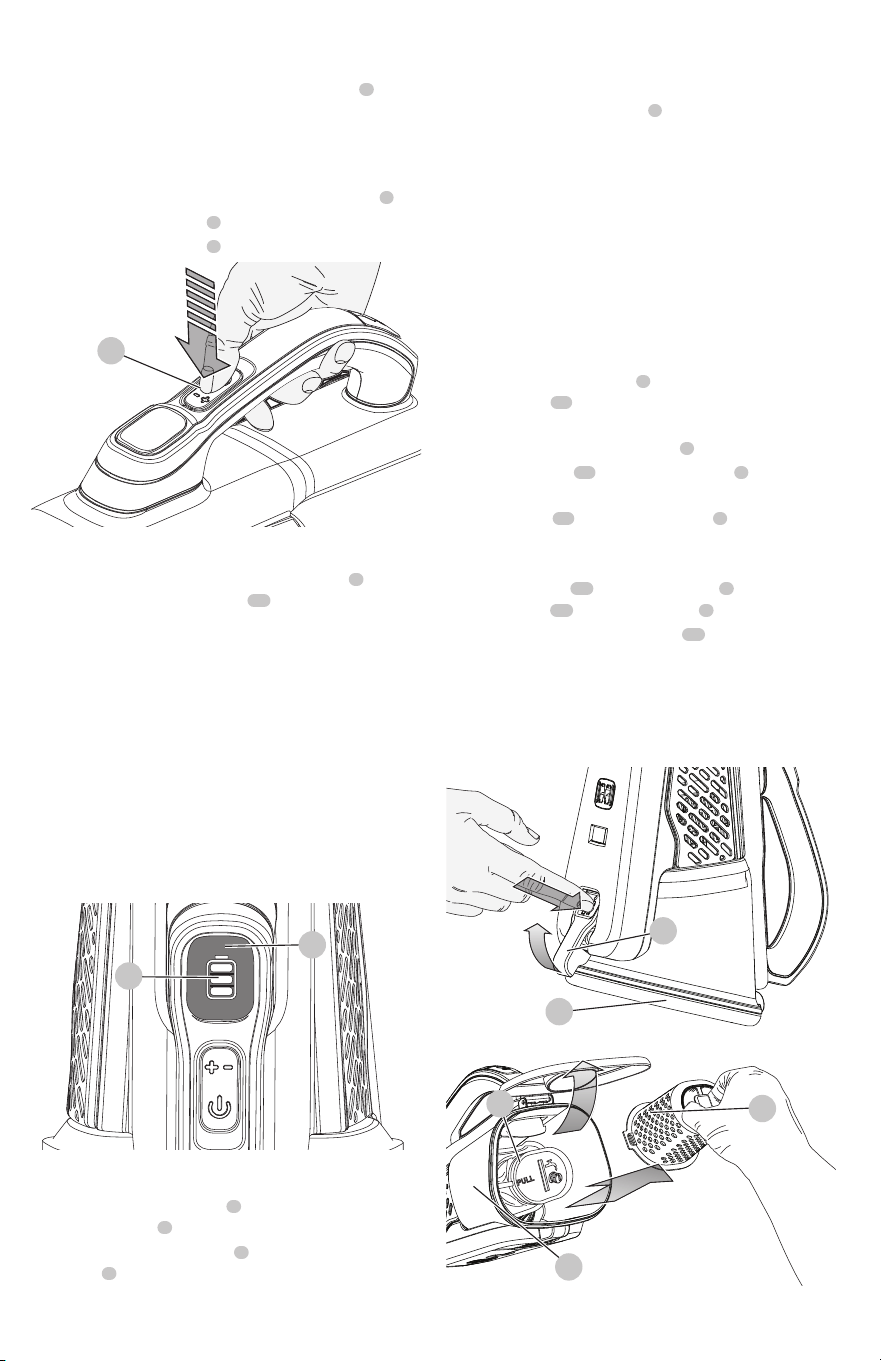
Charging Indicator LED
1. While charging, the white LEDs on the charger
8
will
flash and increase in sections.
2. When charging is completed, the white LEDs will turn off.
Switching On (Fig. C)
1. To switch the appliance ON, press the On/Off switch
1
.
2. Press the On/Off switch
1
again to engage boost mode.
3. Press the On/Off switch
1
switch to turn the vacuum Off.
Fig. C
1
State of charge indicator
This appliance include a state of charge indicator
2
which
consists of three white LED lights
12
that indicate the
level of charge remaining in the battery. This feature is only
activated when the vacuum is poweredon.
The state of charge indicator is an indication of approximate
levels of charge remaining in the battery pack according to
the followingindicators:
The LED battery indicator displays the remaining charge
and warns you when the battery is low. The final LED will
flash continuously when there is only 1 minute of runtime
remaining. All LEDs will flash when the unit isdischarged.
NOTE: The state of charge indicator is only an indication
of the charge left on the battery. It does not indicate tool
functionality and is subject to variation based on product
components, temperature and end-userapplication.
Fig. D
2
12
Extendable Crevice Tool
1. To extend the crevice tool
4
, pull it out from the
vacuum nozzle
3
until it clicks in place.
2. To collapse the crevice tool
4
, push it into the vacuum
nozzle
3
until it clicks in place.
Dry pick up
For everyday spills of dry material.
- Do not fill the dust bowl
5
beyond the end of the filter.
Optimizing the suction force
In order to keep the suction force optimized, the filters must
be cleared regularly during use.
Emptying and cleaning the product.
Removing the dust bowl and filter (Fig. E, F)
WARNING: The filter is reusable and
should be cleaned regularly.
1. Hold the dust bowl over a trash can before pressing the
dust bowl release button
6
to release the dust bowl
access door
13
as shown in figure E.
2. While holding the dust bowl over a trash can, lightly
shake it to empty the dust bowl
5
.
3. Lift the prefilter
14
out of the dust bowl
5
as shown
in figure F.
4. Lift the filter
15
out of the dust bowl
5
.
5. Lightly shake the dust bowl, prefilter and filter over a
trash can until debris is cleared.
6. Install the filter
15
into the dust bowl
5
, then install
the prefilter
14
into the dust bowl
5
.
7. Close the dust bowl access door
13
until it clicks firmly
into place.
WARNING: Never use the appliance
without the filters. Optimum dust collection will only
be achieved with a clean filter.
Fig. E
6
11
Fig. F
7
5
13
Loading ...
Loading ...
Loading ...