Loading ...
Loading ...

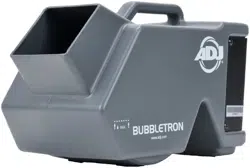
ADJ Products, LLC www.adj.com Bubbletron Go Instruction Manual Page 4
• Battery Powered
• High velocity, high output fan
• Easy accessible front fluid tank
• High bubble output
• Low current draw
• Durable plastic casing
• Optional On/Off Remote Control
Bubbletron Go Features Bubbletron Go Operation
Bubbletron Go Product Registration
The Bubbletron Go carries a one year (365 days) limited warranty.
Please fill out the enclosed warranty card to validate your purchase.
All returned service items whether under warranty or not, must be
freight pre-paid and accompany a return authorization (R.A.) num-
ber. The R.A. number must be clearly written on the outside of the
return package. A brief description of the problem as well as the R.A.
number must also be written down on a piece of paper and included
in the shipping container. If the unit is under warranty, you must pro-
vide a copy of your proof of purchase invoice. You may obtain a R.A.
number by contacting customer support at (800) 322-6337.
ADJ Products, LLC - www.adj.com - Bubbletron Go Instruction Manual Page 5
Filling the Tray Reservoir:
1. Place the Bubbletron Go on a at level surface.
2. The bubble juice tray is located in the front of the machine. Fill the
tray, using premium American DJ
® brand bubble juice. Make sure
that you do not ll the tray above the designated ll line. Filling
above the line will result in damage to the machine. After the usage,
please empty the remaining juice to prevent damage as well.
Operation:
Once the tray has been lled, place the unit on at level surface. Flip
the power switch to the “ON” position and watch the bubbles come
out by the hundreds. Be sure the unit remains in a level position to
avoid accidental leaking.
Remote Operation (Optional):
The unit may be used with an optional on/o remote that can be used
to power on the Bubbletron Go regardless of the setting of the units
power switch.
Remote Operation:
1. Plug the remote control into the unit.
2. Push the power button on the remote to the “ON” position, main
power will be indicated by a glowing red LED above the remote
power button.
Battery Recharge:
It will take about 6 hours to reach full charge. To recharge the battery,
plug the supplied power supply into the input on the rear of the unit
and plug the other end into a matching power supply. A red LED on the
the power supply will glow indicating that the unit is charging. When
the unit reaches full charge a green LED will glow.
Bubbletron Go Battery Precautions
• Never charge batteries unattended. When charging batteries you
should always remain in constant observation to react to any
potential problems that may occur.
• If at any time you witness a battery starting to smoke, get hot, or
abnormal smell, discontinue the charging process immediately.
Disconnect the power supply and observe the unit in a safe place
for approximately 15 minutes. The battery could end up leaking
and the reaction with air may cause the chemicals to ignite, resulting
in a re.
• Neve store or charge battery pack inside your car in extreme tem-
peratures, since this could ignite a re.
• Neve transport or store battery pack in high temperature enviro-
ment for a long time.
Loading ...