Loading ...
Loading ...
Loading ...
(98PO) “NMMA” BOAT W / MOTOR MOUNTING (TYPE II) ENGLISH 7.5”X10.3” 05/09/2016
98PO
SAVE THESE INSTRUCTIONS
Page 9
Fishing Rod Holder Use (Certain Models):
1. Slide the end cap over the end of the fishing rod.
2. Insert the fishing pole into the holder.
Seat Installation:
Certain Models:
1. Inflate each seat cushion slowly to about 75% of its capacity.
2. Attach the seat cushion hinge to the hinge on the boat. Repeat the
connection on the other side and for all seats. See Fig A.
3. Finish inflating the seat cushions slowly until it is firm to the touch
but NOT hard. DO NOT OVER INFLATE!
4. To disassemble the seats, deflate the seats first and reverse the
installation procedures.
NOTE:
Some seat cushions after inflation are tuck in directly into
the fore, mid or aft locations of the boat cockpit. No hinges.
Mariner 3 / Mariner 4:
1.
Inflate each seat cushion slowly to about 75% of its capacity.
2.
Put the seat cushions into the fore, mid or aft locations of the boat cockpit.
3.
Finish inflating the seat cushions slowly until it is firm to the touch but NOT hard. DO NOT OVER INFLATE!
4.
Seat cushions after inflation are tuck in directly into the fore, mid or aft locations of the boat cockpit.
5.
To disassemble the seats, deflate the seats first and reverse the installation procedures.
Fig A
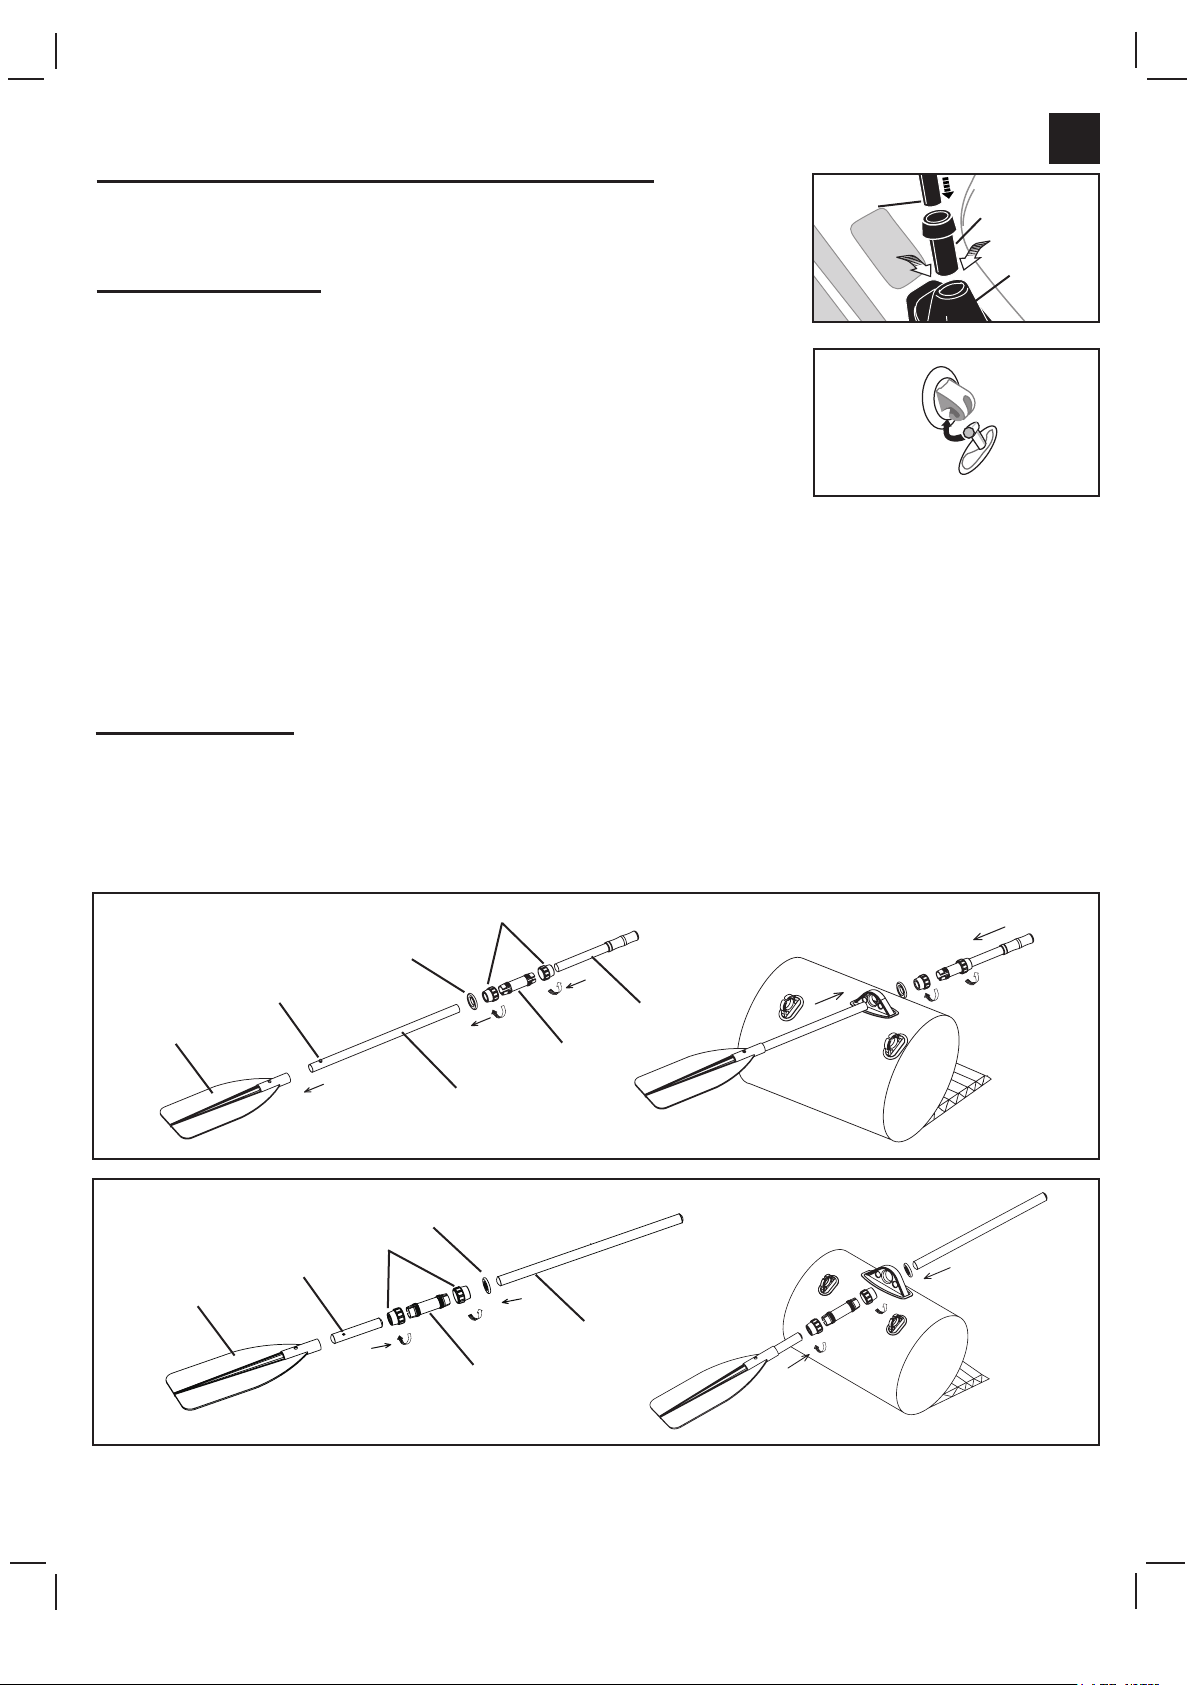
Oar Assembly:
1.
Insert “Shaft A” with the pin end first into the blade. Make sure the pin is securely fastened to the blade.
2.
Insert the assembled “Shaft A” through the oar-lock with the blade towards outboard (water).
3.
Place the retainer ring onto the other end of the assembled “Shaft A”, from inside of the boat.
4.
Join “Shaft A” with “Shaft B” together by inserting them together into the coupler and tighten the
coupler covers securely.
5.
When the oars are not in use secure the oars onto the oar holders located on each side of the boat.
Fishing
Rod
Holder
End Cap
Fishing
Rod
Pin
Coupler Cover
Shaft B
Coupler
Shaft A
Blade
Retainer Ring
Coupler Cover
Shaft
Coupler
Blade
Retainer Ring
Pin
Loading ...
Loading ...
Loading ...