L
N
L
N
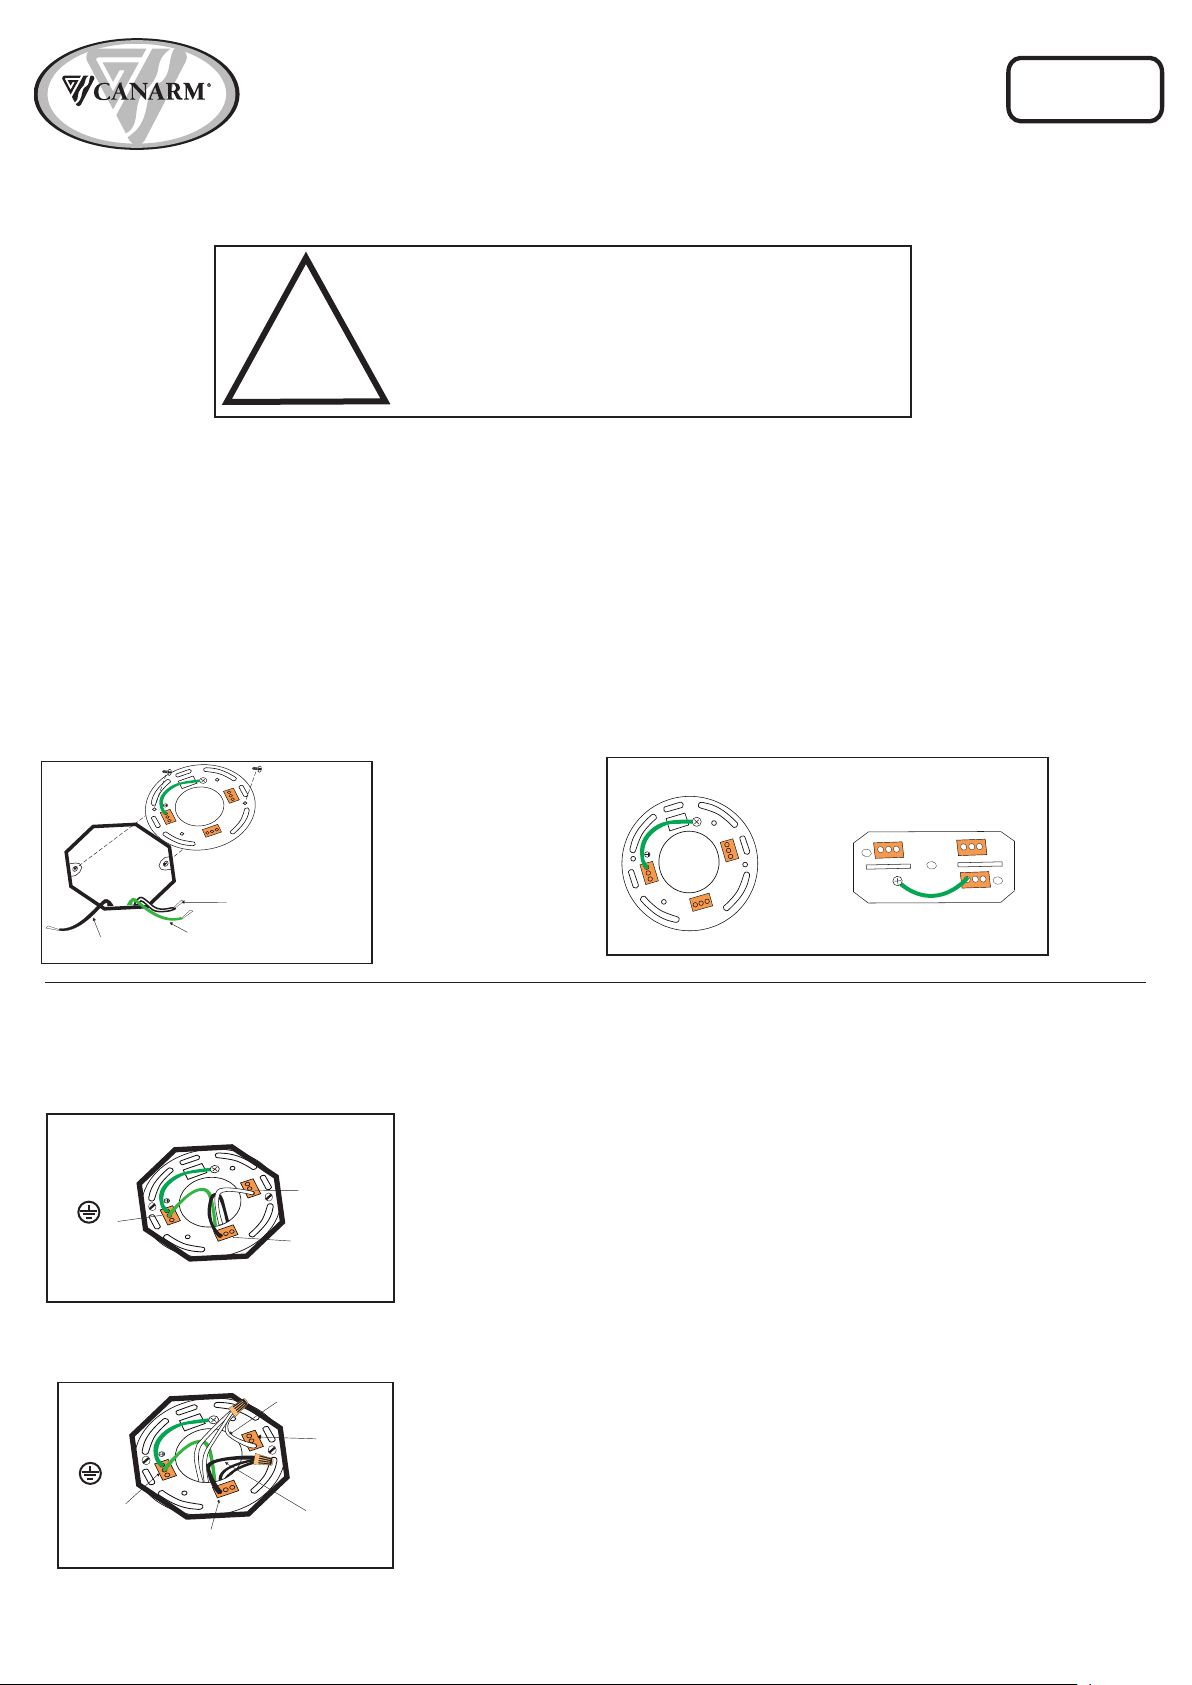
INSTALL EASY CONNECT MOUNTING BRACKET:
Electrical
Box
QUESTIONS OR CONCERNS CONTACT CANARM AT:
1-800-265-1833 (English) • 1-800-567-2513 (French)
Monday through Friday 8:00 AM to 5:00 PM E.S.T.
SAFETY PRECAUTIONS:
1. TURN OFF ELECTRICAL POWER BEFORE STARTING INSTALLATION OF LIGHT FIXTURE.
DO NOT REMOVE INSULATION FROM FIXTURE.
2. THIS PRODUCT MUST BE INSTALLED IN ACCORDANCE WITH THE APPLICABLE INSTALLATION CODE
BY A PERSON FAMILIAR WITH THE CONSTRUCTION AND OPERATION OF THE PRODUCT AND THE
HAZARDS INVOLVED.
3. CAUTION – RISK OF FIRE. CONSULT A QUALIFIED ELECTRICIAN TO ENSURE CORRECT BRANCH CIRCUIT
CONDUCTOR.
L
I
G
H
T
I
N
G
&
F
A
N
S
E
C
L
A
I
R
A
G
E
S
&
V
E
N
T
I
L
A
T
E
U
R
S
Black (Live)
White
(Neutral)
Green (Ground)
Attach easy connect
mounting bracket
to electrical box with
electrical box screws
(not included).
Connect (push) electrical wires from electric box (house wiring) into correct inserts.
Black (Live),
White (Neutral),
Green (Ground)
Easy Connect
mounting
bracket
STEP 1
For multiple black (live) & white (neutral) wires joined in the electrical box
(house wiring), attach a single “black” and “white” Jumper Wire before connecting.
Strip 7mm from a 6” Jumper Wires (AWG 12-24) supplied. Then connect (push)
wires into correct inserts.
STEP 2
EASY CONNECT®
INSTALLATION INSTRUCTIONS
L
N
Jumper Wire
Jumper
Wire
Option 2 - MULTIPLE ELECTRICAL BOX WIRES
CONNECT HOUSE WIRES
IFM624A
10/15
L
N
STYLE #1
STYLE #2
NOTE: Product May Not Look Exactly As Shown In Figures.
(L)
Black
(Live)
(L)
Black (Live)
(N)
White
(Neutral)
(N)
White
(Neutral)
Green
(Ground)
Green
(Ground)
!
INSTRUCTIONS PERTAINING TO RISK OF FIRE OR INJURY TO PERSONS
READ ALL INSTRUCTIONS
IMPORTANT SAFETY
INSTRUCTIONS
SAVE THESE INSTRUCTIONS
Option 1
1-2
Connect (push) electrical wires from fixture into correct inserts.
Black (live),
White (neutral),
Green (ground)
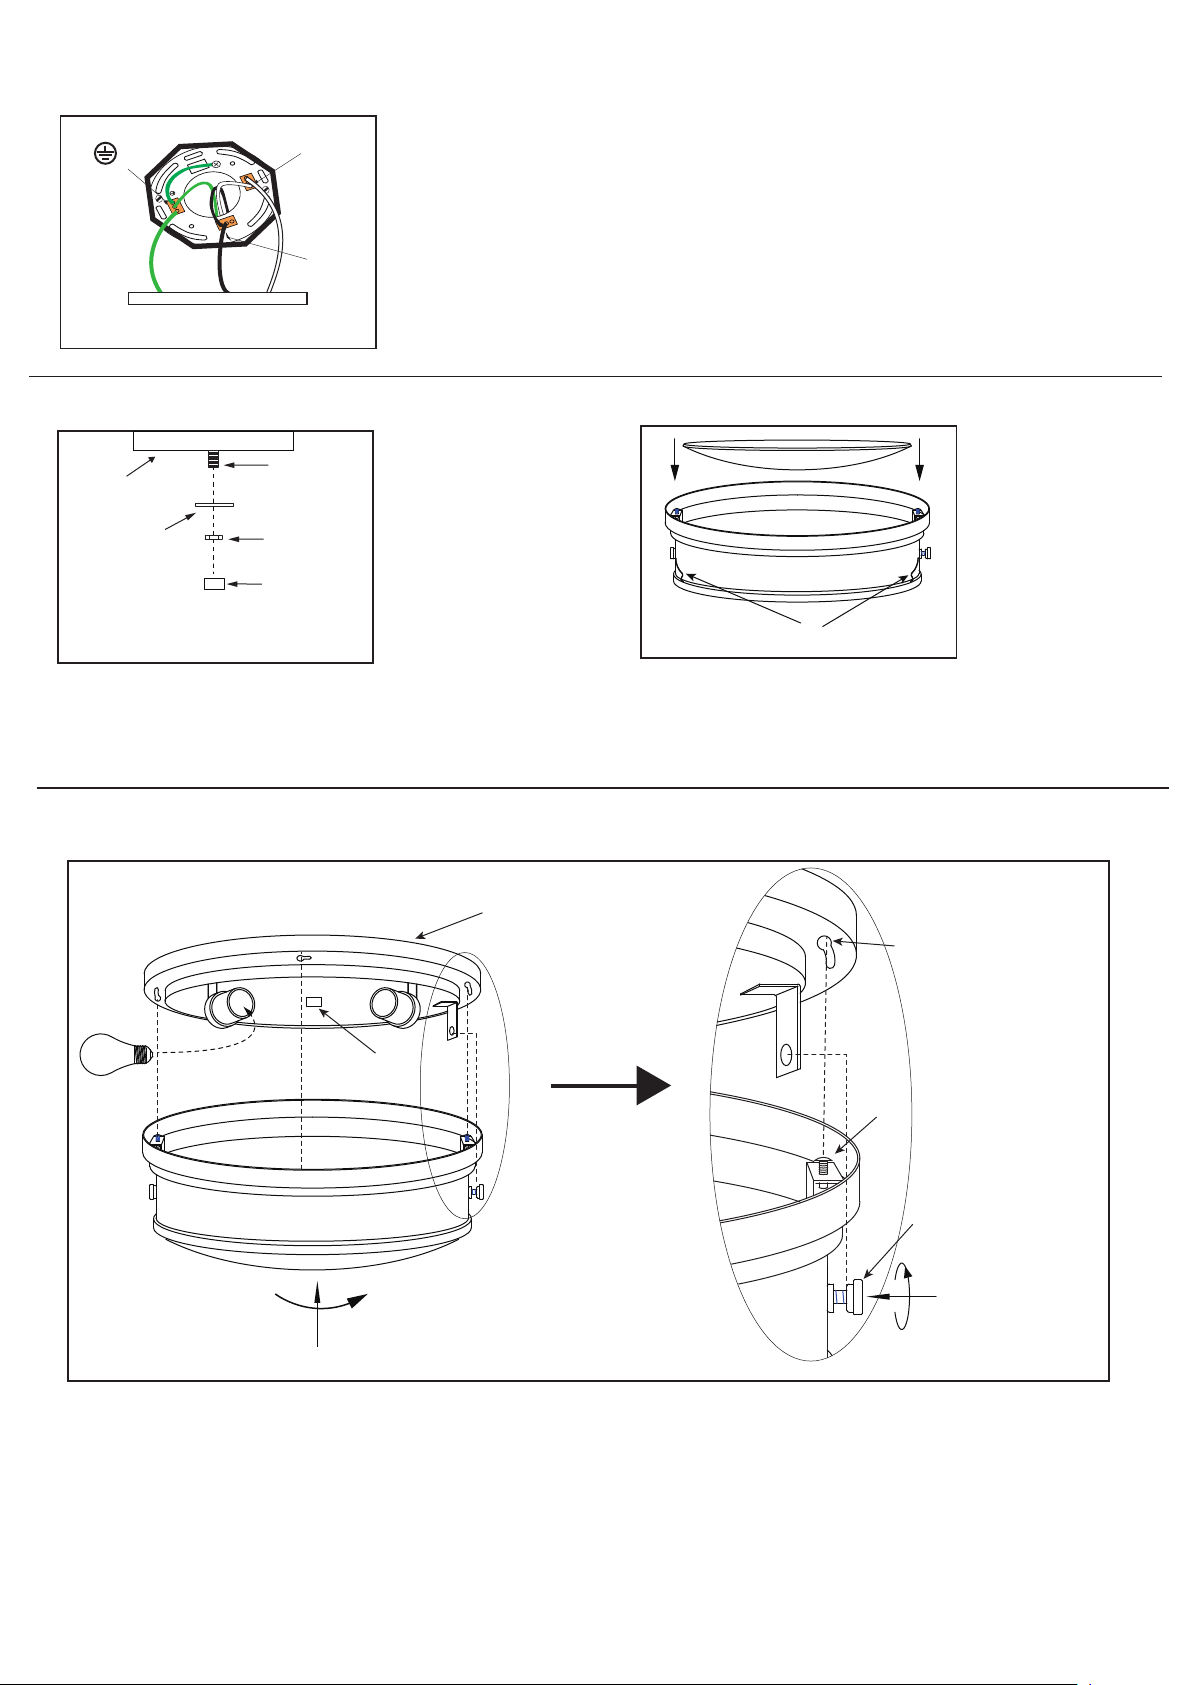
STEP 3
STEP 4
CONNECT LIGHT FIXTURE
STEP 5
STEP 6
Imported By: CANARM LTD., 2157 Parkedale Ave., Brockville, Ontario, K6V 5V6, Tel: (613) 342-5424, Fax: (800) 263-4598
L
N
Light
Fixture
(L)
Black
(Live)
(N)
White
(Neutral)
Green
(Ground)
Install specified bulb type and wattage (not included).
Bulb
Spring Clip
Line up the screws in the cover with the key slots in the pan.
Push the cover onto the pan and turn the cover to secure in place.
The cap nut might be re-tightened if the screws can not go into the slot.
Lock the cover in place using the thumb screw.
Glass
Cover
Cover
Slightly push the glass onto the cover.
Ensure the glass is tightenly secured by
the 3 spring clips.
Thumb
Screw
Slot
Screw
2-2
NOTE: The cap nut might be
re-tightened if the screws
can not go into the slot.
Secure the pan to the nipple tightening
by washer and hex nut. Screw the cap nut
to the nipple. Ensure to tighten the cap
nut firmly.
Nipple
Cap nut
Cap nut
Pan
Pan
Washer
Hex Nut

