Loading ...
Loading ...
Loading ...
19
Timed Dry
Use Timed Dry to select a specific amount of drying time. The
preset settings for EXPRESS DRY™, AIR DRY and TOUCH UP
are automatically set to Timed Dry.
To change the time
Press MORE TIME or LESS TIME until the desired time shows in
the display.
End of Cycle Signal
The End of Cycle Signal produces an audible sound when the
drying cycle is finished. Promptly removing clothes at the end of
the cycle reduces wrinkling.
Press the END of CYCLE SIGNAL pad to adjust the sound level
or turn off the signal.
NOTE:
When WRINKLE GUARD III™ is selected and the End of
Cycle Signal is on, an audible sound will emit every five minutes
until the clothes are removed, or WRINKLE GUARD III is finished.
Dryer Status
Follow the progress of your dryer with the Drying Status
indicators.
DRYING glows when Start is pressed.
DRYING flashes when the display shows the actual minutes
remaining in the cycle. DRYING stops flashing at the start of Cool
Down.
COOL DOWN glows during the cool down part of the cycle.
CHECK LINT SCREEN flashes to remind you to clean the lint
screen before starting a cycle. The light turns off when you open
the dryer door or press Start.
Indicator lights
Other indicator lights show what cycle, options and modifiers
have been selected. The display lights also show the estimated
or actual TIME REMAINING.
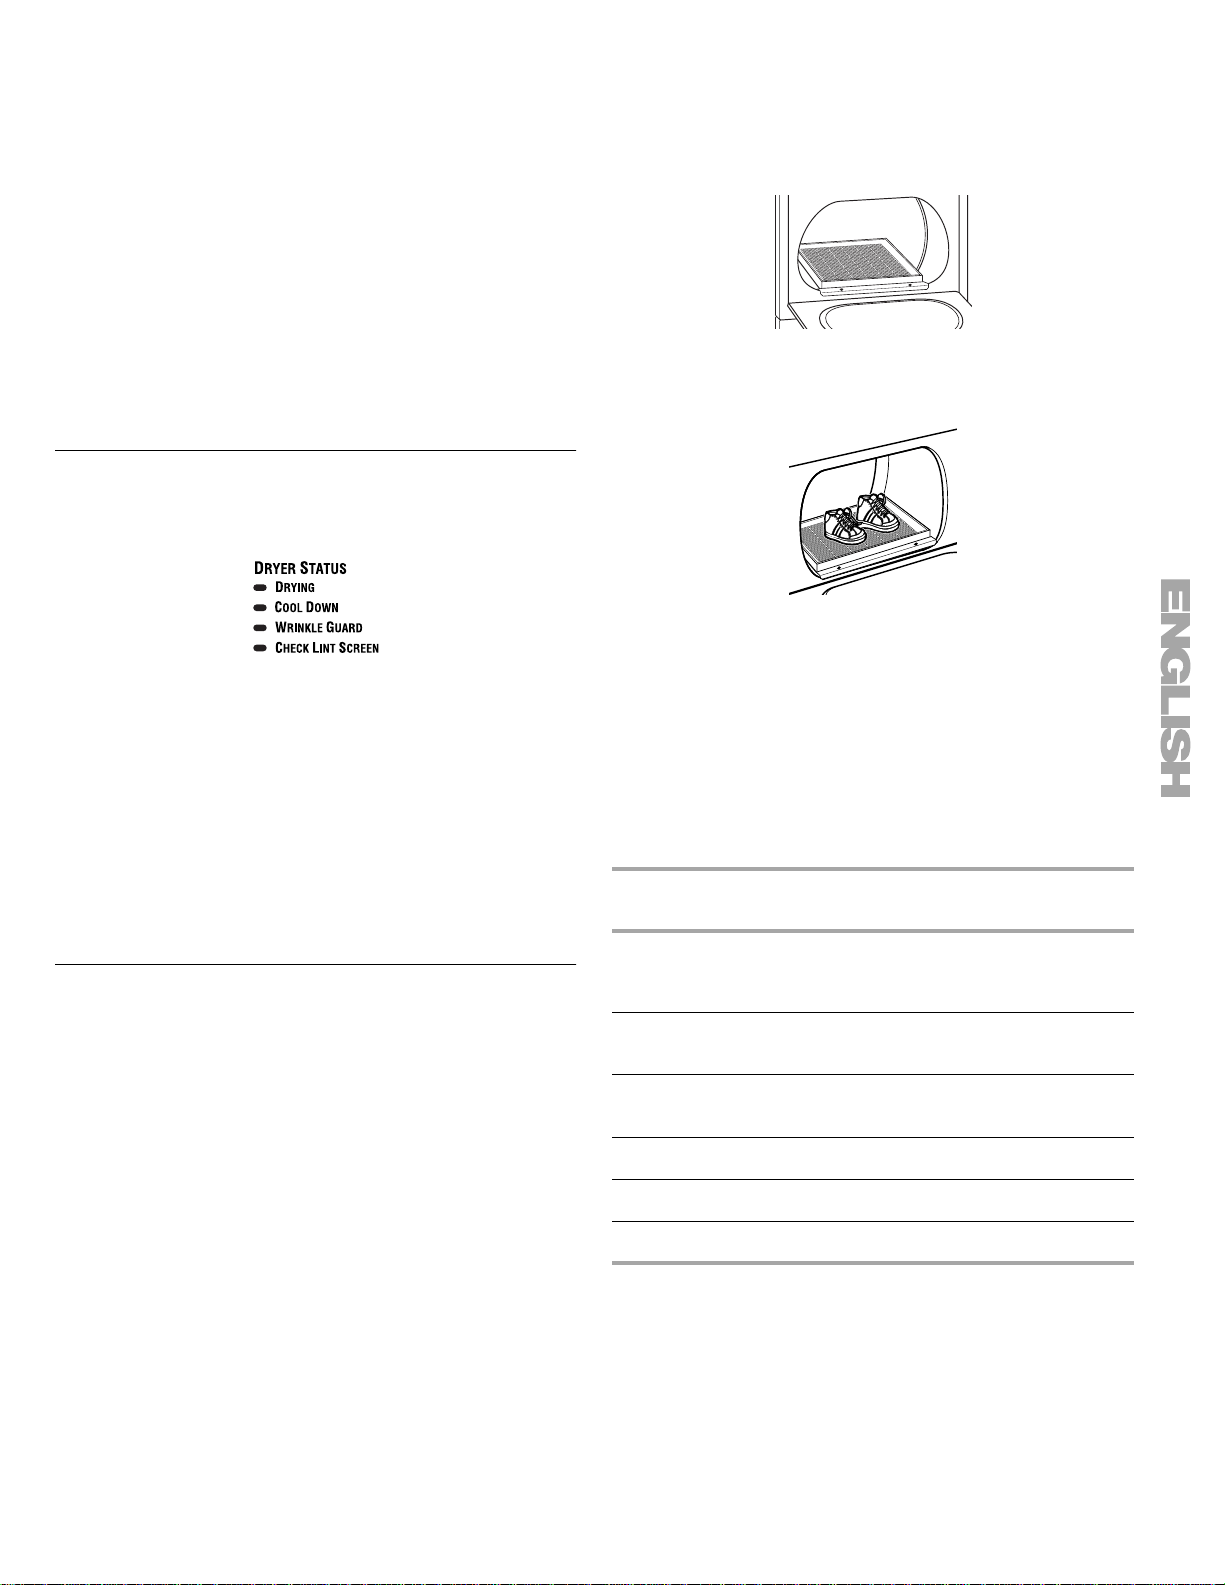
TUMBLE FREE™ Heated Dryer Rack
The dry rack was shipped on top of your dryer. Remove and
discard shipping blocks before use.
Use the TUMBLE FREE™ Heated Dryer Rack for items that you
do not want to tumble dry, such as sweaters. When you use the
heated dryer rack, the heated air inside the dryer flows in a
concentrated pattern to allow efficient and uniform drying. Use
TIMED DRY to select the desired time.
To use the heated dryer rack:
Do not remove the lint screen.
1.
Open dryer door.
2.
Slide dryer rack over the bottom of the dryer door opening.
Push down to secure on the frame.
3.
Place wet items on top of the rack. Allow space around items
for air to circulate. The rack does not move, but the drum will
rotate. Make sure items do not hang over the edges or
between rack grill.
4.
Close the door.
5.
Select the desired cycle to match the fabrics in your load.
Items containing foam, rubber, or plastic must be dried using
an Air Cycle. Refer to the table below.
6.
You must select a time by pressing the MORE TIME or LESS
TIME pads. Refer to the table below.
7.
Start the dryer.
To remove the dry rack, lift it straight up and out of the dryer.
NOTE:
Check the lint screen and remove any lint accumulated
from items dried on the rack.
Suggested Items for
Rack Drying
Cycle
Setting
Suggested Time
(minutes)
Washable wool items
(block to shape and lay
flat on rack)
Delicate/
Casual
20
Stuffed toys (cotton or
polyester fiber filling)
Cotton/
To w e l s
20
Stuffed toys (foam rubber
filled)
Air Dry 50
Galoshes (rubber) Air Dry 20
Foam rubber pillows Air Dry 50
Tennis shoes Air Dry 20
FIT THIS OVER BOTTOM OF DOOR OPENING
TTFIT THIS OVER BO OM OF DOOR OPENING
Loading ...
Loading ...
Loading ...