Loading ...
Loading ...
Loading ...
6
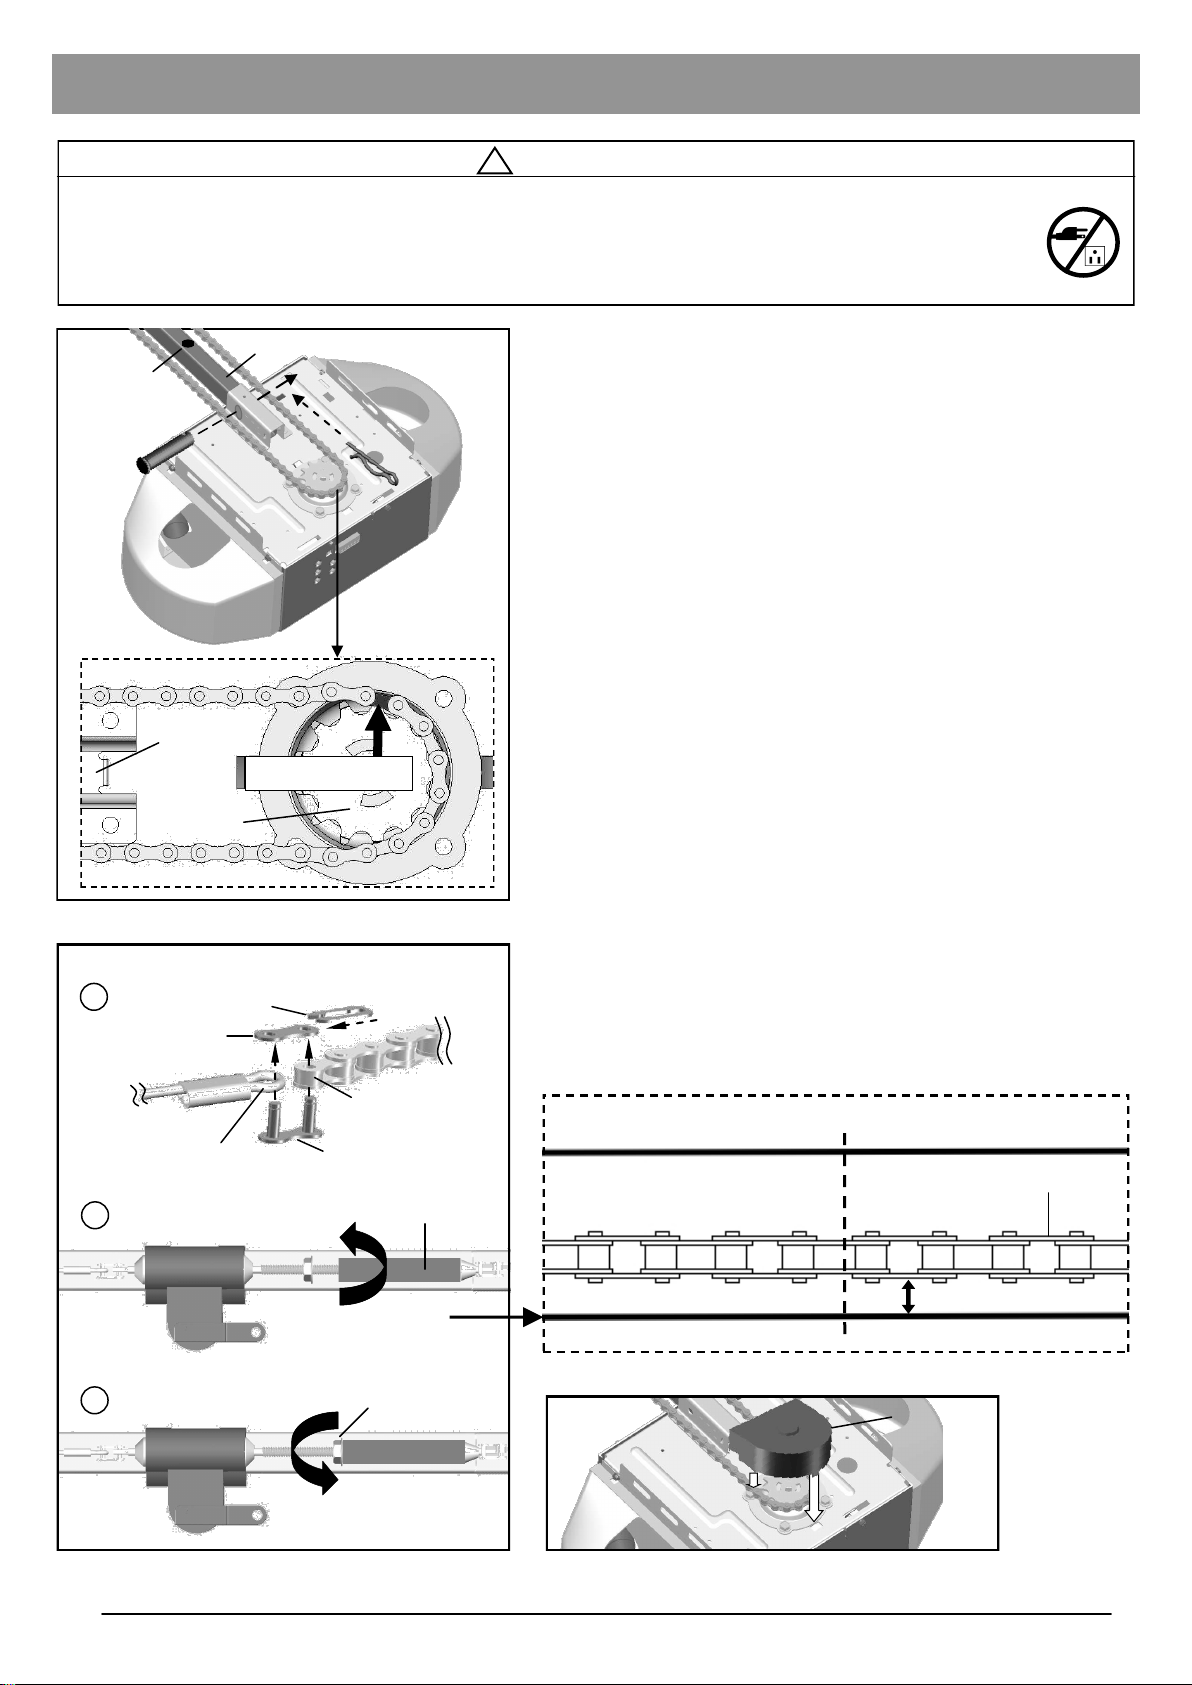
To Install Chain
1. Pull the remaining chain along the rail toward the opener.
2. A segment of chain marked in RED will be seen. Place this
segment in the approximate location on the sprocket as
shown in Fig.1.
3. When the chain is aligned properly around the sprocket, pull
the chain-to-cable connector towards the trolley shaft.
Follow steps shown in Fig.2 to connect & tighten the chain:
1. Align the open end of the chain to the cable eyelet and
connect together using the master link set.
2. Turn the chain-to-cable connector on the trolley shaft until
the chain is about 1/4” (6mm) above the base of the rail.
Compare with the illustration below.
3. Tighten the flange nut on trolley shaft against the chain-to-
cable connector.
When the chain and cable are tightened around the rail and
sprocket on the opener, check and make sure the chain is
properly aligned and not twisted. Attach the sprocket cover to the
opener as shown in Fig.3.
Notice
During operation, it is normal for the chain to appear loose when
the door is closed. If the chain returns to the position as shown
below when the door is opened, the chain is adjusted properly.
DO NOT re-tighten the chain.
When performing maintenance, always PULL the emergency
release to DISCONNECT the door from opener before adjusting
the chain.
Installing Cable and Chain
!
WARNING
To prevent SERIOUS INJURY:
- DO NOT connect power until instructed.
- Keep hands and fingers clear from sprocket during operation.
- Wear gloves when installing chain and cable.
- Keep hands and fingers away from joints and possible sharp edges.
Fig.1
Fig.2
Sprocket
2
Tighten until...
1/4” (6mm)
Base of Rail
Mid-point of rail assembly
3
Tighten nut
Flange Nut
Master Link
Link Cap
Spring Clip
Cable Eyelet
1
Open end of chain
Chain to Cable Connector
To Connect and Tighten the Chain:
Rail Bracket
Chain
Top of Rail
Chain in RED
Actual Size
Cable
Rail Bracket
Clevis Pin
Hitch Pin
Fig.3
Sprocket
Cover
Loading ...
Loading ...
Loading ...