Loading ...
Loading ...
Loading ...
•
['']
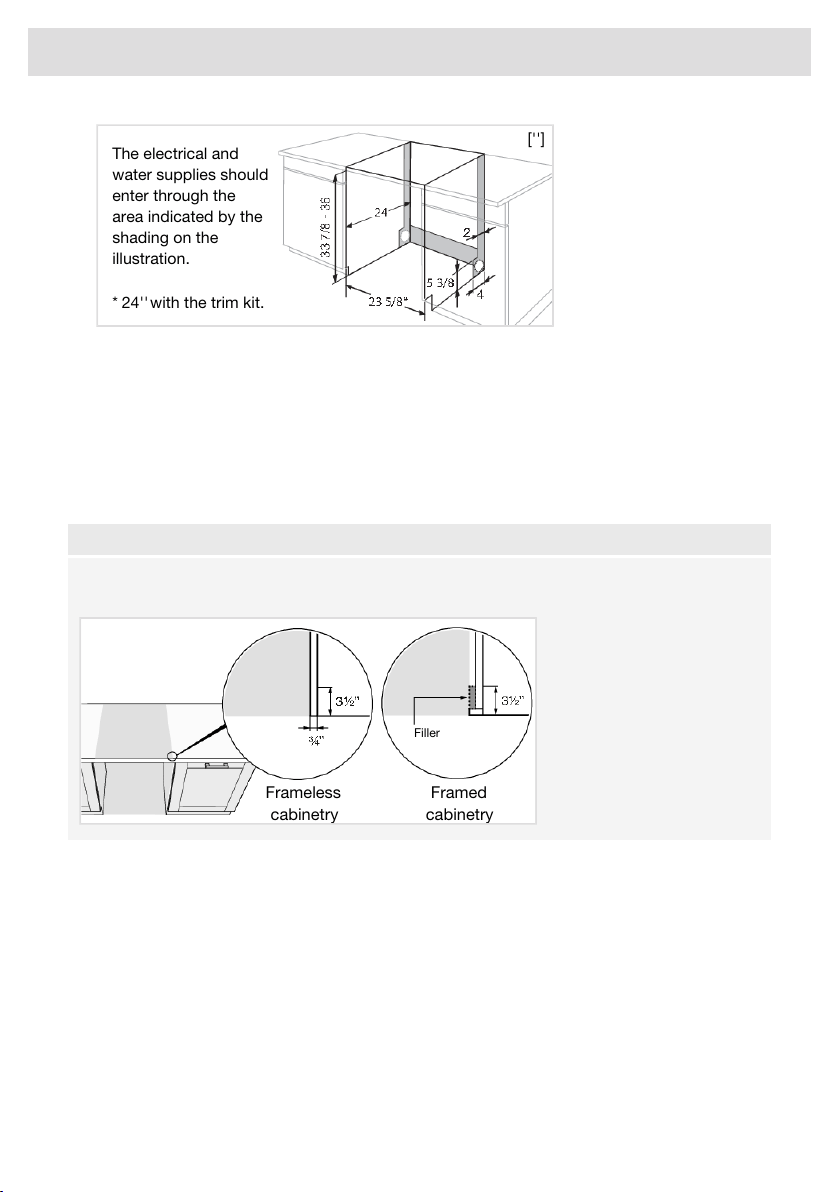
24''with the trim kit.
The electrical and
water supplies should
enter through the
area indicated by the
shading on the
illustration.
*
• Make sure the area on which the dishwasher is to be installed is firm. Adjust the adjustable feet
so that the dishwasher is level. Tighten the lock nuts.
• If the dishwasher is built-in, the surrounding furnishings must be resistant to any condensation
from the dishwasher.
• Fit the protective film (packed in the document bag) to the underside of the countertop. The
protective film is to protect the countertop from moisture.
• Note that the door springs may need adjusting after a cover door has been fitted. Adjust the left
and right door springs equally until the door is evenly balanced.
NOTE!
Framed cabinets require additional finished filler material behind the face frame for a proper in-
stallation. A minimum 3½” (89 mm) finished return is required on all sides of the opening.
Frameless
cabinetry
Filler
Framed
cabinetry
Drain connection
See the separate installation instructions for necessary information.
This dishwasher is suitable for installing in a raised recess (to attain an ergonomic working height).
This means that the dishwasher can be placed so that the drain hose runs to a lower level than the
bottom of the dishwasher, such as by routing it directly to a floor drain. The dishwasher is fitted with
an integrated anti-siphon device to prevent the machine from being emptied of water during the
wash cycle.
The drain hose can also be connected to a connection nipple on the sink unit's water trap. The
connection nipple must have an internal diameter of at least 1/2''.
The drain hose may be extended by a maximum of 87" (2.2 m) (the total length of the drain hose
must not exceed 177" (4.5 m)). Any joins and connecting pipes must have an internal diameter of
at least 1/2''. However, the drain hose should ideally be replaced with a new hose without joins.
35
Installation instructions
Loading ...
Loading ...
Loading ...