Loading ...
Loading ...
Loading ...
13 - ENG
PRESSURE WASHER OPERATING FEATURES
PRESSURE ADJUSTMENTS (FIG. 6)
The pressure setting is preset at the factory to achieve optimum pressure and
cleaning. If you need to lower the pressure, it can be accomplished by these
methods.
1. Back away from the surface to be cleaned. The further away you are, the
less the pressure will be on the surface to becleaned.
2. Change to the 40˚ nozzle (white). This nozzle delivers a less powerful stream
of water and a wider spray pattern. Refer to How To Use SprayWand.
3. (if equipped) This pressure washer’s high
-
+
6
pressure pump is equipped with an additional
feature that allows the pressure setting to be
adjusted.
To lower the pressure, turn the pressure con-
trol knob on the pump counterclockwise to
the desired pressure.
To return the pump pressure to the factory setting, turn the pressure control
knob on the pump clockwise until itstops.
NOTICE: DO NOT overtighten the pressure control knob, if overtightened the knob
COULD break and result in immediate loss of water pressure and costly repairs to
theunit.
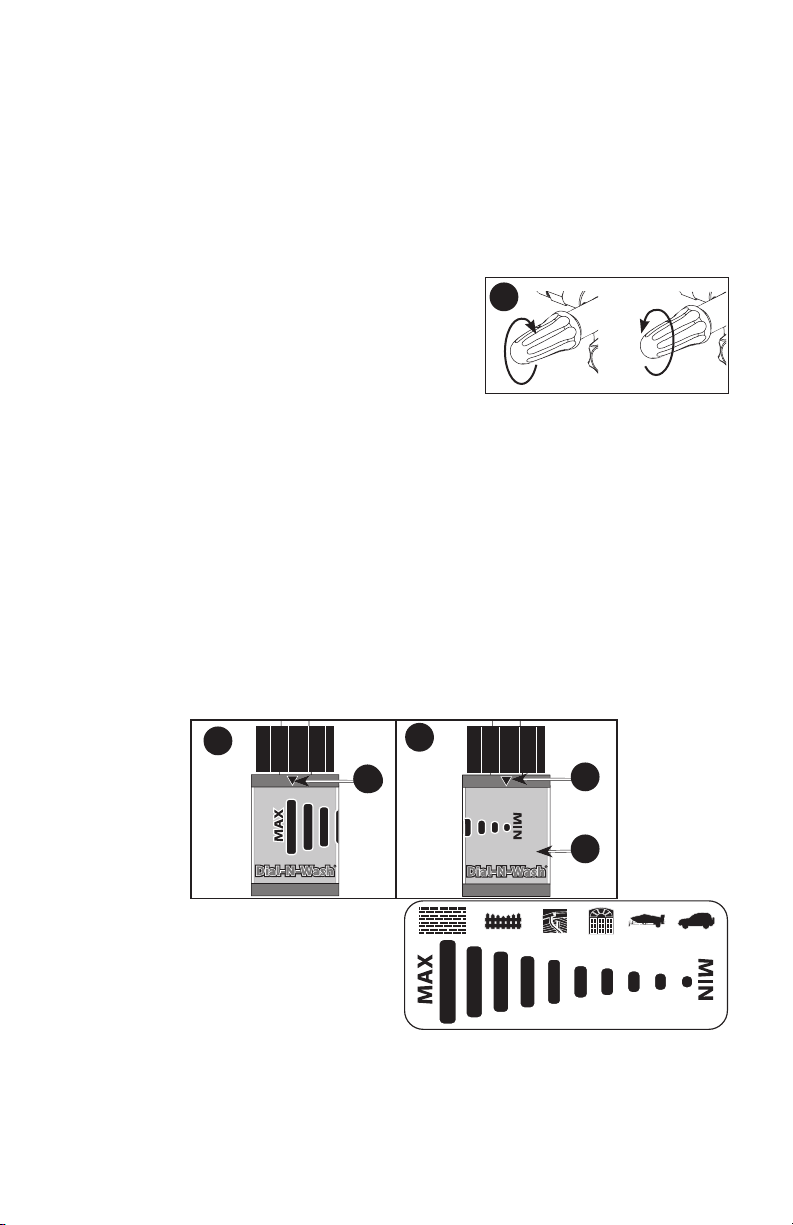
DIAL-N-WASH ADJUSTMENT (FIG. 7, 8) (IF EQUIPPED)
1. Choose the correct high pressure nozzle (0˚, 15˚ or 40˚) for the job to be
performed. Refer to How To Use SprayWand.
2. The Dial-N-Wash is shipped in the MAX pressure setting, the MAX pressure
bar is aligned with the arrow (R) on the collar as shown in Figure 7.
Rotating the Dial-N-Wash (Q) counterclockwise until it stops places it in the
MIN pressure setting, the arrow (R) will align with the MIN pressure bar as
shown in Figure 8.
8
R
Q
7
R
Adjust the pressure by rotating the
Dial-N-Wash (Q) clockwise for
higher pressure or
counterclockwise for lower
pressure, aligning the arrow with
the desired pressure bar on the
Dial-N-Wash.
NOTE: To apply chemicals the black low pressure nozzle must be installed and
the Dial-N-Wash must be in the MAX pressuresetting.
Loading ...
Loading ...
Loading ...