Loading ...
Loading ...
Loading ...
14 49-1000478 Rev. 2
Installation Instructions
INSTALLING THE DOOR HANDLE
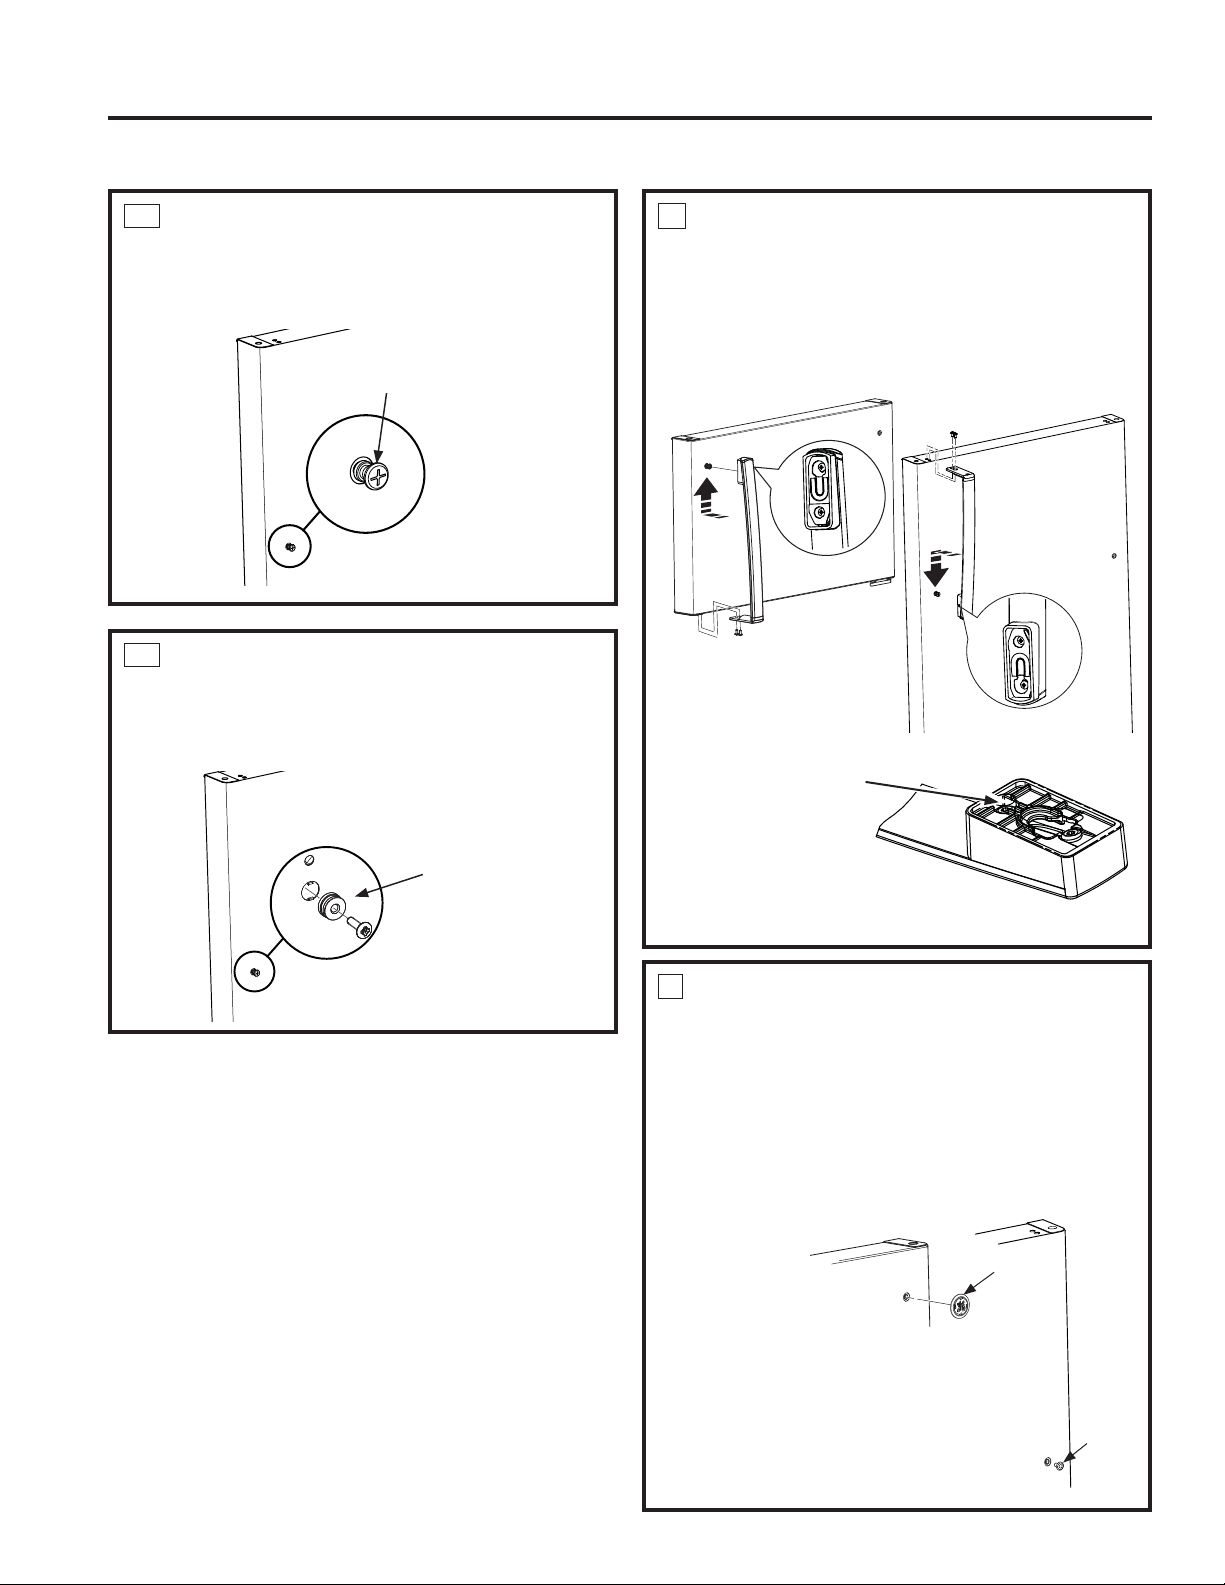
1A
PLASTIC HANDLE
,QVWDOOWKHKDQGOHIDVWHQHULQWRWKHKROHRQWKH
IUHH]HUDQGIUHVKIRRGGRRUV7KHIDVWHQHUV
correspond with the handle side (the side
opposite the hinge).
1B
STAINLESS STEEL HANDLE
Attach plastic bushing to the door with the
VFUHZRQERWKIUHH]HUDQGIUHVKIRRGGRRUV7KH
fasteners correspond with the handle side (the
side opposite the hinge).
Handle Fastener
2
HANDLE INSTALLATION
$WWDFKKDQGOHWRIUHH]HUGRRUE\VOLGLQJKDQGOH
up onto plastic bushing or fastener with the
screws at the bottom of the handle.
2. Attach handle to fresh food door by sliding
handle down onto plastic bushing or fastener
with the screws at top of handle.
NOTE: Be sure to remove
¿OPEHIRUHKDQGOHLQVWDOODWLRQ
if applicable)
3
BADGE AND PLUG BUTTON
INSTALLATION
*
1. Place a plug button on the opposite side of the
fresh food door across from the handle.
2. Remove the backing on the GE Appliances
badge and carefully place it in the hole
RSSRVLWHWKHKDQGOHRQWKHIUHH]HUGRRU%H
sure the badge is oriented the correct way
before applying it to the door.
Plug
button
Badge
Bushing
with Screw
INSTALLATION INSTRUCTIONS
For Stainless Steel Handles Only
'RQRWUHPRYHWKH¿OP
that covers the door
contact surface shown
in the picture. This
¿OPSURWHFWVWKHGRRU
surface from direct
contact with the handle.
*
NOTE: on some pocket handle
models, a template to properly locate
the badge is supplied with the product.
,I\RXSXUFKDVHGDSRFNHWKDQGOH
model without a factory installed
badge, see the instructions printed on
the template for further details.
Loading ...
Loading ...
Loading ...