This appliance is not intended for use by persons (including
children) with reduced physical, sensory or mental capabilities, or
lack of experience and knowledge, unless they have been given
supervision or instruction concerning use of the appliance by a
person responsible for their safety.
Children should be supervised to ensure that they do not play with
the appliance.
BEFORE STARTING YOUR FREEZER
It is important that your freezer stands solidly positioned on the
oor. To compensate for any unevenness in the oor, adjustable
feet are provided on chest freezer models size 320 litres and above.
They are located at the right hand end of the freezer. Adjust the
feet when the appliance is installed (or when yo move it to another
location). When correctly adjusted the appliance will be rmly po-
sitioned on the oor.
If the power cord is damaged, have it replaced by a qualied service
technician. Plug this appliance directly into a GPO
Do not use a double adaptor, power board or extension cord.
WARNING: This appliance must be earthed!
For EU countries, the appliance must be positioned so that the
plug is accessible
CLEARANCES
For the most efcient operation of your freezer allow minimum
clearances of 5cm each side and the rear for air circulation.
OPERATING INSTRUCTIONS
Plug into a properly earthed outlet and switch on.
Close the lid and wait for 3 to 4 hours.
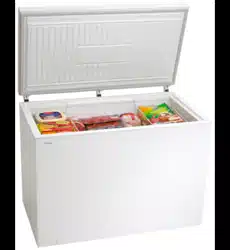
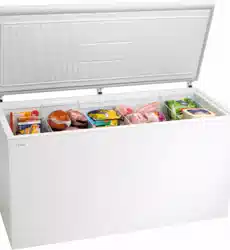
Load food into the cabinet.
Adjusting Temperature
Leave the control knob at the original factory setting. This is correct
for most freezing and storing needs. However, the control setting
can be adjusted if required, by inserting a coin into the slot in the
control knob and turning. (Turn clockwise for colder temperatures).
You should only make small adjustments and wait 24 hours to see
whether you need to make further changes.
General Information
• During vacation leave your freezer operating in the normal manner.
However, if you decide to switch the freezer off for an extended
period, remove all food, clean and dry out the cabinet. Leave the lid
open making sure that accidental closure does not occur otherwise
odours will develop inside the freezer.
• The front or outside surface of your cabinet will be warm to touch.
This is normal.
• Due to the effective sealing of the lid gasket, you may nd that re-
opening the lid immediately after closing is more difcult than
usual. This is normal and should it occur wait a while
for air pressure to stabilise within the cabinet.
• Periodically a running water sound may be heard. This is the
compressor lubrication system operating and is normal.
FREEZING FOOD
Although food can be frozen anywhere in the freezer, it is advisable
when freezing fresh food to place the items to be frozen against
the sides of the chest freezer where they will freeze in the shortest
possible time.
Please Note.
If the operation of the freezer is interrupted, most foods will remain
frozen up to 24 hours if the lid is kept closed. If the interruption is
expected to be for a longer period, place dry ice around the food
and keep the lid closed until normal operation is resumed. Dry ice
is usually available from emergency services in capital cities and
most large country towns.
DEFROSTING AND CLEANING
Since the main purpose of your freezer is to preserve food, it
should be kept spotlessly clean at all times. Your freezer should be
defrosted when ice is approximately 6 mm thick; otherwise it will
interfere with efcient operation and reduce storage capacity. To
ensure hygiene and efciency, complete defrosting is recommended
AT LEAST twice each year,preferably when food supply is low.
To Defrost
• Switch off power to freezer at power outlet and remove cord.
• Remove frozen food, wrap in newspaper and place in a cardboard
box very small items and ice cream should be placed in another
freezer if possible.
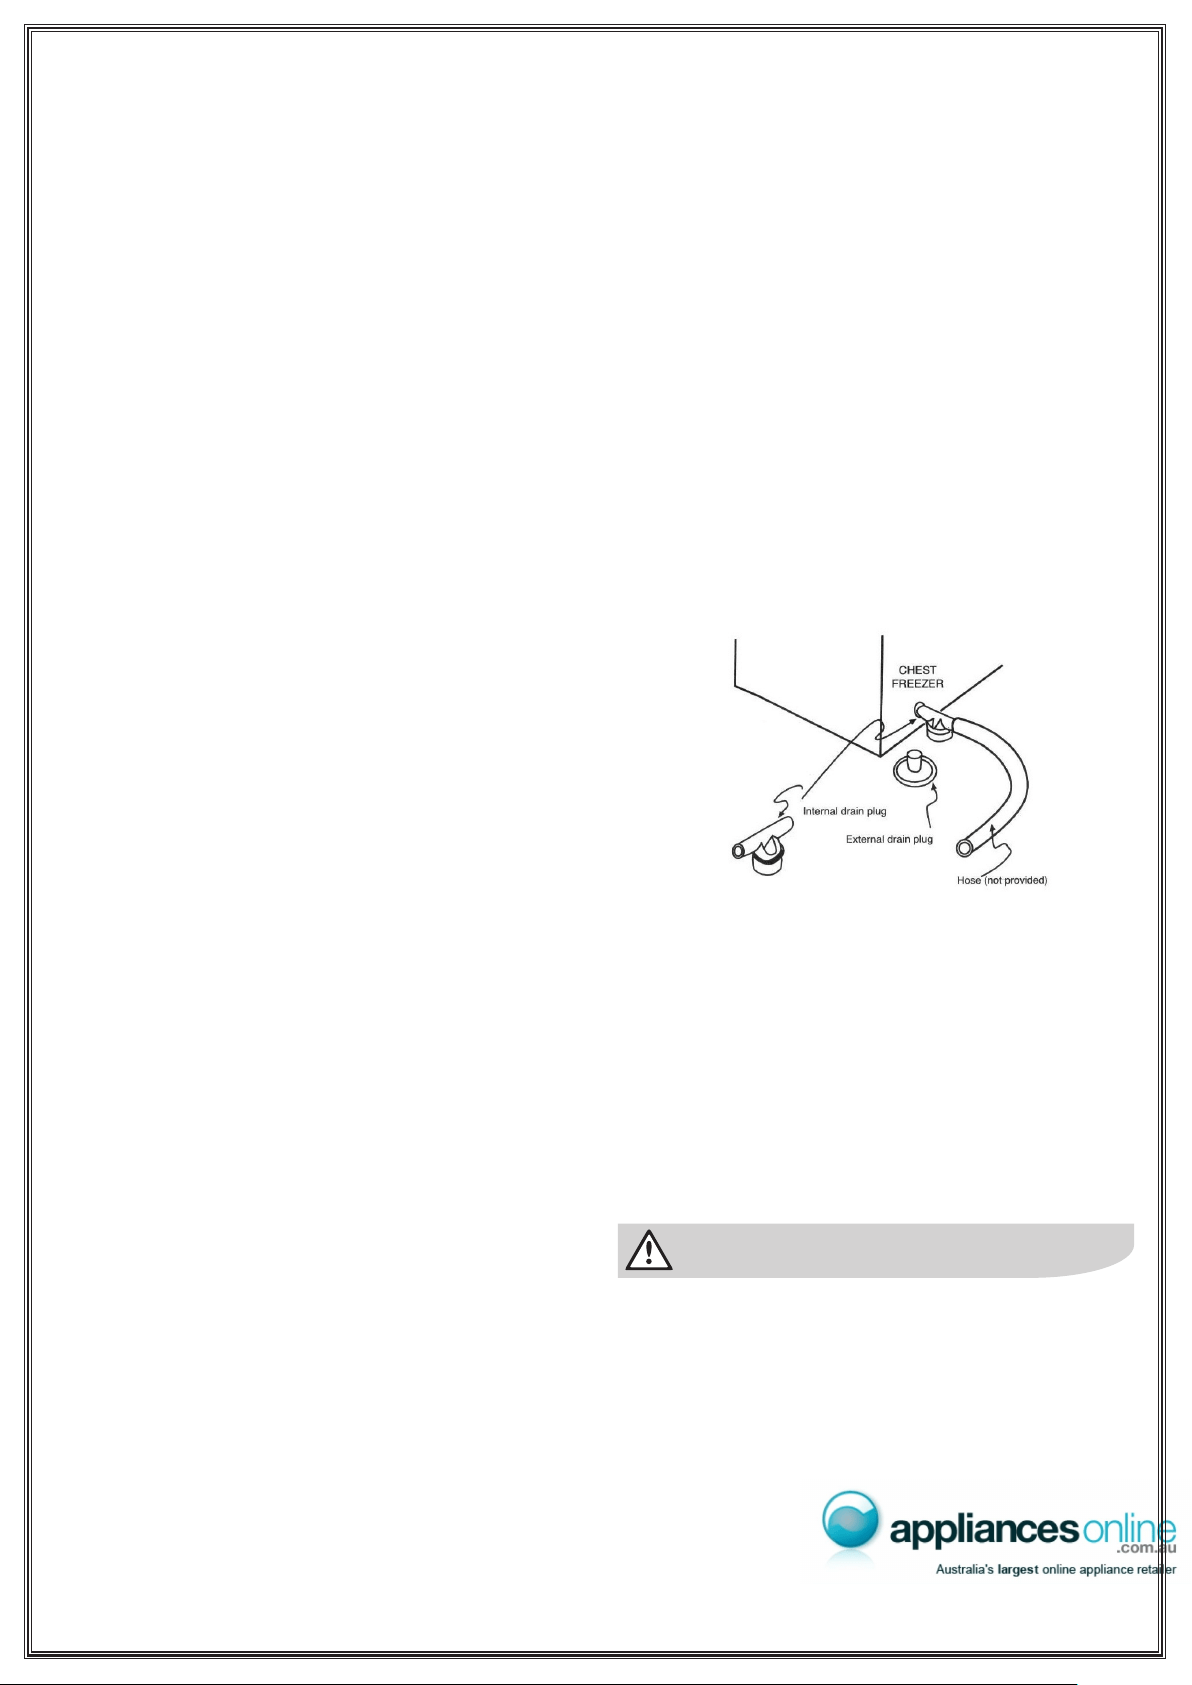
• Lift out the internal drain plug from the drain
hole inside the freezer. The internal drain plug has a spout which
forms a T’, (see diagram). If difcult to remove, use “T” piece to
twist and pull.
• Remove the external drain plug from the front of the freezer and
push either end of the spout on the internal drain plug, into the
drain hole on the front of the freezer (see diagram).
• If required t one end of a drain hose (not provided), onto the
protruding end of the spout on the internal drain plug and locate
the other end of the hose into the household drainage, eg laundry
oortrap. NOTE You may choose to run this short hose into a
suitable tray or container, or you can connect your garden hose
onto the protruding drain spout and run the water outside into your
garden etc. If you use a tray or container ensure that it is large
enough to accept any water which may ow out.
- Pour approximately 1 litre of warm water down the drain, inside
the chest freezer, to clear it of possible ice residue.
- Leave the lid open and wait for the frost to soften; pans of hot
water may be placed inside the freezer to speed up defrosting.
- Scrape the softened frost off the walls, using a plastic scraper
DO NOT USE A KNIFE, METAL SCRAPER OR SHARP
POINTED TOOL TO REMOVE ICE AS THEY CAUSE DAMAGE
TO THE LINER SURFACE. Do not use mechanical devices or
other means to accelerate the defrosting process other than
those recommended by the manufacturer.
- After defrosting is complete and all of the water has drained,
wipe the freezer out with a damp cloth and dry, ensuring the
freezer inner surfaces are dry before reloading frozen food. Water
in the freezer can cause food to stick to liner when frozen.
- Remove spout from front face of freezer.
- Remove hose from spout.
- Replace the internal drain plug back into the drain hole inside
the freezer. Make sure it is seated properly and is tight.
- Replace the external drain plug.
- Reconnect power cord to power outlet and switch on.
- Reload the food to be frozen.
OPERATING INSTRUCTIONS FOR YOUR CHEST FREEZER
To get the most out of every feature of your Chest Freezer read these instructions carefully.
warning
CLEANING
Interior - The interior should be cleaned when defrosting. Any
spilled food should be should be wiped up thoroughly and
promptly.
Exterior - It is a good idea to polish about once a year with a
high- grade wax like the one you use with your car, after that, an
occasional wipe over with a clean, damp cloth will help remove
ngermarks. Note: Do not wax plastic parts or decorative trim.
Wash these in warm (not hot) water and use an unscented
detergent. Avoid getting water on controls.
Avoid scouring pads, abrasive powders, metal polishes, aerosol
cleaners, methylated spirits and other solvents as they could
damage the easy to clean glossy surfaces.
Some pressurised aerosol containers use ammable propellants.
These containers can usually be identied by the word ammable
and/or a small red ame symbol. These products must not be
stored inside any freezer as an explosion may result.
SERVICE
WHAT TO DO BEFORE YOU CALL FOR SERVICE
Here are some easy checks you can make yourself before you
call for service. You may easily locate the problem and save
yourself the inconvenience, time, and money of a service call.
IF FREEZER IS NOT OPERATING
- Check that the cord is plugged into the outlet properly and that
the outlet is switched “on”.
- Check with another appliance or lamp to see if the outlet has
electrical supply.
- Try adjusting the temperature control to a slightly ‘colder’
position. (See “Adjusting temperature”).
IF THERE ARE INDICATIONS OF ODOUR
- Does interior need cleaning
- Some foods produce odours and should be covered.
- Check that containers and wrapping papers are not the cause.
- Did odour start about the same time you started storing
something different?
IF THE LID WILL NOT CLOSE
- Check the storage level of frozen food.
DISPOSAL
When you dispose of your old freezer, remove the lid. Children
can suffocate if they get locked inside.
This freezer contains insulation formed with ammable blowing
gases. Avoid safety hazards by carefully disposing of this
appliance.
R600a REFRIGERANT
This appliance may contain a small quantity of environmentally
friendly, but ammable, non-synthetic R600a refrigerant:
• Ensure that the tubing of the refrigerant circuit is not
damaged during transportation and installation.
• Leaking refrigerant may cause eye injuries or ignite.
• The room for installing appliance must be at least 1m³ per 8g
of refrigerant. The amount of refrigerant in the appliance
can be found on the rating plate.
• Keep ventilation openings in the appliance enclosure or in
the built-in structure clear of obstruction.
• Do not use electrical appliances inside the food storage
compartments of the appliance, unless they are of the
type recommended by the manufacturer.
• Do not damage the refrigeration circuit.
If you are unsure of the refrigerant type check the rating plate
on the back of the unit.
warning
warning
This document sets out the terms and conditions of product warranties for
Electrolux branded appliances. It is an important document. Please keep it
with your proof of purchase documents in a safe place for future reference
should you require service for your Electrolux appliance.
General Terms and Conditions
1. In this warranty
(a) ‘Electrolux’ means Electrolux Home Products Pty Ltd ABN 51
004 763 341 in respect of Appliances purchased in Australia and
Electrolux (NZ) Limited in respect of Appliances purchased in New
Zealand;
(b) ‘Appliance’ means any Electrolux product purchased by you
accompanied by this document;
(c) ‘Warranty Period’ means
(i) where you use the Appliance for personal, domestic or
household purposes in Australia the period of ‘24’ months and in
New Zealand the period of ‘24’ months;
(ii) where you use the Appliance for commercial purposes, the
period of ‘3’ months, (if the period stated is 0 months you are not
covered by this product warranty) following the date of original
purchase of the Appliance;
(d) ‘you’ means the purchaser of the Appliance not having purchased
the appliance for re-sale, and ‘your’ has a corresponding meaning.
2. This warranty only applies to Appliances purchased and used in
Australia or New Zealand and is in addition to (and does not exclude,
restrict, or modify in any way) any non-excludable statutory warranties in
Australia or New Zealand.
3. Electrolux warrants that, when dispatched from an Electrolux warehouse,
the Appliance is free from defects in materials and workmanship for the
Warranty Period.
4. During the Warranty Period Electrolux or its Authorised Service Centre
will, at no extra charge and subject to these terms and conditions, repair
or replace any parts which it considers to be defective. You agree that
any replaced Appliances or parts become the property of Electrolux.
This warranty does not apply to light globes, batteries, lters or similar
perishable parts.
5. Parts and Appliances not supplied by Electrolux are not covered by this
warranty.
6. Where you are within an Electrolux service area, this warranty covers the
cost of transport of the Appliance to and from Authorised Service Centres
of Electrolux and travelling costs for representatives of the Authorised
Service Centre to and from your home or business. If you are outside an
Electrolux service area, you will bear these costs. For information about
whether you are within an Electrolux service area, please phone 13 13 49 in
Australia, or 0800 10 66 10 in New Zealand.
7. Proof of purchase is required before you can make a claim under this
warranty.
8. You may not make a claim under this warranty unless the defect claimed
is due to faulty or defective parts or workmanship. Electrolux is not liable in
the following situations (which are not exhaustive):
(a) The Appliance is damaged by:
(i) accident
(ii) misuse or abuse, including failure to properly maintain or
service
(iii) normal wear and tear
(iv) power surges, electrical storm damage or incorrect power
current
(v) incomplete or improper installation
(vi) incorrect, improper or inappropriate operation
(vii) insect or vermin infestation.
(b) The Appliance is modied without authority from Electrolux in
writing.
(c) The Appliance’s serial number or warranty seal has been removed
or defaced.
(d) The Appliance was serviced or repaired by anyone other than
Electrolux or its Authorised Service Centres.
9. This warranty, the contract to which it relates and the relationship
between you and Electrolux are governed by the law applicable in the
Australian State where the Appliance was purchased or the law applicable
in New Zealand if the Appliance was purchased in New Zealand. Where
the Appliance was purchased in New Zealand for business purposes the
Consumer Guarantee Act does not apply.
Limitation of liability
10. To the extent permitted by law:
(a) Electrolux excludes all warranties other than as contained in this
document;
(b) Electrolux shall not be liable for any loss or damage whether direct
or indirect or consequential arising from your purchase, use or non-use
of the Appliance.
11. Provisions of the Trade Practices Act and State consumer legislation in
Australia, and the Consumer Guarantees Act, the Sale of Goods Act and the
Fair Trading Act in New Zealand, imply warranties or conditions, or impose
obligations, upon Electrolux which cannot be excluded, restricted or modied.
To the extent permitted by law, the liability of Electrolux (if any) arising out of
or in relation to the Appliance or any services supplied by Electrolux shall be
limited (where it is fair and reasonable to do so),:
(a) in the case of Appliances, at its option, to the replacement or repair
of the Appliances or the supply of equivalent products or the payment
of the cost of replacing the Appliances or having the Appliances
repaired or of acquiring equivalent Appliances. Upon being replaced,
parts and Appliances become the property of Electrolux; or
(b) in the case of services, at its option, to the supply of the services
again or the payment of the cost of having the services re-supplied; and
in the case of Appliances or services supplied in New Zealand, loss or
damage whether direct or indirect or consequential that is reasonably
foreseeable.
Privacy
You acknowledge that in the event that you make a warranty claim it
will benecessary for Electrolux and its Authorised Service Centres to
exchangeinformation in relation to you to enable Electrolux to meet its
obligationsunder this warranty.
EXTENDED WARRANTIES AND INDEMNITY
Sealed Refrigeration System Warranty
For a further period of three years following the expiry of the Warranty period,
Electrolux or its agent will supply replacements for, or at the sole option of
Electrolux, repair, all parts it nds defective in the Sealed Refrigeration System
which comprises: compressor, condenser, evaporator, dryer and tubing. During
this three year period you will pay for the costs of labour (including any call
out or service fees), and freight if necessary in replacing defective parts in
the Sealed Refrigeration System. You will pay for the costs of transport of the
Appliance if further service is required and the costs of parts or repairs to parts
other than those included in the Sealed Refrigeration System
Frozen Food indemnity
Subject to the following exclusions, Electrolux will indemnify you for a period of
34 months from the date of purchase of the Appliance against any loss or
damage to frozen foodstuffs due to a Sealed Refrigeration System breakdown.
This indemnity will be limited to:
(a) in the case of freezers with a capacity of less than 400 litres
– AU$150
(b) in the case of freezers with a capacity of 400 litres or more
– AU$300
This indemnity does not cover loss or damage to frozen foodstuffs
occasioned by:
(a) failure to plug in the freezer to a properly connected power
supply or failure to switch on the power point
(b) accidental removal of the plug from the power point or
switching off the power supply;
(c) failure to keep the door or lid of the freezer closed
(d) the introduction of abnormal heat loads to the freezer;
(e) failure to observe the operating and installation instructions
supplied with the freezer; and
(f) failure to defrost the freezer at recommended intervals on chest
freezers or non frost free models
WARRANTY TERMS AND CONDITIONS
FOR SALES IN AUSTRALIA AND NEW ZEALAND
APPLIANCE: CHEST FREEZER
Important Notice
Before Calling a Service Technician please check carefully the operating instructions, service booklet and the warranty terms and conditions.
AUSTRALIA
FOR SERVICE or to nd the address of your nearest state service centre
please call 13 13 49 for the cost of a local call
FOR SPARE PARTS or to nd the address of your nearest state spare parts
centre lease call 13 13 50 for the cost of a local call
NEW ZEALAND
FOR SERVICE or to nd the address of your nearest authorised service
centre in New Zealand
Free call 0800 10 66 10
FOR SPARE PARTS or to nd the address of your nearest spare parts
centre in New Zealand
Free call 0800 10 66 20
Electrolux Home Products Australia
telephone: 1300 363 640
fax: 1800 350 067
email: customercar[email protected]
web: www.electrolux.com.au
P/No. 1451236 Issue: October 2009
© Copyright 2009 Electrolux Home Products Pty Ltd
Model Number......................................................... Serial Number...................................................
Purchased from..................................................................................................................................
Address...............................................................................................................................................
Date of purchase................................................. Receipt Number....................................................
PLEASE COMPLETE THE ABOVE FOR FUTURE REFERENCE AND
RETAIN FOR YOUR OWN RECORDS. PLEASE DO NOT MAIL