Loading ...
Loading ...
Loading ...
8
7. Close both doors and check that they close as easily as you
like. If not, turn both screws to the right to raise the refrigerator
by tiling it more to the back until the doors close as easily as
you like.
8. Check and make sure that the technician sheet is placed in the
base grille cavity before assembling this into the cabinet.
9.
and then the right side. See graphic 3. You may accommodate
the water dispenser tubing and wiring into base grille cavity
below the left bottom hinge.
10. Attach the base grille by pushing it into the cabinet clips. See
graphic 2.
Door Alignment
The refrigerator doors are designed to be slightly misaligned
vertically when the refrigerator is empty. Please use the following
steps to align the refrigerator doors.
1.
nut located below the refrigerator door. See graphic 11.
2.
screw. See graphic 12. Depending on how the refrigerator door
is misaligned in relation to the freezer door, you will need to
turn the screw to the right to raise or to the left to lower the
refrigerator door until both doors have been aligned vertically.
3.
Reattach the base grille if it was dislodged.
HANDLE INSTALLATION AND REMOVAL
PARTS INCLUDED:
setscrew(s).
To Install the Handles:
NOTE: The handle mounting setscrews are preinstalled in the
handle.
1. Remove the handles, which are packed inside the refrigerator.
NOTE:
towel or other soft surface.
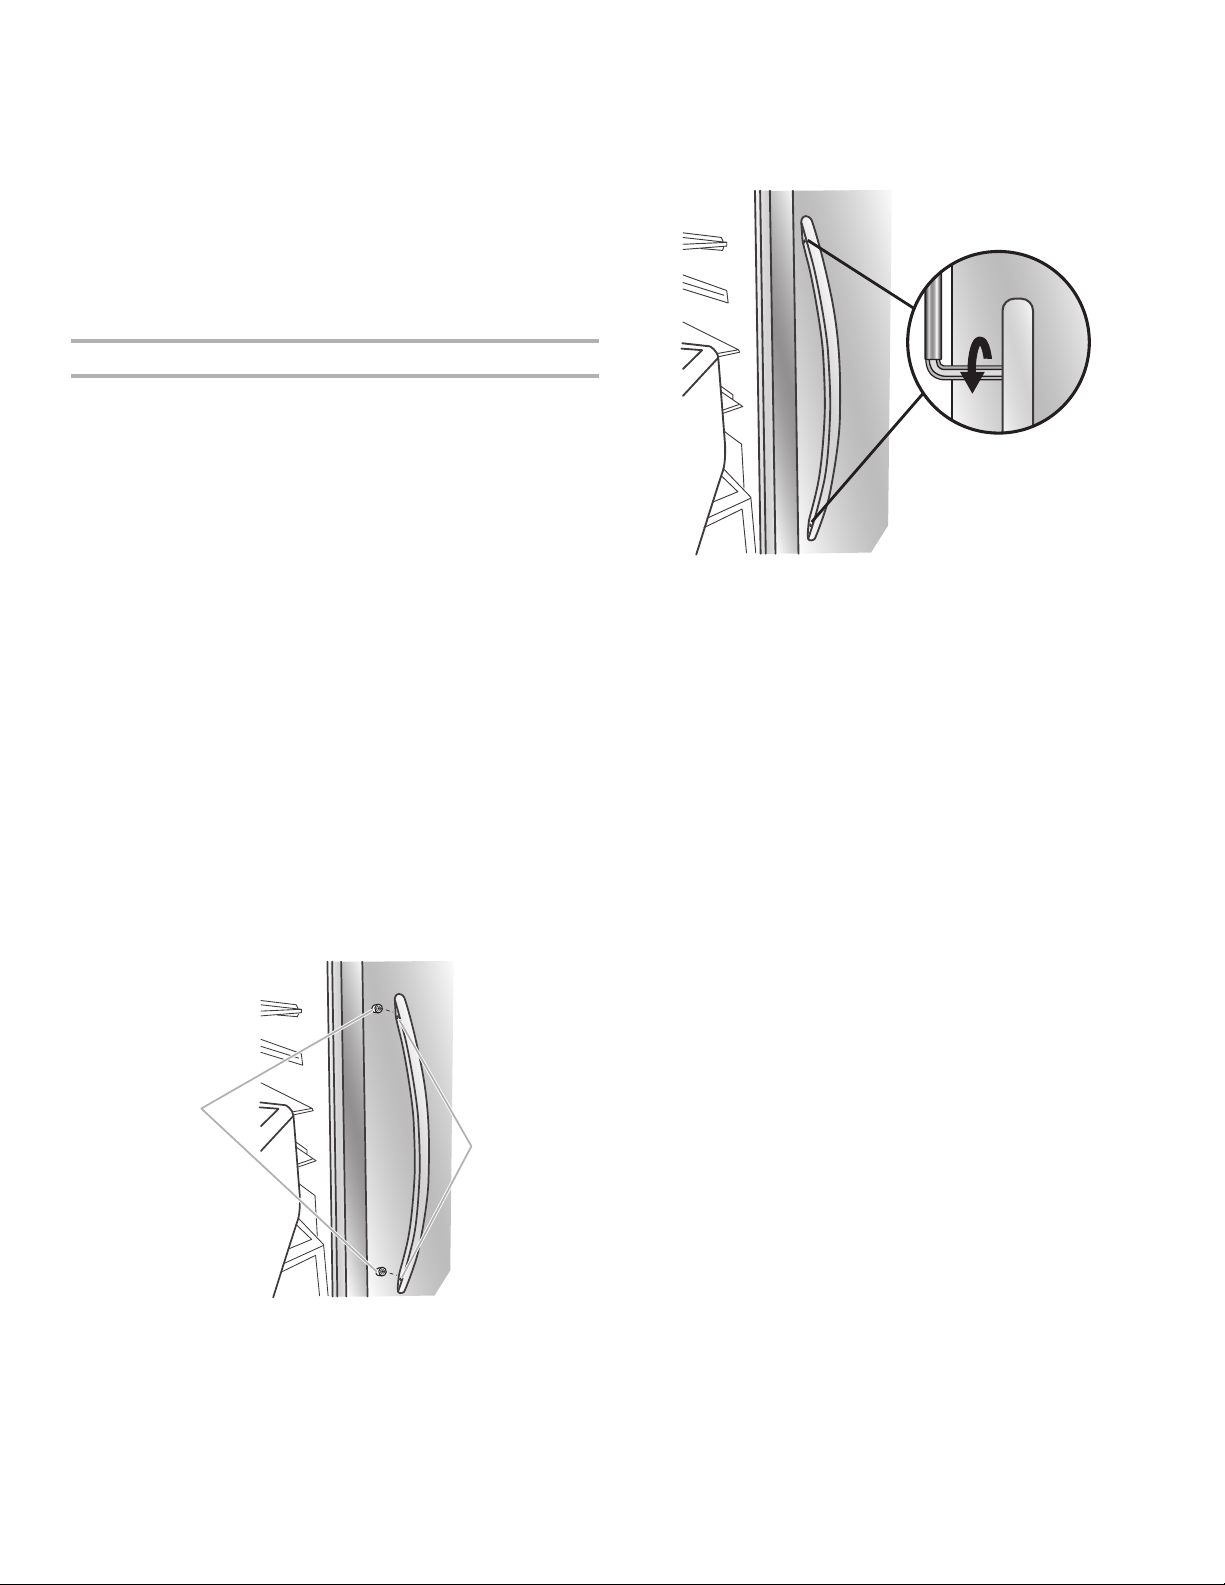
2. Open the freezer door. On the refrigerator door, place the
handle on the shoulder screws with the setscrews facing the
freezer.
B
A
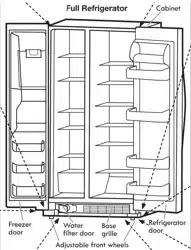
3. Firmly push the handle toward the door until the handle base is
engaged in the setscrew.
5. Using a clockwise motion, tighten the setscrew until it begins to
contact the shoulder screw.
6.
7. Once both setscrews have been partially tightened as outlined
in the previous steps, fully tighten both the upper and lower
setscrews.
IMPORTANT: When the screws feel tight, tighten them an
8. Open the refrigerator door and close the freezer door. Repeat
steps 2 through 7 to install the other handle onto the freezer
door with the setscrews facing the refrigerator.
9.
To Remove the Handles:
1.
it is engaged in the setscrew.
2. Using a counterclockwise motion, loosen the setscrew a
quarterturn at a time.
3. Repeat steps 1 and 2 for the upper setscrew. Gently pull the
handle away from the door.
If necessary, use a Phillips screwdriver to remove the shoulder
screws from the door.
A. Shoulder screws
B. Setscrews inside the handle
Loading ...
Loading ...
Loading ...