Loading ...
Loading ...
Loading ...
10
Baking and Roasting
IMPORTANT: To avoid damage to the interior finish, do not place
food or cookware on the oven door or oven bottom.
Before baking and roasting, position racks according to the
“Positioning Racks and Bakeware” section.
To Bake or Roast:
1. Press BAKE.
Press TEMP/TIME or TEMP/HOUR “up” or “down” arrow
pads to set a temperature other than 350°F (175°C) in 5°
amounts. The bake range can be set between 170°F and
500°F (75°C and 260°C).
2. Press START or START/ENTER.
The temperature can be changed at any time after this step
by pressing the Temp/Time or Temp/Hour “up” or “down”
arrow pads. Start does not need to be pressed again. If
baking/roasting while the Timer is counting down, the set
baking/roasting temperature can be displayed for 5 seconds
by pressing Bake.
3. Press OFF/CANCEL or CANCEL/OFF when finished.
Preheating
After Start is pressed, the oven will enter a timed preheat cycle.
The bake indicator light will light up. The Electronic Oven Control
automatically selects the preheat cycle time based on the oven
temperature selected. The cycle time will not change if the
temperature is reset before the cycle countdown ends. Preheat is
complete and the oven is ready to use when a 1-second tone
sounds, the cycle countdown ends, and the set temperature is
displayed.
Preheat temperatures are affected by varying factors such as
room temperature and peak energy usage times. It is normal for
the temperature showing on the display and the actual oven
temperature to differ.
Waiting an additional 10 minutes after the preheat time ends to
put food in the oven is suggested when baking foods with
leavening ingredients, such as yeast, baking powder, baking
soda and eggs.
IMPORTANT: When the oven is baking, the burner in the broiler
drawer will be on. Do not store anything in the broiler drawer.
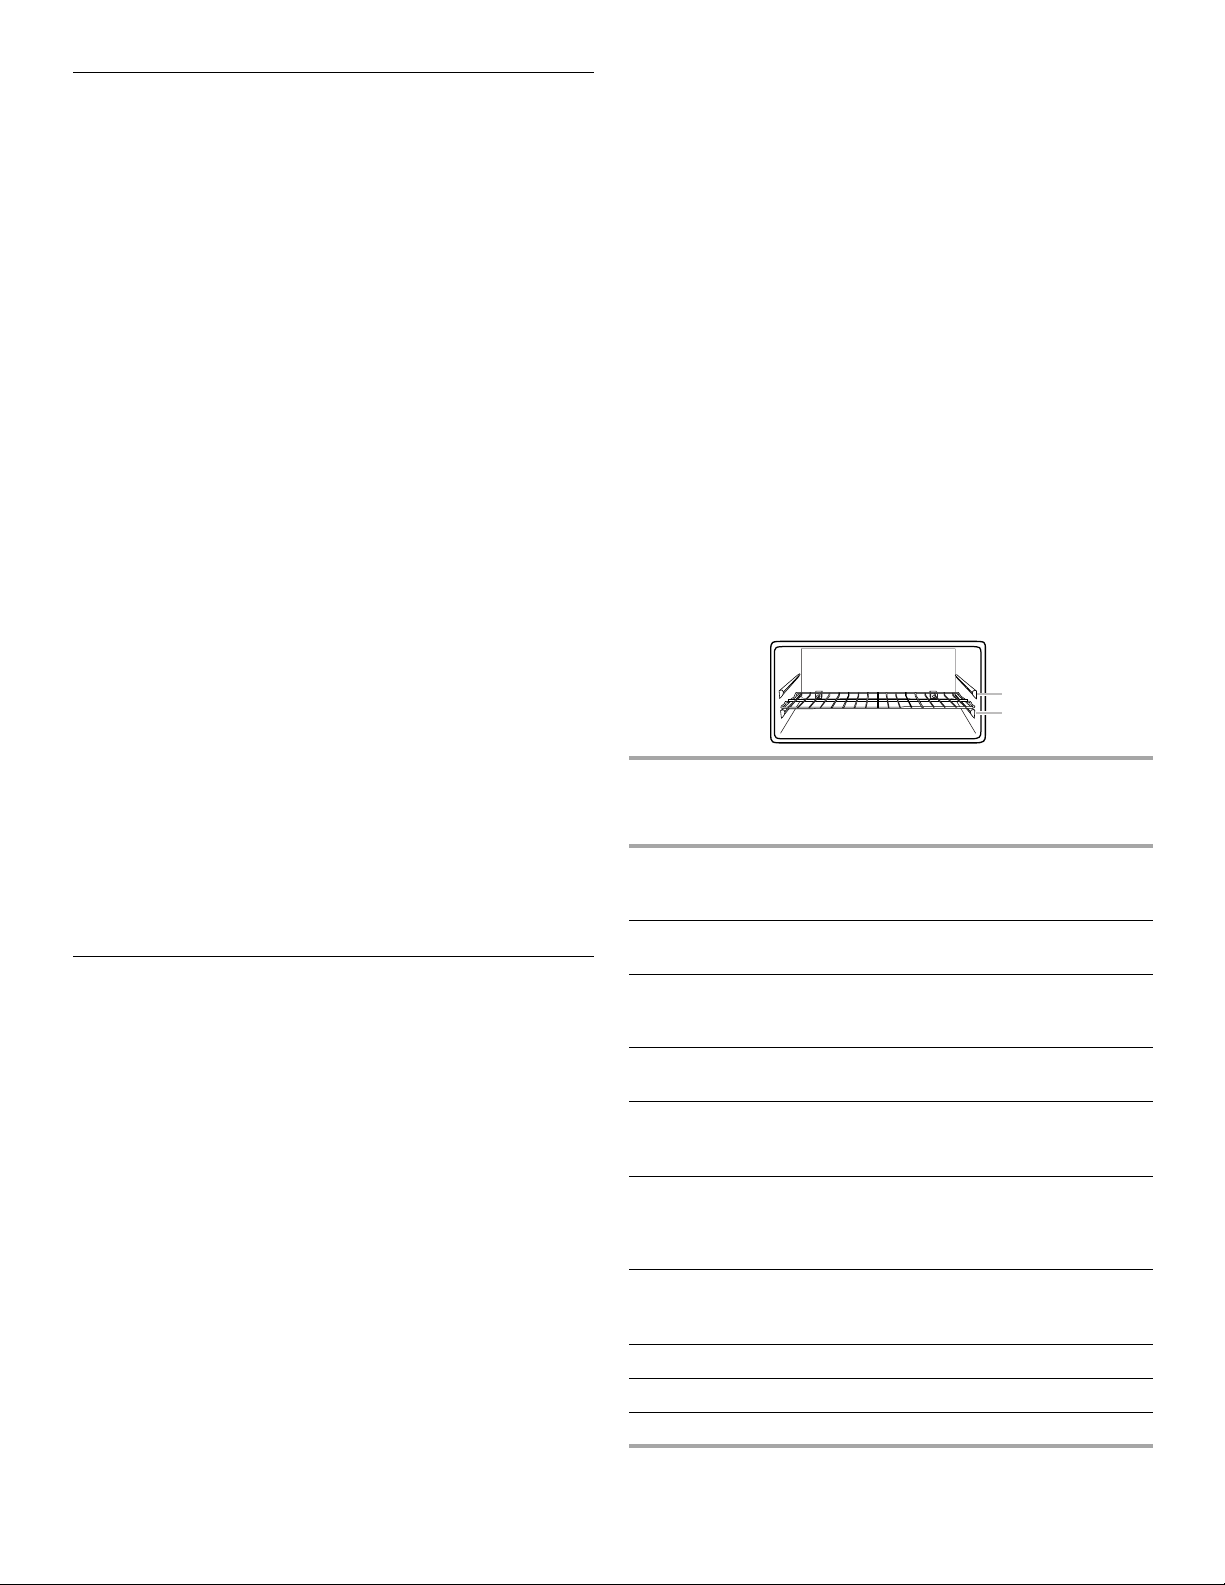
Broiling
BROILER
The broiler is located below the oven door. Use an oven rack for
broiling. To remove a rack, pull it out to the stop position, raise
the front edge, then lift out. Reverse the steps to replace a rack.
Always broil with both the broiler and the oven doors closed.
■ To avoid damage to the broiler, do not step on or apply
weight to the broiler door while it is open.
■ Preheat the broiler before use. Recommended preheat times
can be found in the Broiling Chart. Completely close broiler
door during broiling.
■ Do not use broiler cavity for storage.
■ Broiling uses direct radiant heat to cook food. Changing the
temperature when broiling allows more precise control when
cooking. The lower the temperature, the slower the cooking.
Thicker cuts and unevenly shaped pieces of meat, fish and
poultry may cook better at lower broiling temperatures
■ For best results, use a broiler pan and grid. It is designed to
drain juices and help avoid spatter and smoke.
If you would like to purchase a broiler pan, one may be
ordered. Please refer to the cover for contact information. Ask
for Part Number 4396923.
■ Pull out the rack to the stop position before turning or
removing food. Use tongs to turn food to avoid the loss of
juices. Very thin cuts of fish, poultry or meat may not need to
be turned.
To Broil:
1. Open the broiler door and pull the rack out to the stop
position.
2. Place food on a grid in a broiler pan, then place it in the
center of the oven rack.
3. Push the oven rack back to the original position. Close the
door to ensure proper broiling temperature.
4. Press BROIL.
The BROIL indicator light will light up.
5. Press START.
The indicator light will light up. The temperature setting can
be changed at any time during broiling. If broiling while the
Timer is counting down, the set broiling temperature can be
displayed for 5 seconds by touching BROIL.
6. Press OFF/CANCEL or CANCEL/OFF when finished broiling.
BROILING CHART
For best results, place food 3" (7.0 cm) or more from the broil
element. Times are guidelines only and may need to be adjusted
for individual foods and tastes. Broiling may be affected by the
size, weight and thickness of food.
FOOD
PREHEAT
NEEDED?
RACK
POSITION
COOK TIME
Minutes
SIDE 1 SIDE 2
Ground meat
patties ³₄" (1.8 cm)
thick, well-done 5 min 2 6 6
Fish fillets 1¹₂"
(3.8 cm) thick 11 min 1 9
Chicken breasts,
boneless
bone-in
No
No
2
2
12
20
18
16
Frankfurters,
well-done 5 min 1, 2 5 3-4
Pork chops 1"
(2.5 cm) thick,
well-done No 2 10-11 8-9
Steak 1" (2.5 cm)
thick, medium rare,
medium
well-done
No
No
No
1
1
1
7
11
12-13
5
6
8
Ham slice,
precooked ¹₂"
(1.25 cm) thick No 2 8 6
Toast, 9 slices No 2 3-4 1-2
French fries, 18 oz No 2 15-17
Nuggets, 12 oz No 2 7 5
1
2
Loading ...
Loading ...
Loading ...