Loading ...
Go!
You’re ready to use your new Westinghouse appliance. A few tips from us:
Lighting the gas hotplate, grill and oven
To light a burner, press the corresponding knob and while continuing to press, turn the knob
anticlockwise to the ‘High’ position. Continue to press the knob after the flame is established for
approximately 5 seconds. If the flame goes out when the knob is released, allow some time for the gas
to disperse, then press the knob again, this time holding it down with slightly more force for the same
length of time. Release the knob once the flame is established, and turn further anticlockwise to reduce
the flame height as desired.
WARNING
WARNING
• If burner does not light within 5 seconds, turn the knob to ‘Off’ position, allow gas to disperse,
then try lighting again.
Remember to pre-heat each time.
For best cooking results pre-heat the oven. Pre-heating allows the oven to reach the required
temperature quickly and eciently as well as cook food at the correct temperature for the entire
cook time. Recommended pre-heat time is 30 minutes for baking and 3 minutes for grilling.
Set your temperature
• To set the temperature, turn the grill/oven temperature selector knob in a clockwise direction to
the desired setting.
• An indicator light in the display will turn on and the grill/oven will begin to heat.
• Once the food is cooked, turn the temperature selector back in an anti-clockwise direction.
Note: For WFE614 and WFE616 models, the desired cooking function must be selected before the
oven will turn on.
Set a Timer
• To set the timer, simply turn the timer knob clockwise to the required number of minutes.
Note for 60 minute timer: For any time below 15 minutes, turn knob past 15 minutes, then back to
required time setting.
Note for 120 minute timer: For any time below ten minutes, turn the knob past the thirty minute mark,
then turn it back to the required number of minutes.
OVEN
Hot air is distributed by a fan behind the rear wall of the compartment, providing
an even temperature on all shelf levels – perfect for multi-level cooking or reheating
entire meals for your family..
SOLID
COOKTOP
(WFE532
model only)
The strong solid-cast cooktop allows wide contact with your cookware for fast,
efficient cooking. The cooktop is sealed to prevent spilt liquids from running under
the hotplates.
Refer to your full user manual for more details on oven functions.
Condition the oven
(to burn o any residue)
New appliances can have oil or residue left from
manufacturing. You will need to heat your oven for
30 minutes before using it for the first time.
1. Ensure the “Auto O” timer is set to “O”.
2. For WFE614 and WFE616 models turn the
function selector dial to “Oven/Fan Bake”.
3. Using the oven control knob, set the oven at
180°C for approximately 30 minutes.
4. For separate grill models run grill on maximum
for 15 minutes with grill door open.
5. For WFE532 model which is fitted with solid
hotplates, turn heat setting to high for 3 minutes
to fully harden the hotplate coating.
Installing the oven accessories
Set...
Choose the right program for the best result:
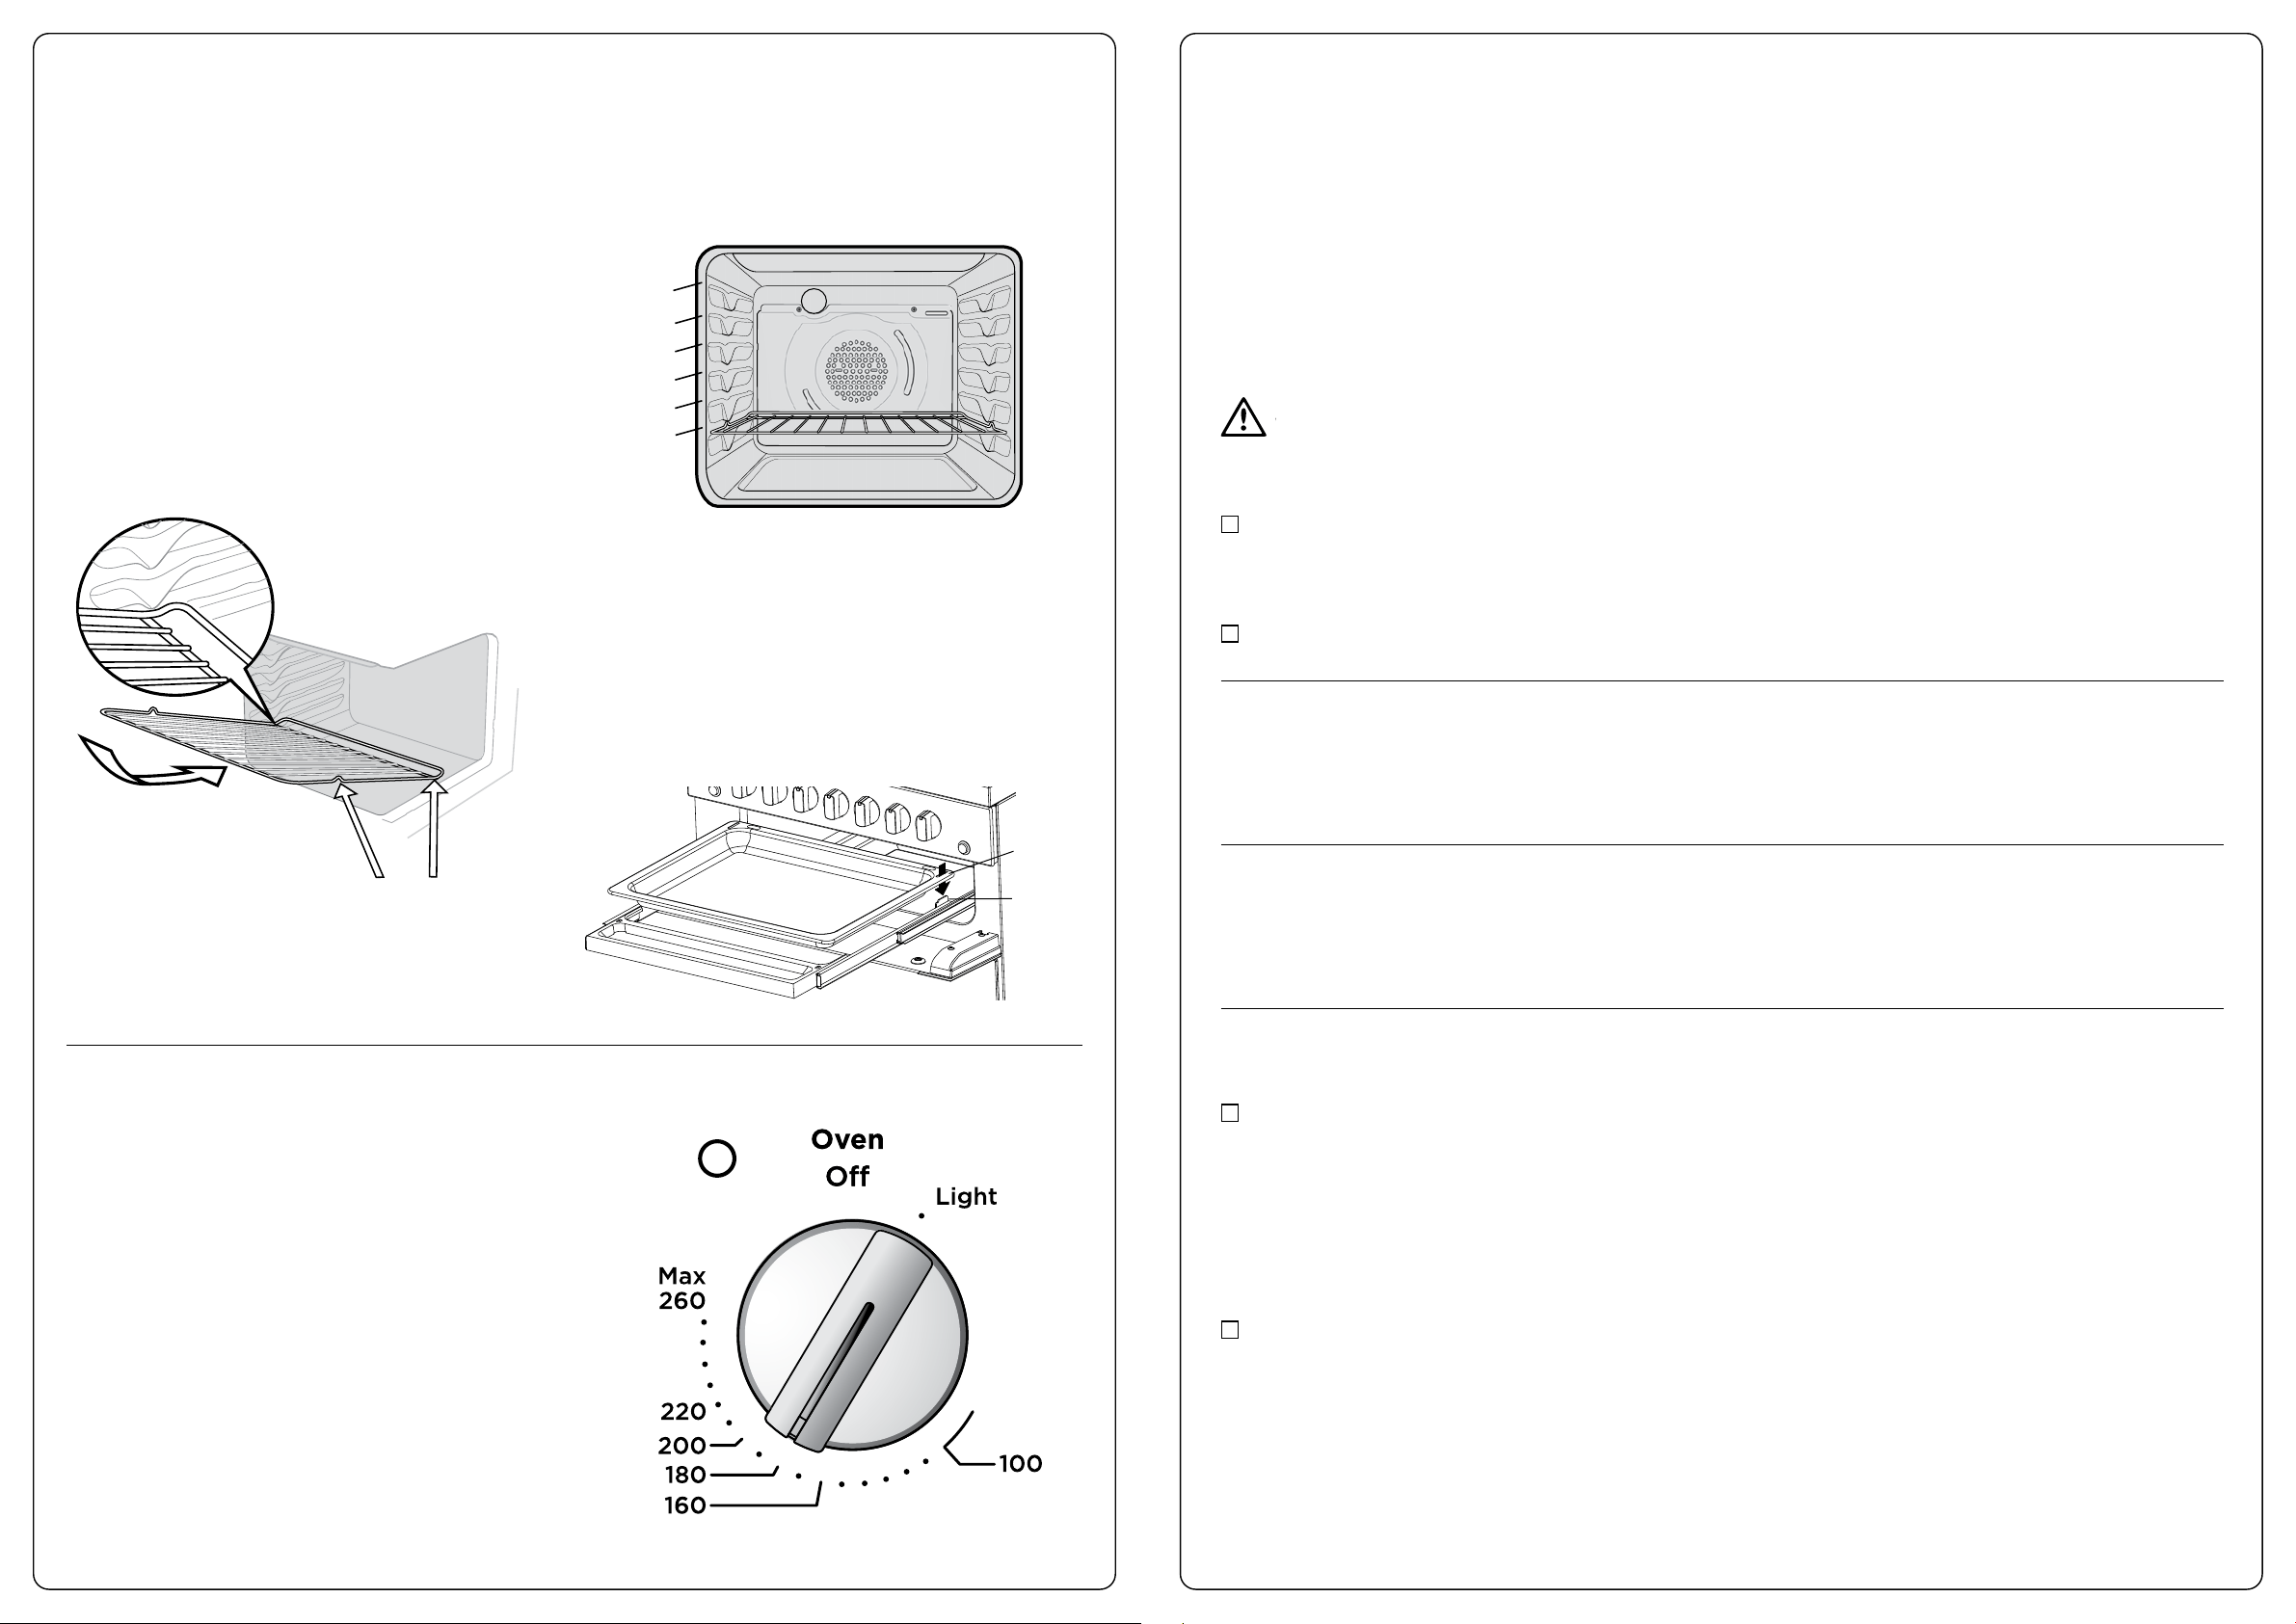
Oven shelf location
5 shelf positions
1
2
3
4
5
Not a shelf
position
NOTE: The top ledge is not a shelf position. There are no stops for
shelf withdrawal.
Separate grill
To insert the grill tray in a separate grill underbench
product, open the grill door and fully extend the
grill drawer Position the grill tray so that the slots
on the outer edges fit over the tabs on the slides.
Rear slot
Slide tab
Fitting the oven shelves
1. Ensure shelf orientation is correct
(refer to diagram below).
2. Slide oven shelves onto oven supports
(side runners) at an angle until raised back
of shelf is past the stop on oven supports
(side runners).
3. Lower front of shelf and push in until stop
is reached.
4. To remove oven shelves, withdraw to the stop
and raise the front of shelf to clear the stop.
Note the orientation of
the side and rear features