Loading ...
Loading ...
Loading ...
16
English
DRAINING THE TANK
If there is any liquid left in the tank after spraying, the tank should be drained before cleaning.
• Remove the battery pack.
• Remove the motor housing from the tank.
• Drain the contents through the ll area.
NOTE: Drain the liquid back into the original container. Do not store chemical liquid in the tank.
CLEANING THE TANK
• Fill the tank about one-third full with clean water. A small amount of mild household detergent may be added.
NOTE: Never use ammable chemicals or abrasive cleaning agents to clean the tank.
• Wipe the outside of the tank with a clean, dry cloth.
• Reattach the motor housing to the tank.
• Reinstall the battery pack. Spray until the tank has been emptied. Make sure to direct the spray toward an area that
will not be damaged by the spray solution.
• Rell and repeat the procedure with clean water. It may be necessary to rinse the tank more than once, then drain
again as instructed above.
• Allow all parts to completely dry before reinstalling parts and storing the unit.
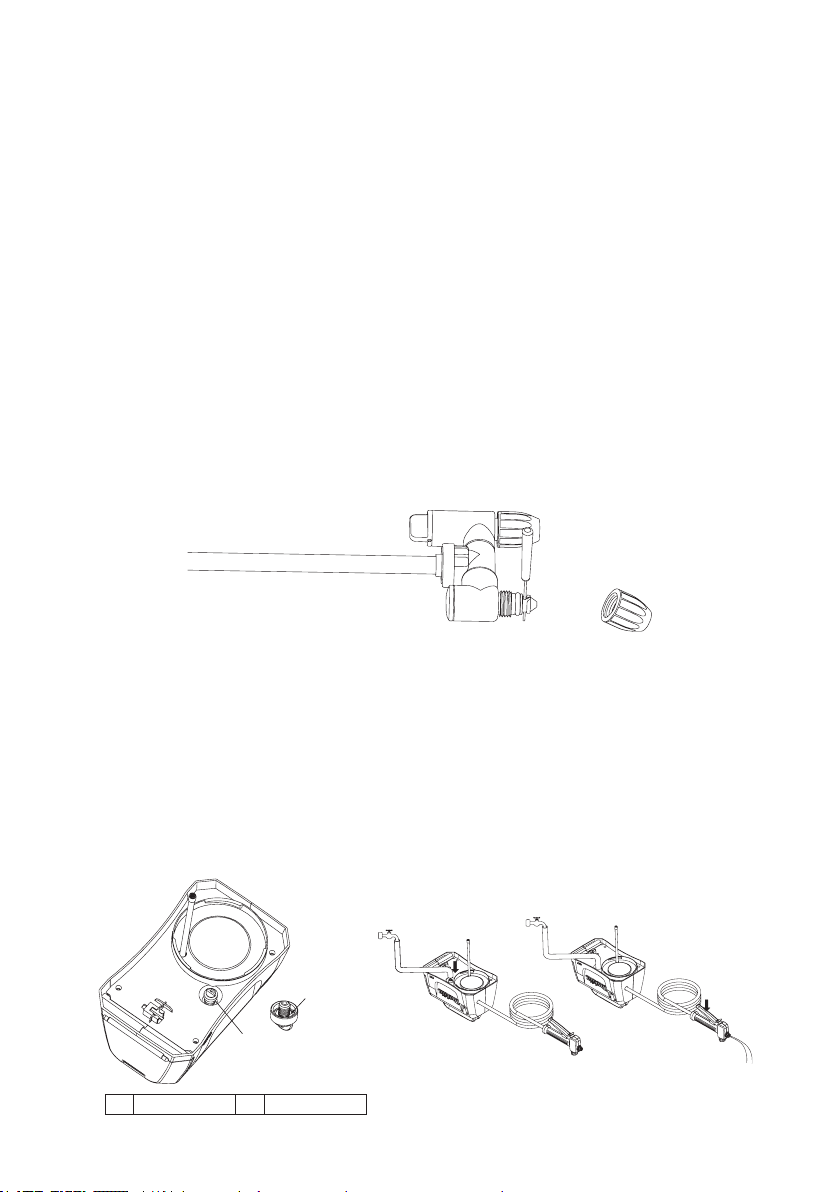
CLEANING THE NOZZLE
If the nozzle becomes plugged, use the steps below to clear.
• Remove the battery pack.
• Unscrew and remove the nozzle cap form adjustable spray head of the spray wand.
•
Push a small wire through the exposed holes to clear any debris. Then ush with clean water. Refer to Figure 15
.
• Wipe the adjustable spray head with a clean dry cloth, and reattach the nozzle cap to the adjustable spray head.
CLEANING THE PUMP
If the sprayer cannot draw the uid from tank or it cannot spray out liquid at the rst use or after long-term storage.
Follow the procedures below to clean the pump:
1. Switch off the machine and remove the battery.
2. Remove the spray wand from handle.
3. Drain any remaining liquid or store leftover liquid to another container to make sure the tank is empty.
4. Separate the motor housing from the tank and turn it upside down. Refer to Figure 16.
5. Unscrew the red cap to open water inlet hole, and then connect the hole to the water tap. Make sure the O-ring is
placed inside the red cap.
6. Open the water tap slowly and press down the lever at the same time to allow water ush away any debris
adhered to the pump. Refer to Figure 17.
7. Disconnect the water tap and re-tighten the red cap. Make sure that the O-ring inside the cap is in place.
Figure 15
2
1
Figure 16 Figure 17
1 Red cap 2 O-ring
Loading ...
Loading ...
Loading ...