Loading ...
Loading ...
Loading ...
6
Access
point
COMPUTER IN1COMPUTER IN2
HDMI
USB TYPE B
S-VIDEO
VIDEO
AUDIO OUT
AUDIO IN3AUDIO IN1
AUDIO IN2
MIC
MONITOR OUT
CONTROL
USB
TYPE A
DC5V
0.5A
R
L
COMPONENT
Cb/Pb
Y
Cr/Pr
AUDIO
OUT
HDMI
R
L
R
L
VIDEO
S-VIDEO
AUDIO
OUT
AUDIO
OUT
AUDIO
OUT
USB
(A)
DISPLAY
RS-232C
LAN
VCR/DVD/Blu-ray
Disc player
Computer
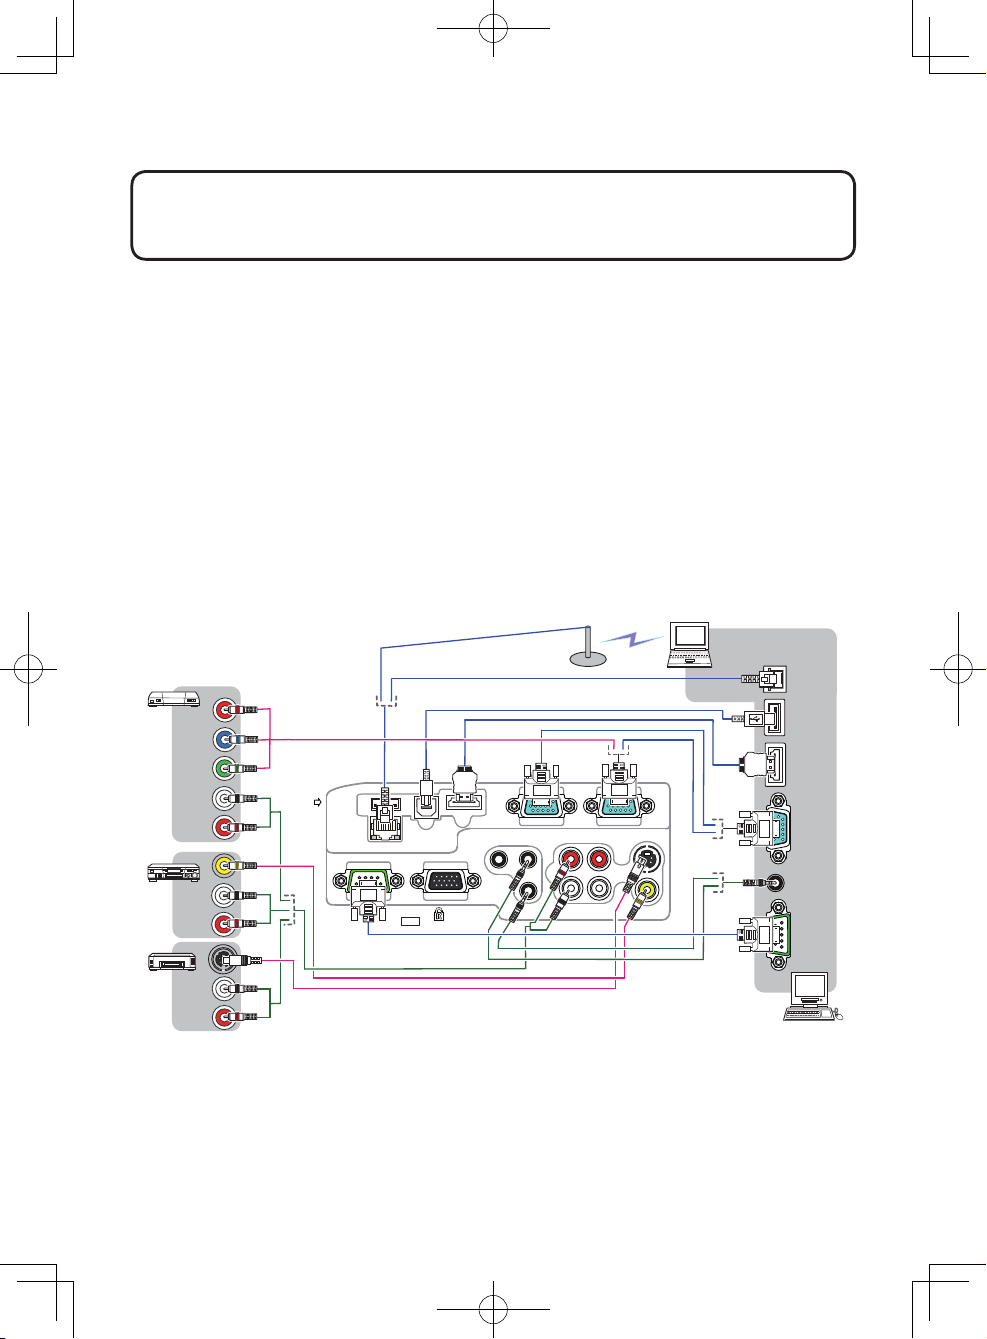
Connecting with your devices
Be sure to read the manuals for devices before connecting them to the projector.
Make sure that all the devices are suitable to be connected with this product, and
prepare the cables required to connect. Please refer to the following illustrations
to connect them.
For details, please see “User's Manual” - “Operating Guide” and “Network Guide”.
(
20, 22)
• When AUTO is selected for the COMPUTER IN1 or COMPUTER IN2 port in
COMPUTER IN of the INPUT menu, that port will accept component video signals.
• To use network functions of the projector, connect the LAN port with the
computer's LAN port, or with an access point that is connected to the computer
with wireless LAN, using a LAN cable.
(continued on next page)
•
If you insert a USB storage device, such as a USB memory, into the USB TYPE A
port and select the port as the input source, you can view images stored in the device.
• You can connect a dynamic microphone to the MIC port with a 3.5 mm mini-plug.
In that case, the built-in speaker outputs the sound from the microphone, even
while the sound from the projector is output.
Arrangement (continued)
•
The projector may make a rattling sound when tilted, moved or shaken,
since a ap to control the air ow inside of the projector has moved. Be aware that
this is not a failure or malfunction.
NOTE
Loading ...
Loading ...
Loading ...