Loading ...
Loading ...
Loading ...
_ WARNING:Whenservicing,useonlyidentical
Craftsmanreplacementparts.Useofanyotherpart
maycreateahazardorcauseproductdamage.
A
WARNING: Always wear safety goggles or safety
glasses with side shields when using compressed air
to clean tools. If the operation is dusty, also wear a
dust mask.
_k WARNING: To avoid serious personal injury, always
remove the battery pack from the tool when cleaning
or performing any maintenance.
GENERAL MAINTENANCE
Avoid using solvents when cleaning plastic parts. Most
plastics are susceptible to damage from various types of
commercial solvents and may be damaged by their use.
Use clean cloths to remove dirt, dust, oil, grease, etc.
_ WARNING: Do not at any time let brake fluids,
gasoline, petroleum-based products, penetrating
oils, etc. come in contact with plastic parts.
Chemicals can damage, weaken or destroy plastic
which may result in serious personal injury.
Only the parts shown on the parts list are intended to be
repaired or replaced by the customer. All other parts
should be replaced at a Sears Service Center.
CLEANING THE HAND VAC
See Figures 7- 9.
The dust bowl should be checked, emptied, and cleaned
periodically to obtain maximum dust collection.
REMOVING THE DUST BOWL
See Figure 7.
[] Remove the battery pack from the vacuum.
[] Depress the release button located on top of the hand
vac. Pull the dust bowl down and out to separate it
from the motor housing.
PRESSRELEASEBUTTON
PULLDUSTBOWLDOWN
ANDOUTTOREMOVE
Fig. 7
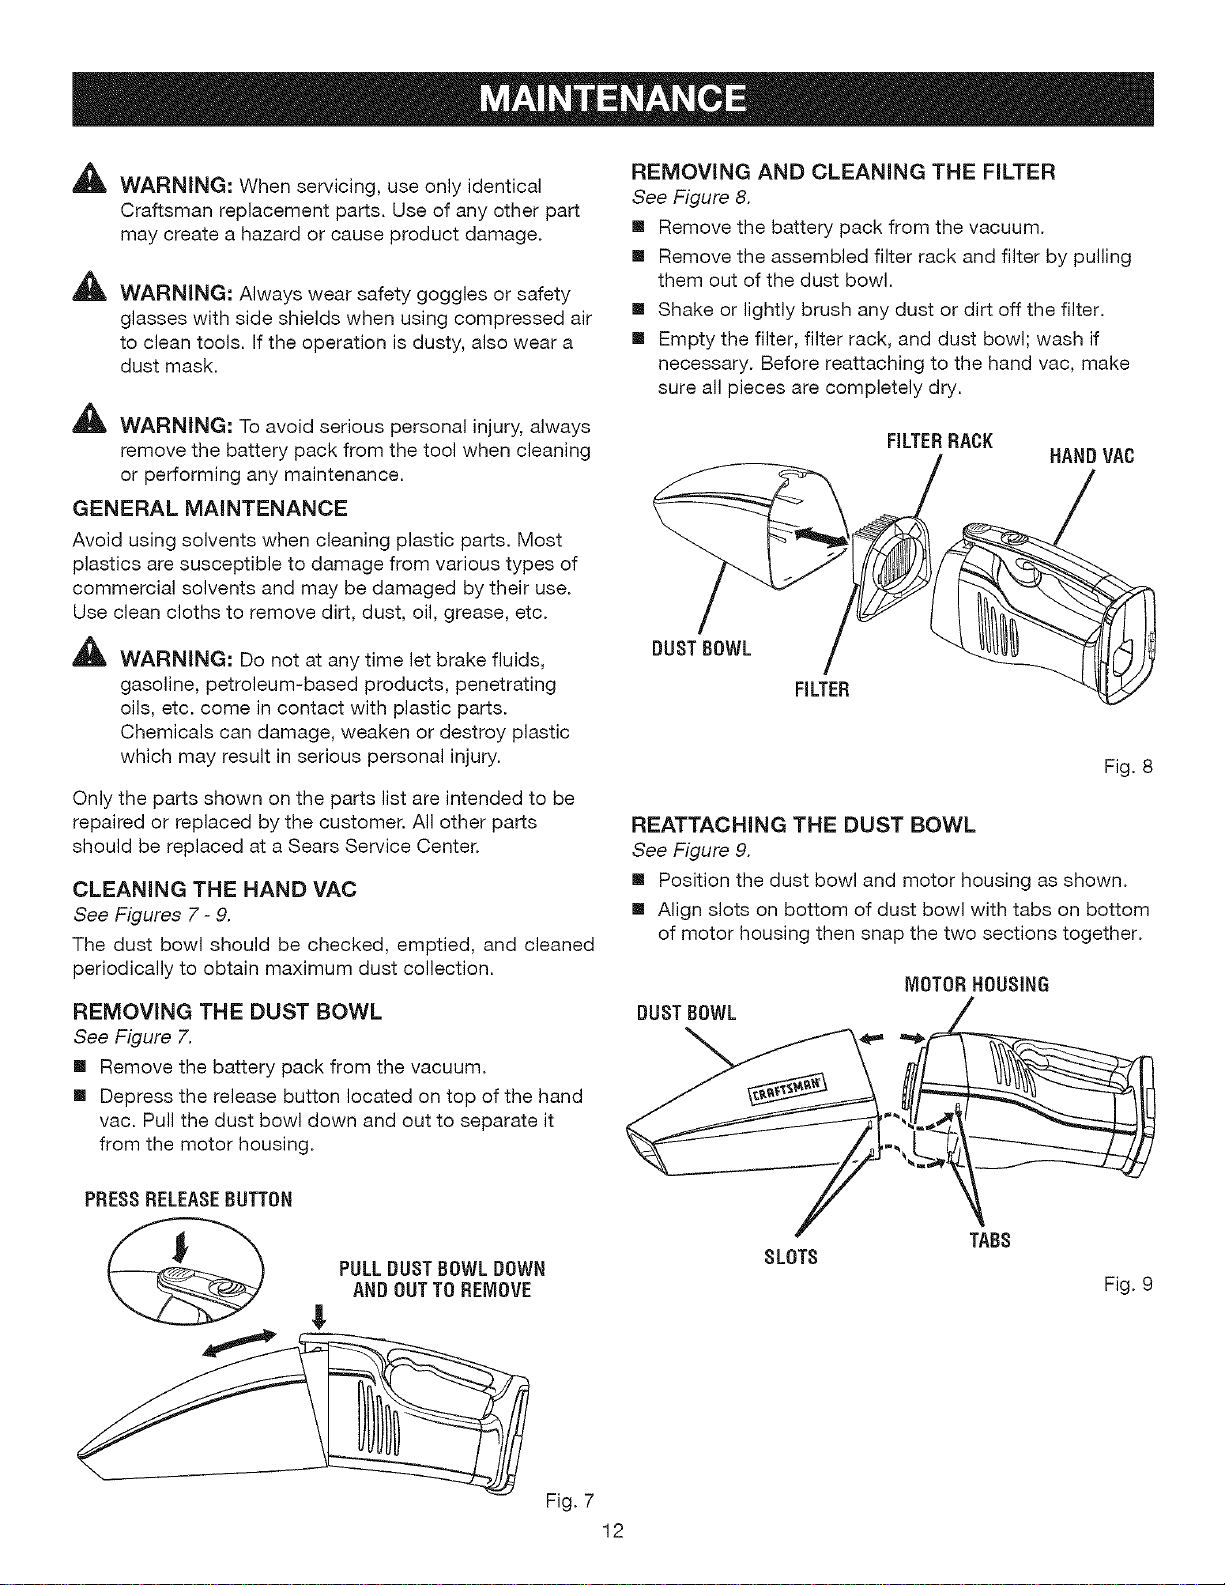
REMOVING AND CLEANING THE FILTER
See Figure 8.
[] Remove the battery pack from the vacuum.
[] Remove the assembled filter rack and filter by pulling
them out of the dust bowl.
[] Shake or lightly brush any dust or dirt off the filter.
[] Empty the filter, filter rack, and dust bowl; wash if
necessary. Before reattaching to the hand vac, make
sure all pieces are completely dry.
FILTERRACK
_FILTIR / HANDVAC._
DUSTBOWL
Fig. 8
REATTACHING THE DUST BOWL
See Figure 9.
[] Position the dust bowl and motor housing as shown.
[] Align slots on bottom of dust bowl with tabs on bottom
of motor housing then snap the two sections together.
MOTORHOUSING
DUSTBOWL /
TABS
SLOTS
Fig. 9
12
Loading ...
Loading ...