Loading ...
Loading ...
Loading ...

7
English
• The closer your sprayer is to the object
being sprayed the more the overspray.
• When spraying, always pres and hold the
trigger of the spray gun after spray pass
has begun and release trigger before
stopping the pass. Always keep the gun
pointed squarely at the spray surface
and overlap passes slightly to obtain the
most consistent and professional nish
possible.
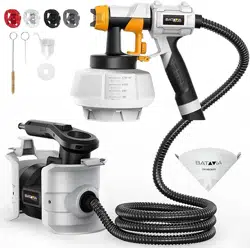
7. Cleaning the spray gun
(See Fig. G).
Special cleanup instructions for
use with ammable solvents (must
have a ash point above 70°F
/21℃):
• Always ush spray gun outside.
• Area must be free of ammable vapors.
• Cleaning area must be well-ventilated.
• DO NOT SUBMERGE air compressor!
7.1 Unplug the spray gun, and trigger the
spray gun so that the material inside the
spray gun ows back into the container.
7.2 Unscrew the container (11). Empty any
remaining material back into the mate-
rial container.
7.3 Pour a small amount of the appropriate
cleaning solution into the container
(warm, soapy water for latex materials;
mineral spirits for oil-based materials).
Clean container and properly dispose of
cleaning solution.
7.4 Rell the container with NEW cleaning
solution.
7.5 Attach the container to the gun and
plug in the sprayer.
7.6 Spray the solution through the gun for
two seconds in a safe area. Spray again
for two seconds. Unplug the spray gun,
and trigger the spray gun so that the
material inside the spray gun ows
back into the container.
7.7 Wipe the exterior of the container and
gun until clean.
7.8 Unscrew the nut (1) and remove the air
cap (2) and nozzle (3).
7.9 Clean the container, suction tube, air
cap and nozzle with a cleaning brush
and the appropriate cleaning solution.
Never clean nozzle or air holes in the spray
gun with sharp metal objects.
Do not use solvents or lubricants contain-
ing silicone.
7.1 0 Turn both knobs on both sides of the Air
Compressor Assembly to the “Unlock”
position, pull and separate the spray
gun from the Air Compressor Assem-
bly. (See Fig. B).
7.11 (a) Clean the rear of the spray gun with
the appropriate cleaning solution.
(b) Turn the suction tube anti-clockwise
and pull the suction tube downward to
disassemble it from the spray gun.
Then clean the suction tube with the
appropriate cleaning solution.
8. Maintenance
(See Fig. H).
You should inspect the air lter in the Air
Compressor Assembly to see if it is exces-
sively dirty. If it is dirty, follow the steps
below to replace it.
a. Unplug the spray gun. Remove the lter
cover with your hands directly.
b. Remove the dirty lters and replace with
new ones.
c. Secure the cover back onto the main
housing.
Never operate your unit without the air
lters. Dirt could be sucked in and inter-
fere with the function of the unit.
7063781-Spray-gun-Ma-2008-31.indb 77063781-Spray-gun-Ma-2008-31.indb 7 11-09-2020 09:5011-09-2020 09:50
Loading ...
Loading ...
Loading ...