Loading ...
Loading ...
Loading ...
Installation instructions en
31
¡ Contact protection must be guaranteed by the in-
stallation.
Electrically connect the appliance with the
protective contact plug
Note:The appliance must only be connected to a pro-
tective contact socket that has been correctly installed.
▶
Insert the plug into the protective contact socket.
When the appliance is installed, the mains plug of
the power cord must be freely accessible. If free ac-
cess to the mains plug is impossible, an all-pole
isolating switch must be integrated into the perman-
ent electrical installation in accordance with the in-
stallation regulations.
Electrically connecting an appliance without a
protective contact plug
Note:Only a licensed professional may connect the ap-
pliance. Damage caused by incorrect connection is not
covered under the warranty.
An all-pole isolating switch must be integrated into the
permanent electrical installation according to the install-
ation regulations.
1.
Identify the phase and neutral conductors in the
socket.
The appliance may be damaged if it is not connec-
ted correctly.
2.
Connect the hob in accordance with the connection
diagram.
See the rating plate for the voltage.
3.
Connect the wires of the mains power cable accord-
ing to the colour coding:
‒ Green/yellow = Protective conductor
‒ Blue = Neutral conductor
‒ Brown = Phase (external conductor)
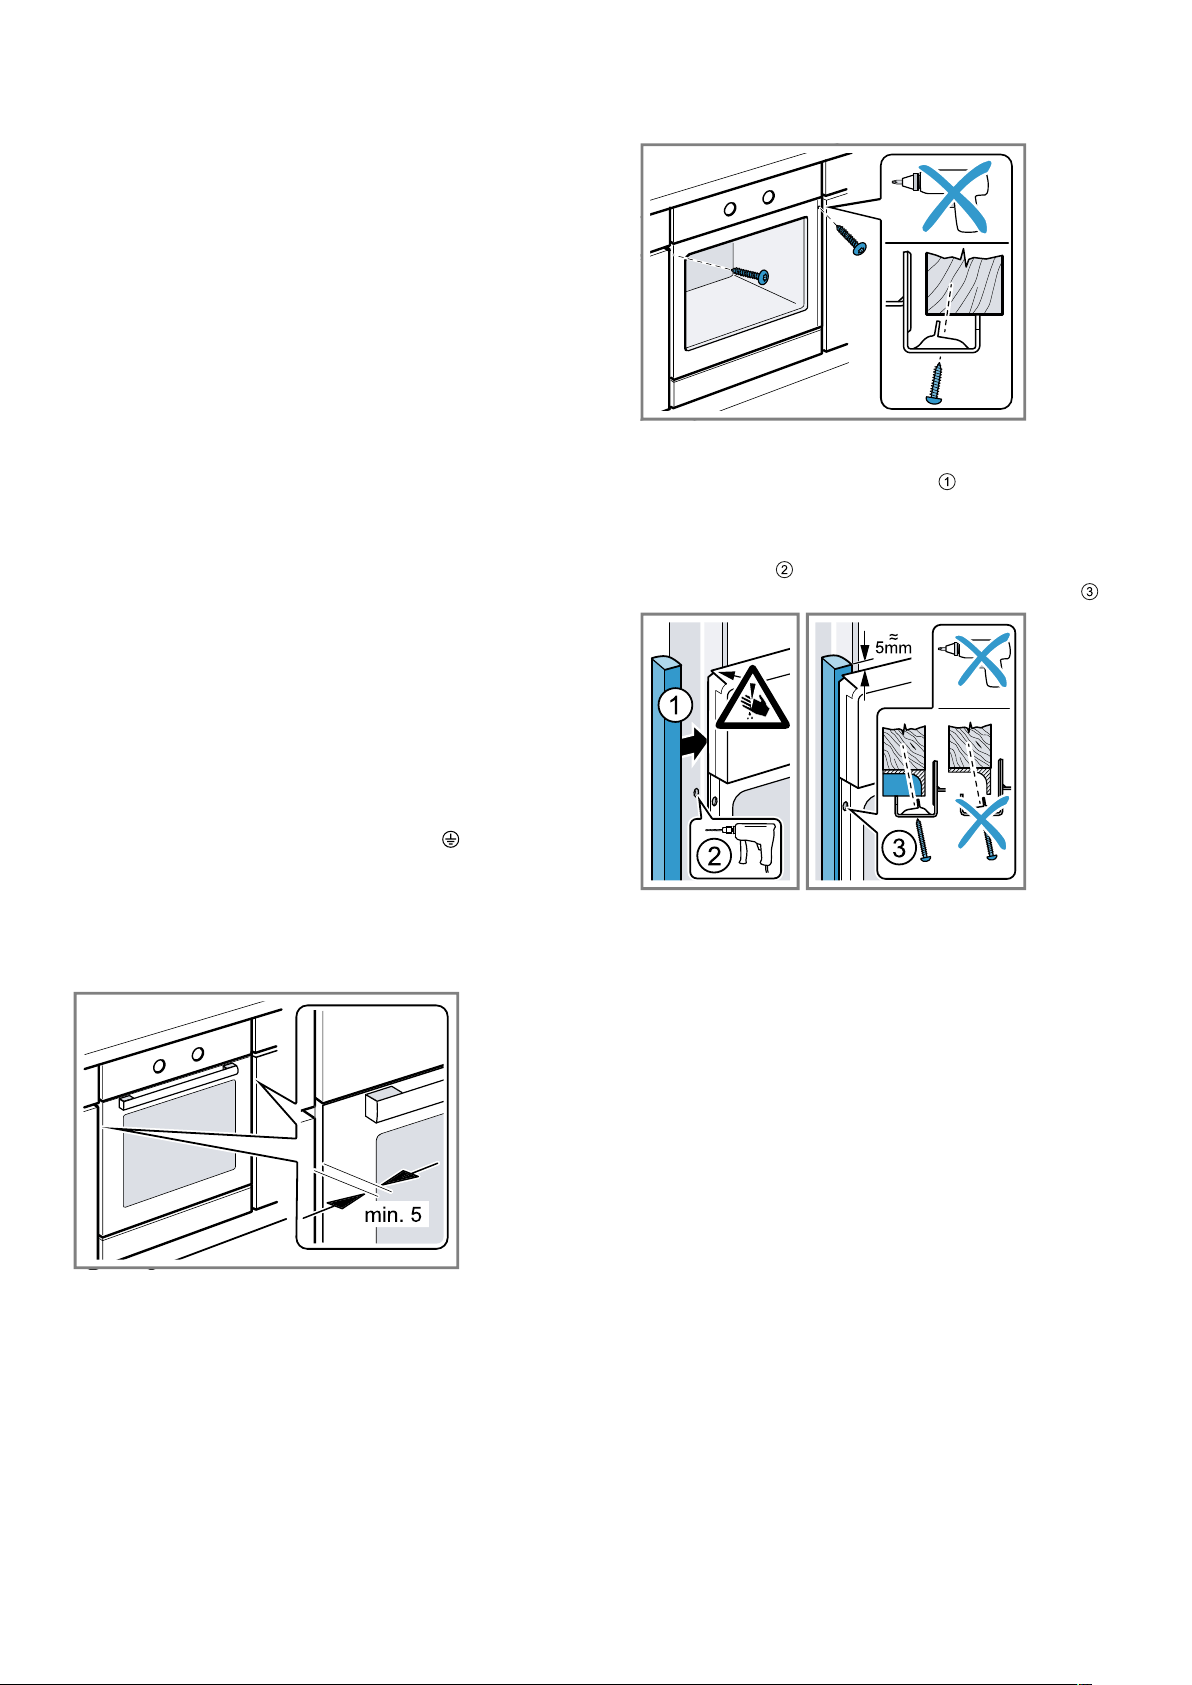
21.8 Installing the appliance
1.
Slide the appliance in fully and centre it.
2.
Screw the appliance into place.
3.
For handleless kitchens with vertical bar handle
strips:
‒ Attach a suitable filling piece in order to cover
any sharp edges and to guarantee a safe install-
ation.
‒ Pre-drill aluminium profiles to establish a screw
connection .
‒ Secure the appliance using a suitable screw .
Note:The gap between the worktop and the appliance
must not be closed by additional battens.
Thermal insulation strips must not be fitted to the side
panels of the surround unit.
21.9 Removing the appliance
1.
Disconnect the appliance from the power supply.
2.
Undo the fastening screws.
3.
Lift the appliance slightly and pull it out completely.
Loading ...