Loading ...
Loading ...
Loading ...
29
When attaching parts, use the backward procedures of removal.
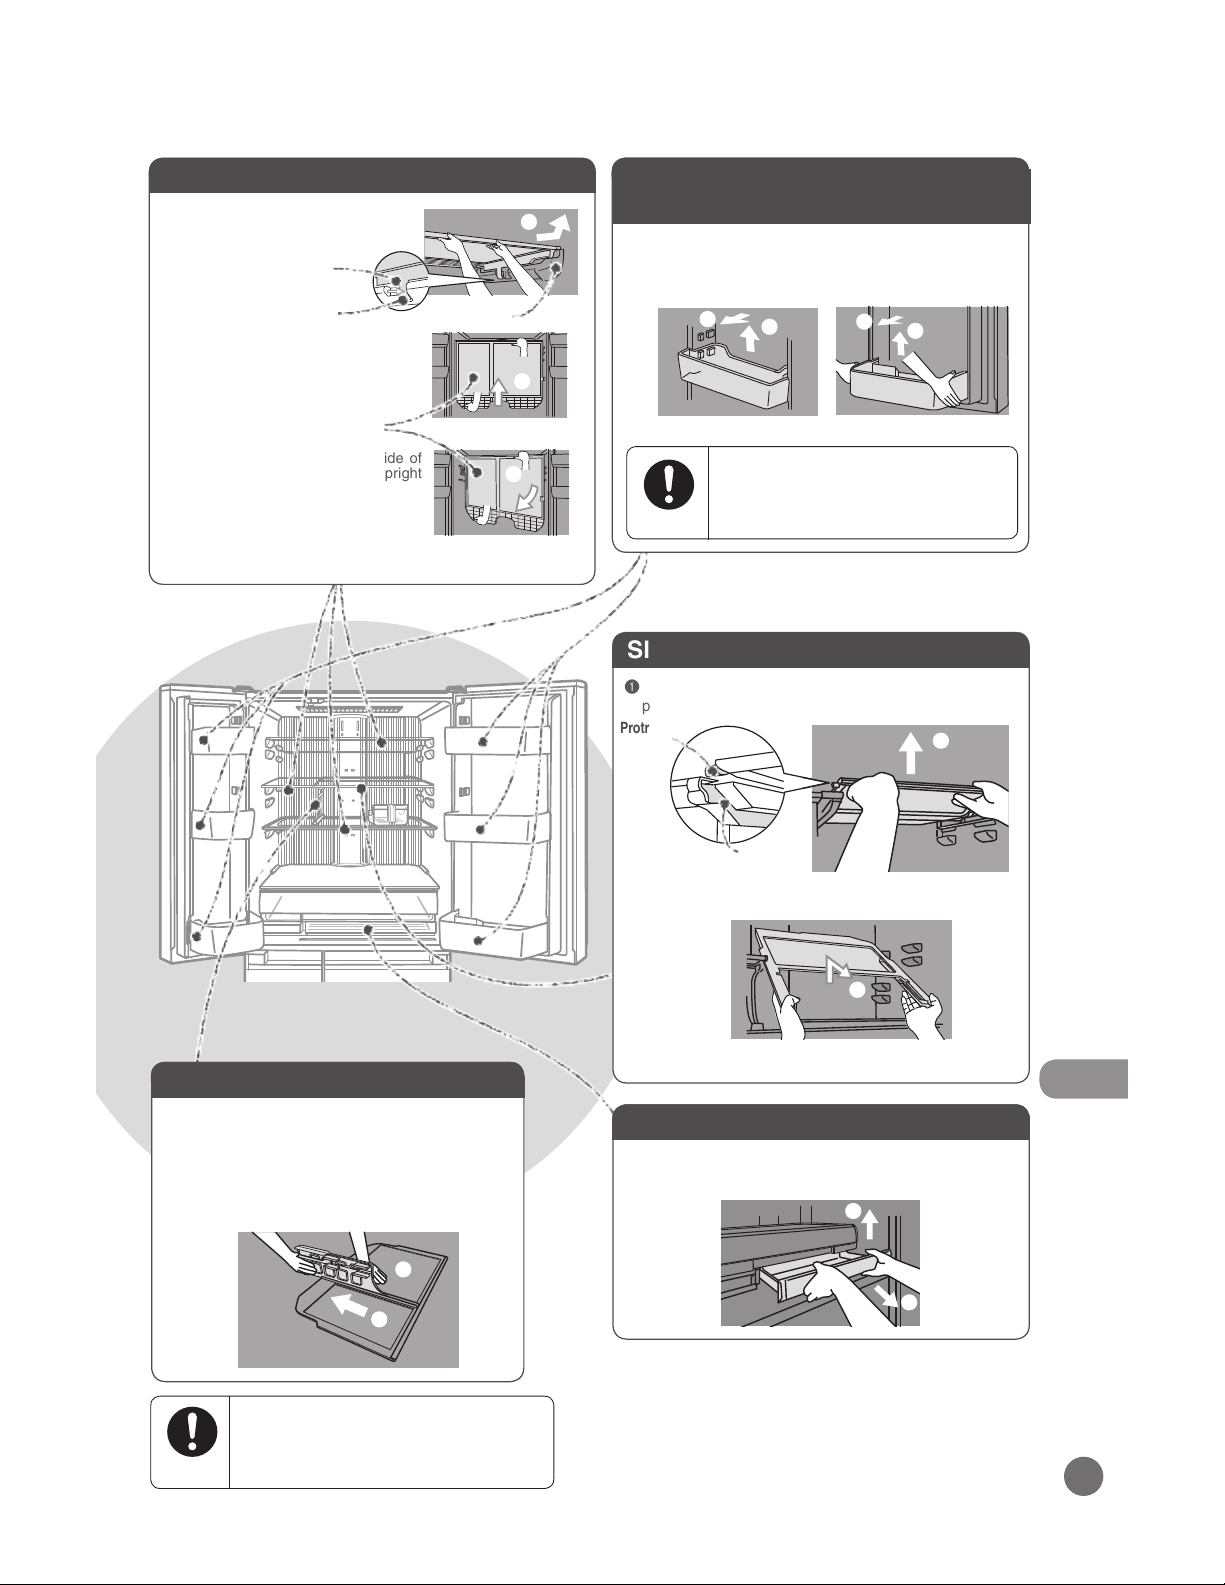
Partition
1
Remove the glass shelf (lower) and place it on a
surface such as a stand.
2
Press the glass shelf (lower) down with one hand.
* The shelves are firmly installed.
3
Pull in the direction indicated by the arrow.
Be careful when attaching and
removing the glass shelf.
If it is attached improperly, it could come
loose and fall, causing injury.
Follow the
instructions
1
Remove the slide glass shelf (front) using the protruding
parts in the front and back along with the grooved parts.
Slide Glass Shelf (Front) (Back)
2
Pull the slide glass shelf (back) out to the front
while holding the front with both hands.
Grooved
Part
Protruding
Part
Glass Shelf (Upper) (Middle) (Lower)
1
Lift up the left and right of the pocket alternately.
* The pockets are firmly installed.
2
Pull out to the front.
Adjustable Pocket Bottle Pocket
Be careful when attaching and
removing the pocket.
If it is attached improperly, it could come
loose and fall, causing injury.
Follow the
instructions
Adjustable Pocket (Large) (Small) /
Bottle Pocket (Large) (Small)
1
1
2
2
1
2
2
3
* Swiftly pulling out the part to the front can damage the
side of the door. Pull out the part slowly to remove it.
1
Pull out to the front using both hands
until making contact with the tabs.
Lift the front of the shelf to remove the tabs.
2
Hold the front and back of the glass
shelf (lower) and pull the back out to
the front of the rail. Lift the front to
make the glass shelf upright.
3
Pull out the right side or left side of
the glass shelf (lower) (in the upright
position of
2
) to remove from the
refrigerator.
Pull out until making
contact
* Remove with the partition attached after
you have removed the glass shelves
(upper) and (middle) and slide glass shelf.
Rail
Tab
Backside (in the upright
position)
1
2
3
Lower Case
1
2
1
Fully pull out the lower case.
2
Lift the lower case out to the front.
Cleaning
Loading ...
Loading ...
Loading ...