Loading ...
Loading ...
Loading ...
4
English
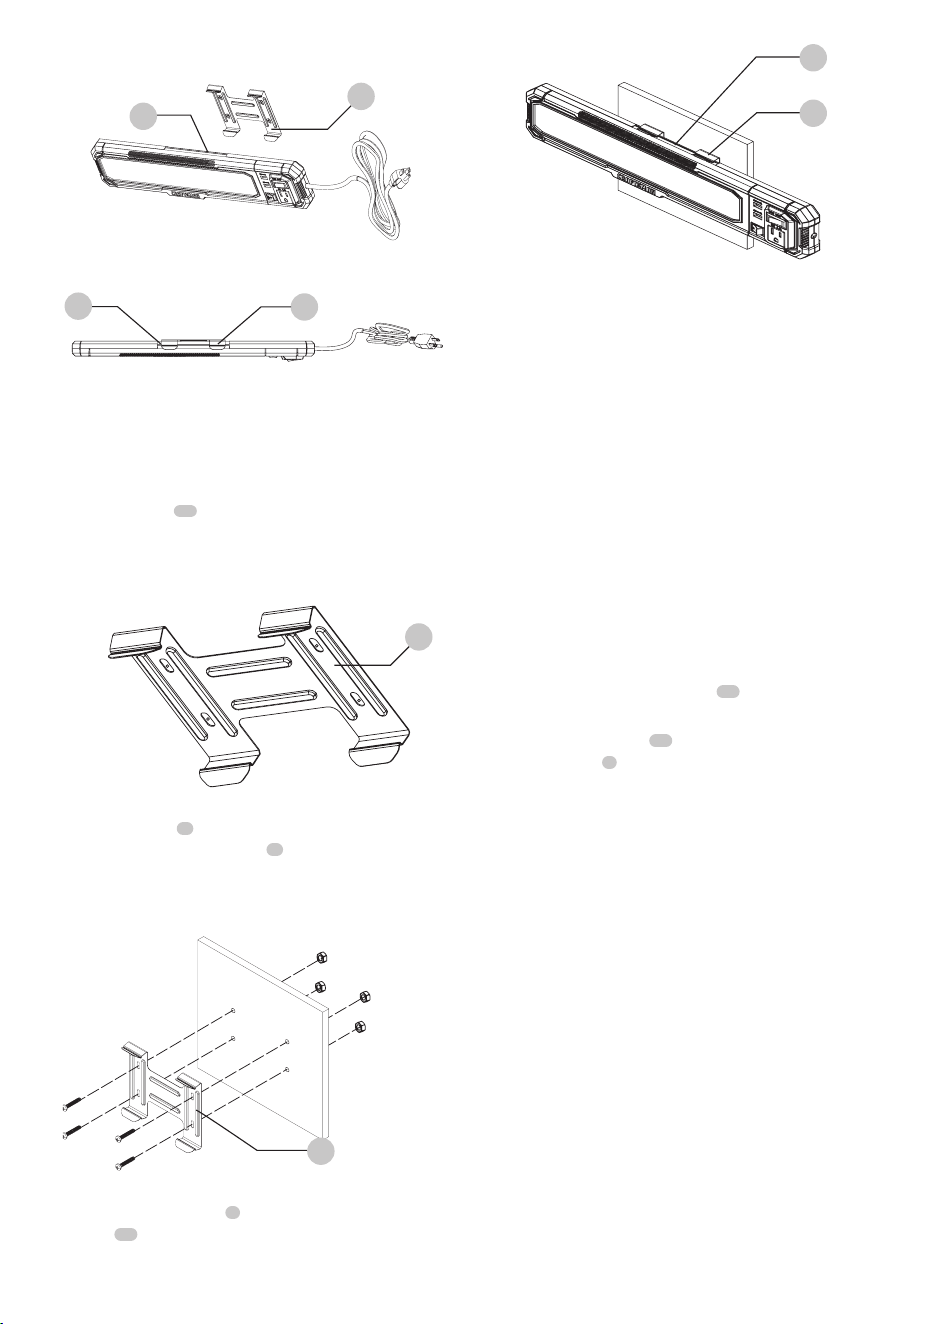
Fig D.
11
4
Fig E.
11
4
MOUNTING BRACKET TO NON-FERROUS
METAL
If the under cabinet is non-ferrous metal, mounting methods
will be as shown below (Fig F, G, H).
Hold the bracket
11
in desired position and mark the four
locations of the mounting holes. Drill four small holes using
a 5/32-in. drill bit (not included).
Fig F.
11
Align the bracket
11
so that the mounting holes match up
to the holes Secure the bracket
11
to the mounting surface
with all four M4x38mm machine screws (not included) and
four nuts for machine screw (not included), using Philips
screwdriver (not included) as shown in Fig. G.
Fig G.
11
Align the bracket groove
4
in the light fixture with the
bracket
11
and press light into bracket until it snaps into
place as shown in Fig. H.
Fig H.
11
4
CAUTION: Except the cabinet materials mentioned
above, other materials are not recommended for
mounting this fixture.
Grounding Instructions
WARNING: Risk of Electrical Shock. This fixture
IS ONLY FOR USE ON 120V and is equipped with
an approved 3 conductor cord with a 3-prong,
grounded plug. TO REDUCE THE RISK OF
ELECTRICAL SHOCK, it must only be plugged into
a properly grounded 3-prong outlet. In the event
of a short circuit, grounding reduces the risk of
shock by providing an escape wire for the electric
current. This fixture must be properly grounded.
Do not use in or near standing water, or where
water may accumulate. Keep this fixture at least
16 feet from pools or spas. Keep plug dry. DO NOT
IMMERSE THIS FIXTURE.
The fixture is equipped with a cord having a grounding wire
with an appropriate grounding plug
10
.
1. Properly lay out the cord.
2. The cord set and plug
10
with this unit contains a
grounding pin
9
. This plug MUST be used with a
grounded outlet
.
IMPORTANT: The outlet being used must be installed
and grounded in accordance with all local codes and
ordinances.
3. Make sure the outlet being used has the same
configuration as the grounded plug. DO NOT USE AN
ADAPTER. Refer to Fig. A.
4. Inspect the plug and cord before each use. Do not use if
there are signs of damage.
5. If these grounding instructions are not completely
understood, or if in doubt as to whether the fixture is
properly grounded, have the installation checked by a
qualified electrician.
DANGER: RISK OF ELECTRICAL SHOCK.
IMPROPER GROUNDING CAN RESULT IN
ELECTRICAL SHOCK.
• Do not modify the plug provided. If it does not fit the
available outlet, a correct outlet should be installed
by a qualified electrician.
• Repairs to the cord set or plug MUST be made by a
qualified electrician or Authorized Service Center.
Loading ...
Loading ...
Loading ...