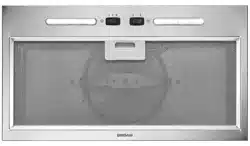
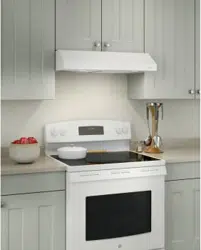
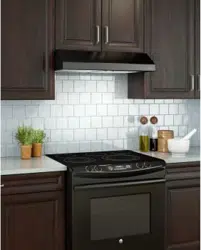
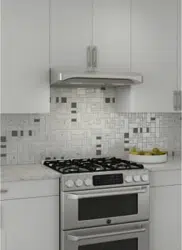
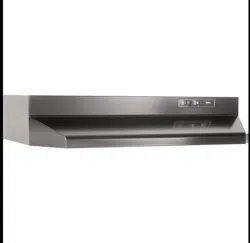
INSTALLATION, USE & CARE INSTRUCTIONS Powerpack Inserts for Broan BBN1243SS
Table of contents
Safety
Installation
Recommended Tools and Accessories
Install Ductwork (Ducted Installations Only)
Optional Liners (PM300SS Unit Only)
Remove the Cabinet Brackets
Prepare the Cabinet
Prepare the Unit
Install the Unit
Connect Ductwork
Wiring
Install the Filters
Operation
Maintenance and Cleaning
Grease Filter(s)
Non-Ducted Recirculation Filter(s)
Stainless Steel Cleaning
Wiring Diagram
Service Parts
Warranty
PREPARE THE UNIT
NOTE: Since this manual covers different unit models, some details in the following illustrations may slightly differ from your unit.
If present, remove all protective poly film from the unit and/ or parts.
Remove the grease filter(s) by pulling down on tab and tilting the filter(s) downward. Set aside the filter(s).
Disassemble the wiring compartment cover (grey part in FIG . 13) from inside the unit by removing its retaining screw. Remove the parts bag behind the cover. Set aside the parts bag and the cover along with its screw.
Punch out one of the two knock-out holes (grey parts in FIG . 14).
INSTALL THE UNIT
1. Run house power cable between service panel and unit location . Stub out a 2-foot length of power cable inside the cabinet . Attach the power cable to the unit using an appropriate 7/8” diameter strain relief (not included) . NOTE: The HCK44 cord connection kit (optional) can be used instead of the house power cable . Refer to the instruction packed with the HCK44 cord connection kit.
2. Insert the unit in the cabinet, until you feel a ‘click’ from both sides of the unit, confirming that the Ease of Install Hooks rest on the top of the cabinet bottom sides 1, or cabinet brackets 2 or 3 (FIG . 15) . Move the unit from left to right, from rear to front and up to ensure the Ease of Install Hooks are retaining the unit inside the cabinet.
NOTE: The unit will be protruding below the cabinetry until tightened . NOTE: If, for any reason, the unit has to be removed from the cabinet, it is possible to disengage the Ease of Install Hooks . To do so, while holding and pushing on one side of the unit, lift simultaneously the Ease of Install hooks levers ( 1 and 2, grey parts in FIG . 16) in the other side of the unit until the hooks are retracted
3. Lift the unit until contact is made between the unit flange and cabinet . Secure the unit to the cabinet using 4 no . 8 x 5/8 ” wood screws included in parts bag (2 screws per side) . Use upper or lower holes (1, 2, 3 or 4) (FIG . 17)
MAINTENANCE
ALWAYS SWITCH OFF THE ELECTRICITY SUPPLY BEFORE CARRYING OUT ANY OPERATIONS ON THE APPLIANCE .
Grease Filter(s) - The grease filter(s) should be cleaned frequently . Use a warm dishwashing detergent solution . Grease filter(s) is (are) dishwasher safe . Clean the filter(s) in the dishwasher using a non-phosphate detergent . Discoloration of the filter(s) may occur if using phosphate detergents, or as a result of local water conditions - but this will not affect filter performance . This discoloration is not covered by the warranty . To minimize or prevent discoloration, hand wash filter(s) using a mild detergent .
Non-Ducted Recirculation Filter(s) - The Non-Ducted Recirculation filter(s) should be changed every 3 to 6 months . Replace more often if your cooking style generates extra grease, such as frying and wok cooking .
STAINLESS STEEL CLEANING
Do:
Regularly wash with clean cloth or rag soaked with warm water and mild soap or liquid dish detergent .
Always clean in the direction of original polish lines .
Always rinse well with clear water (2 or 3 times) after cleaning . Wipe dry completely .
You may also use a specialized household stainless steel cleaner .
Don’t:
Use any steel or stainless steel wool or any other scrapers to remove stubborn dirt .
Use any harsh or abrasive cleansers .
Allow dirt to accumulate .
Let plaster dust or any other construction residues reach the unit . During construction/ renovation, cover the unit to make sure no dust sticks to the stainless steel surface .
Avoid when choosing a detergent:
Any cleaners that contain bleach will attack stainless steel .
Any products containing: chloride, fluoride, iodide, bromide will deteriorate surfaces rapidly .
Any combustible products used for cleaning such as acetone, alcohol, ether, benzol, etc ., are highly explosive and should never be used close to a range .