
Loading ...
Loading ...
Loading ...
Operation en-us
13
¡ If you have set a power level before activating the func-
tion, this power level is used automatically after the
function has been deactivated.
6.7 Panel lock
You can use the panel lock to prevent the cooktop from
being turned on accidentally.
CAUTION
The panel lock may be turned on and off accidentally due
to:
▶
water spilled during cleaning
▶
food that has overflowed
▶
objects being placed on the panel lock touch key.
Activating the panel lock
Requirement:The cooktop is turned off.
▶
Touch Panel Lock for 4seconds.
a The indicator over Panel Lock lights up for 10seconds.
a The control panel is locked.
Deactivating the panel lock
You can turn off the wipe protection manually.
▶
Touch Panel Lock for 4seconds.
a The control panel is unlocked.
Automatic panel lock
This function automatically activates the panel lock when
you switch off the cooktop.
The automatic panel lock can be activated in the basic set-
tings →
Page13
.
6.8 Wipe protection
With this function you can avoid changing the settings
while cleaning the control panel during cooking.
This function does not lock the main switch. You can turn
the cooktop off at any time.
Activating wipe protection
▶
Touch Clean Lock.
a The indicator above Clean Lock lights up.
a The control panel is locked for 35seconds.
a After 30seconds a beep indicates that the wipe protec-
tion is about to turn off.
Deactivating wipe protection
▶
Touch Clean Lock.
a The indicator above Clean Lock goes out.
6.9 Basic settings
You can configure your appliance to meet your needs.
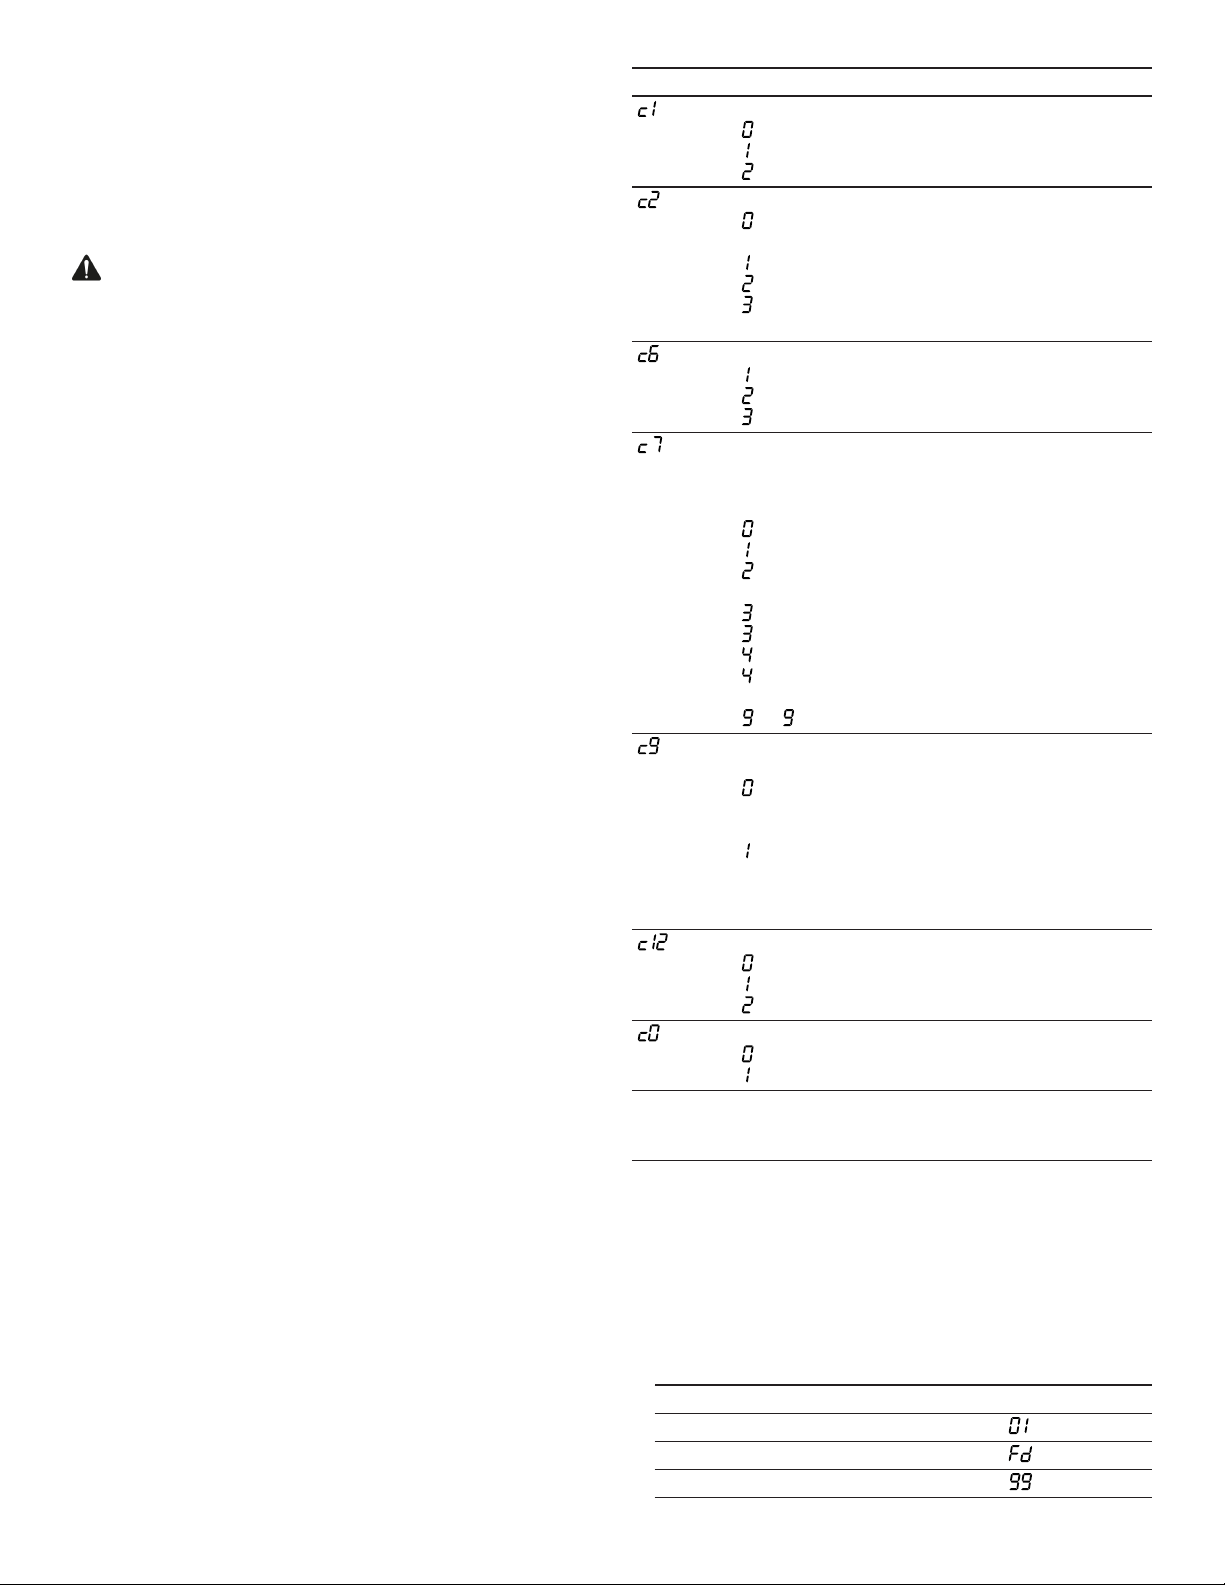
Basic settings overview
Here you can find an overview of the basic settings and
the preset factory settings.
Display Function
Panel lock
– Manual
1
– Automatic
– Function deactivated
Signal tones
– Confirmation signal and error signal are
off. The main switch signal remains on.
– Only error signal is on.
– Only confirmation signal is on.
– Confirmation signal and error signal are
on.
1
Duration of timer end signal
– 10seconds
1
– 30seconds
– 1minute
Power management function. Limiting the to-
tal power of the cooktop. The available set-
tings depend on the maximum power of the
cooktop.
– Deactivated
1
,
2
– 1.000W minimum power
– 1.500W
...
– 3.000W recommended for 13A
. – 3.500W recommended for 16A
– 4.000W
. – 4.500W recommended for 20A
...
or . – Maximum power of the cooktop
2
Time for setting a cooking zone after selec-
tion
– Unlimited: The last selected cooking zone
remains selected. You can adjust the settings
without having to select it again.
– Limited: You can adjust the settings for
the selected cooking zone within 10seconds.
After 10seconds you have to select the
cooking zone again.
Results for suitability test for cookware
– Not suitable.
– Not ideal.
–Suitable.
Restore factory settings
– Off
1
– Restore appliance to factory settings
1
Factory setting (may vary according to model)
2
The cooktop's maximum power output is shown on the
rating plate
Changing the basic settings
Requirement:The cooktop is turned off.
1. Turn on the cooktop.
2. Within the next 10seconds, press Timer for about
4seconds.
The first four displays provide the product information.
To call up the individual displays, touch the control
panel.
Product information Display
Customer Support index (CI)
Production number
Production number1
Loading ...
Loading ...
Loading ...