Loading ...
Loading ...
Loading ...
Melntenence
Oven Door
Leveling Legs
i Note: The oven door on a new range may feel "spongy"
when it is closed. This is normal and will decrease with use.
Oven Window
To protect the oven door window:
1. Do not use abrasive cleaning agents such as steel wool
scouring pads or powdered cleansers as they may scratch
the glass.
2. Do not hit the glass with pots, pans, furniture, toys, or
other objects.
3. Do not close the oven door until the oven racks are
in place.
Scratching, hitting, jarring or stressing the glass may weaken
its structure causing an increased risk of breakage at a
later date.
Oven Light
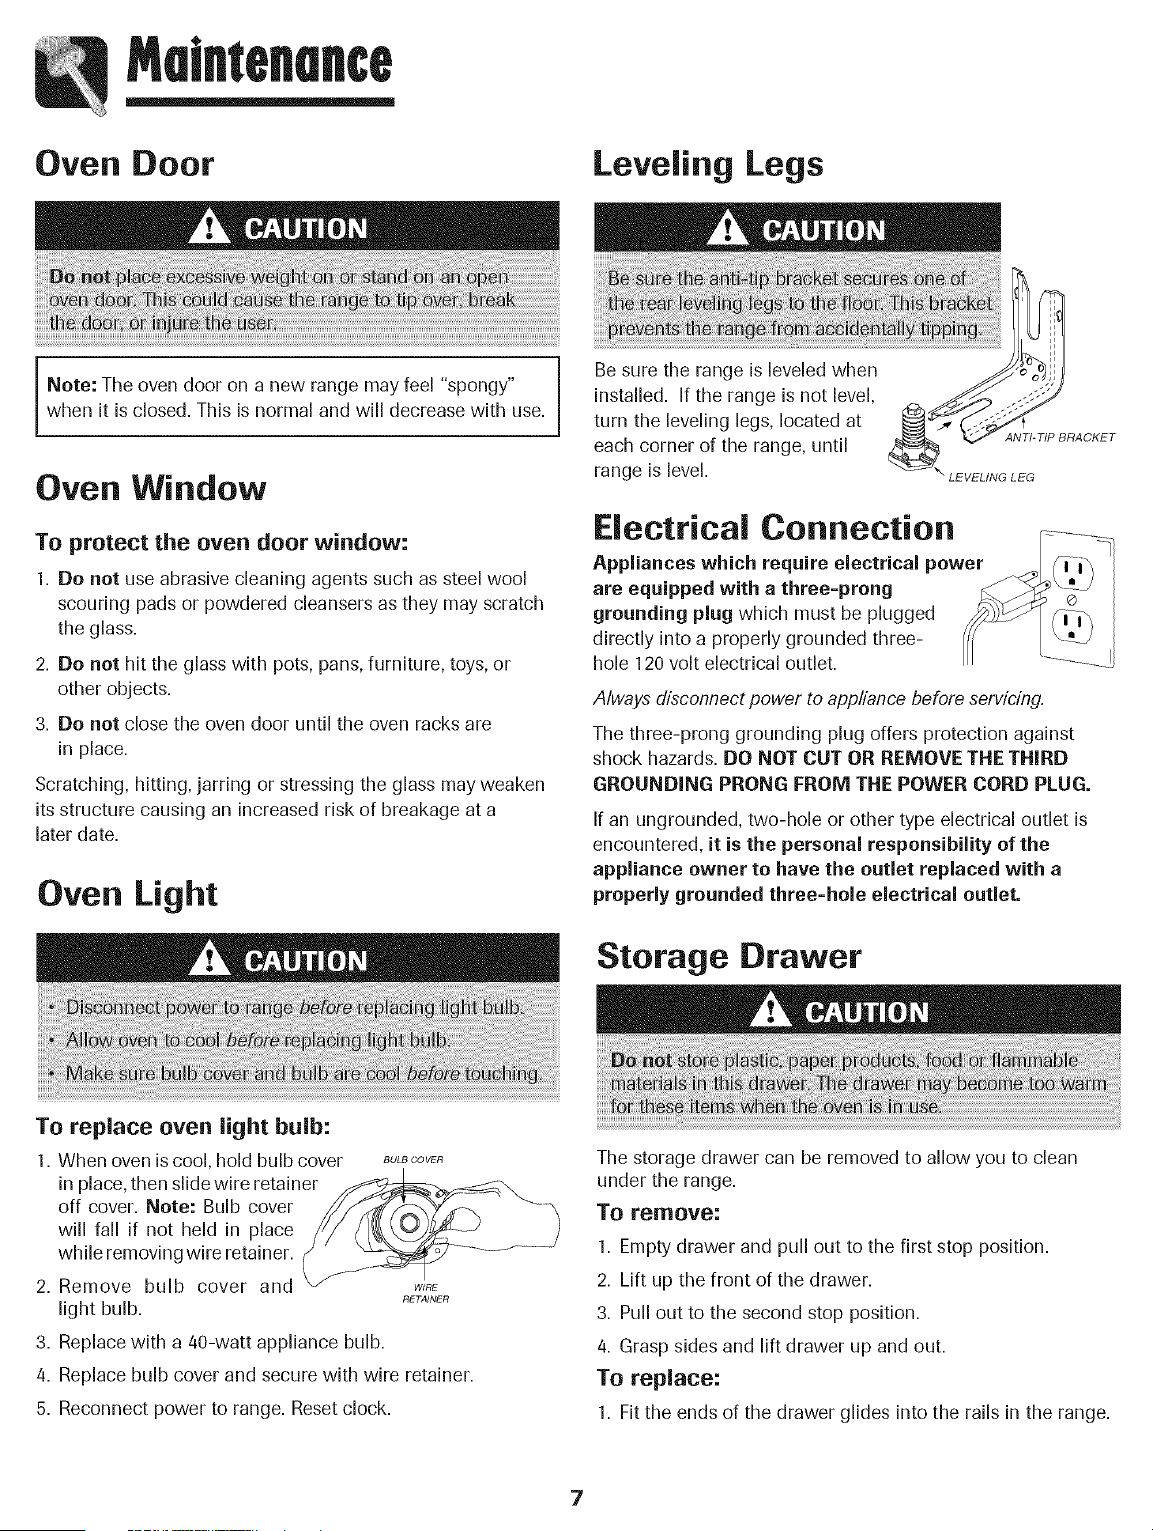
i Be sure the range is leveled when
installed. If the range is not level,
turn the leveling legs, located at
each corner of the range, until
range is level.
Electrical Connection
Appliances which require electrical power
are equipped with a three=prong
grounding plug which must be plugged
directly into a properly grounded three-
hole 120 volt electrical outlet.
Always disconnect power to appliance before servicing.
The three-prong grounding plug offers protection against
shock hazards. DO NOT CUT OR REMOVE THE THIRD
GROUNDING PRONG FROM THE POWER CORD PLUG.
If an ungrounded, two-hole or other type electrical outlet is
encountered, it is the personal responsibility of the
appliance owner to have the outlet replaced with a
properly grounded three=hole electrical outlet.
Storage Drawer
To replace oven light bulb:
1. When oven iscool, hold bulb cover BuL_OOVER
in place, then slide wire retainer
off cover. Note: Bulb cover
will fall if not held in place
while removing wire retainer. (-
2. Remove bulb cover and k/ w_RE
RETAINER
light bulb.
3. Replace with a 40-watt appliance bulb.
4. Replace bulb cover and secure with wire retainer.
5. Reconnect power to range. Reset clock.
The storage drawer can be removed to allow you to clean
under the range.
To remove:
1. Empty drawer and pull out to the first stop position.
2. Lift up the front of the drawer.
3. Pull out to the second stop position.
4. Grasp sides and lift drawer up and out.
To replace:
1. Fit the ends of the drawer glides into the rails in the range.
7
Loading ...
Loading ...
Loading ...