Loading ...
Loading ...
Loading ...
8
• Visually inspect the exterior of the shipping package and immediately report any damage
to the carrier. Upon opening the package, any concealed damage should also be
immediately reported to the carrier.
• Remove the shipping carton, tape, and packing material. Remove the protective plastic
lm from the exterior panels on all models and from the interior door panels on solid
door models. If the appliance is exposed to the sun or to heat, remove the lm after the
appliance cools.
• Remove all accessory containers before discarding the packing materials. Dispose of all
packing materials in a proper and environmentally responsible manner.
• Check for missing or damaged accessories.
C. Setup
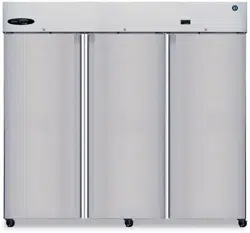
1. Remove the Appliance from the Pallet and Install the Casters
1) Move as close to the nal location as
possible.
2) Remove the 2 bolts securing the unit to
the pallet, then remove the unit from the
pallet. Block the unit securely at a height of
8" (20cm) off the oor. Do not lay the unit
down. NOTICE! Do not allow the door(s)
to bear the weight of the appliance.
3) Attach the casters to the bottom of the unit.
Locking casters should be attached to the
front of the unit. See Fig. 1.
4) While supporting the appliance to keep it
from tipping, lower the casters to the oor.
2. Check the Refrigeration Circuit
• Visually check that the refrigerant lines do not rub or touch other lines or surfaces and
that the condenser fan blade turns freely.
• Check that the compressor is snug on all mounting pads.
3. Position the Appliance and Lock the Front Casters
The front casters on the appliance are lockable. After positioning the appliance in its nal
location, lock the front casters.
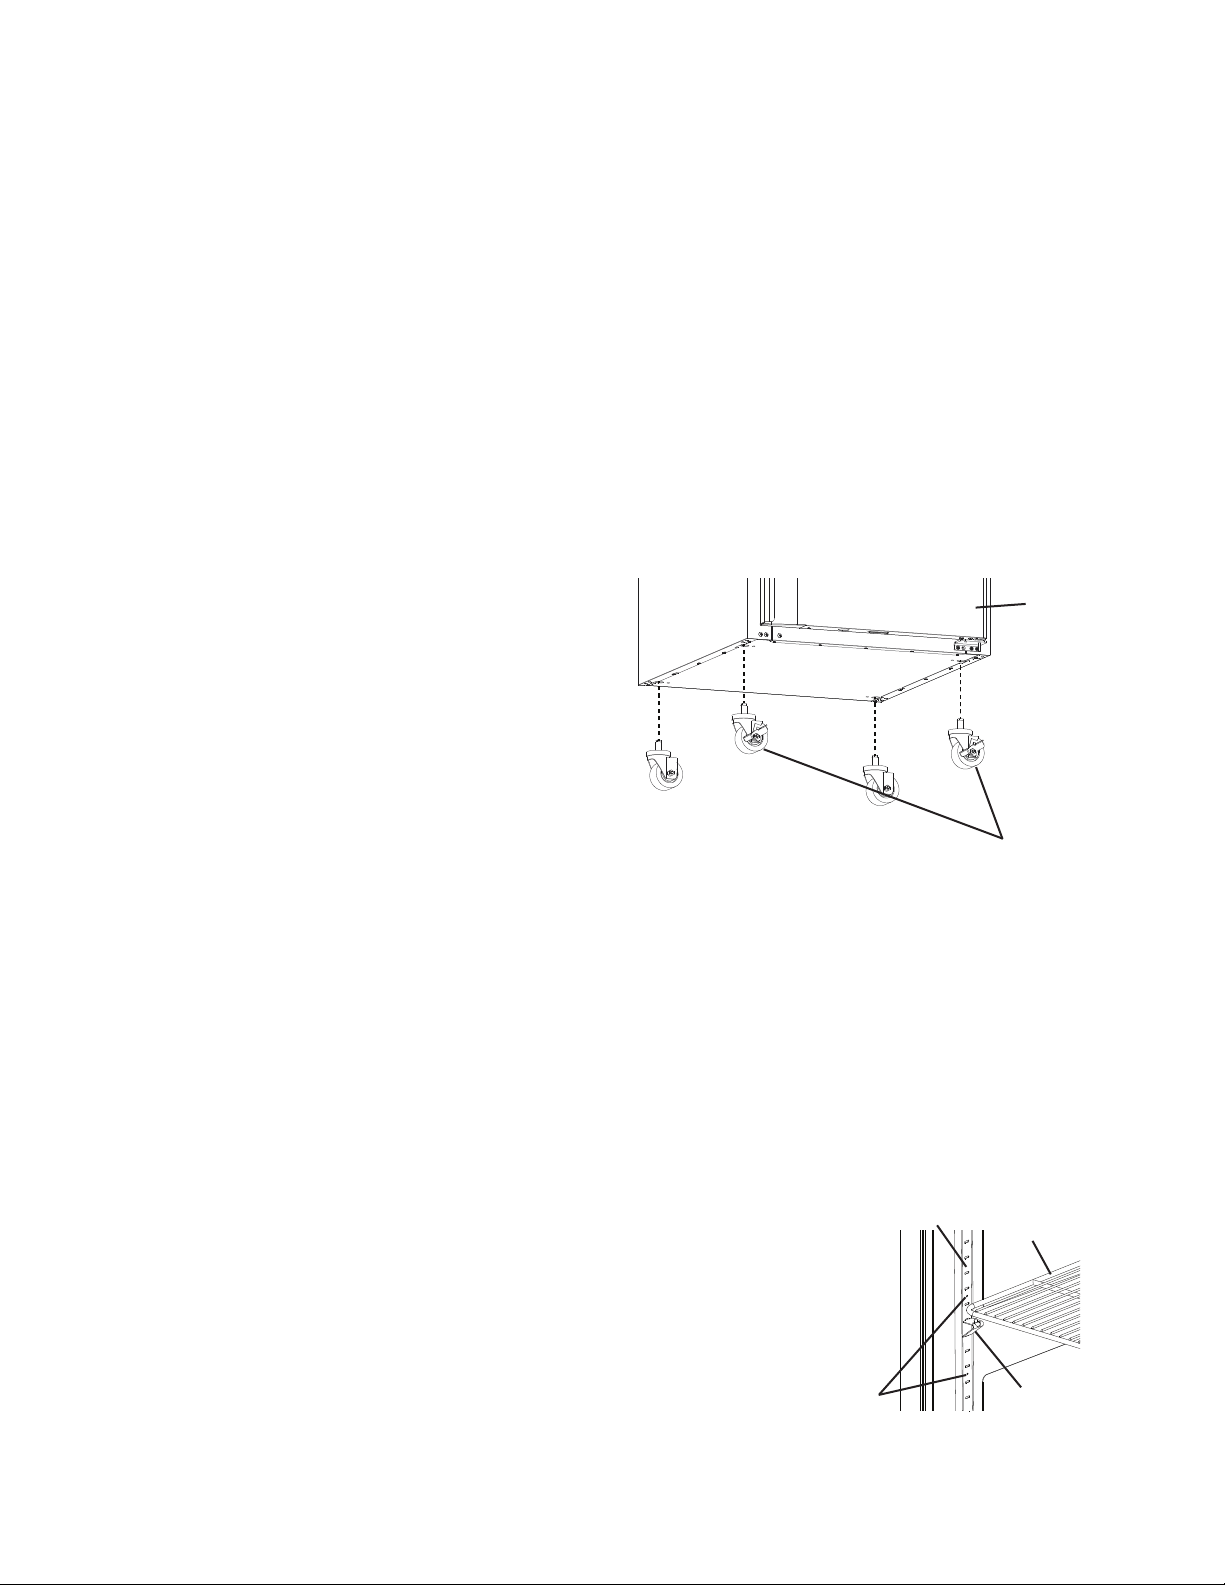
4. Install the Shelves
Shelf support clips are provided in the accessory pack.
1. Place the shelf support clips into the pilasters (4 shelf support
clips per shelf). Indexing holes are provided on the pilasters
in evenly spaced intervals to assist you in positioning the
support clips at the same height. See Fig. 2.
2. Place the shelves in position on the shelf support clips.
Shelf
Support
Clip
Indexing
Holes
Pilaster
Shelf
Fig. 2
Door
Locking Casters in Front
Fig. 1
Loading ...
Loading ...
Loading ...