Loading ...
Loading ...
Loading ...

ON
OFF
OFFOFF
6
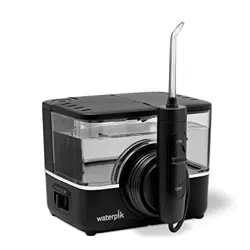
GETTING STARTED
Charge
Fill
Insert
Eject
ON ON
Power ON
• 2 • 4 • 6 • 8 •10
Water
ON
ON
High
OFF
• 2 • 4 • 6 • 8 •10
Low
Charging Unit Prior to First Use
Plug the power supply into the wall outlet and connect the magnetic plug to the
unit (see image) for approximately 4.5-5 hours. The charge indicator on the unit
will glow while charging and then begin to ash momentarily every 3 seconds when
the unit is fully charged. A full charge will last for approximately 4 weeks when unit
is used once a day for one minute a day. When the batteries are in need of charging
(approximately 30% charge le) the charge indicator light will blink 3 times quickly to
indicate that the user should consider recharging the unit. A complete recharge will
take 4.5-5 hours. If you use your Water Flosser once a day or less, it is recommended
that you charge it every 3-4 weeks. If you use it twice a day or more, charge the unit
more frequently.
Preparing the Reservoir
Remove the reservoir, li the reservoir lid, and ll with warm water. Fill with warm
water. Replace the reservoir over the base and press down rmly and close the lid.
Inserting and Removing Tips
Insert tip into the center of the Water Flosser handle, pressing down rmly until the
tip clicks into place. The colored ring will be ush with the top of the handle if the tip
is correctly locked into place. To remove tip from the handle slide the tip eject button
on the handle.
Prime Unit (First Time Use Only)
Set pressure control on base to high (pressure setting No.10), point the handle and
tip into sink. Turn power and water ON until water ows from the tip.
Adjusting the Pressure Setting
Set the pressure control on the base of the unit to the lowest setting (pressure
setting No.1) for rst-time use. Gradually increase pressure over time to the setting
you prefer – or as instructed by your dental professional.
Using the Water Flosser
Always place the tip in your mouth before turning the unit power ON. With
water switch on handle in OFF position, turn power on. Lean over sink and slightly
close lips enough to prevent splashing while still allowing water to ow
from mouth into the sink. Turn water switch ON. When nished, turn water
switch and power OFF. During use you can stop the ow of water by sliding the
water switch on handle to the OFF position.
NOTE: Motor will continue to run.
Loading ...
Loading ...
Loading ...