
Loading ...
Loading ...
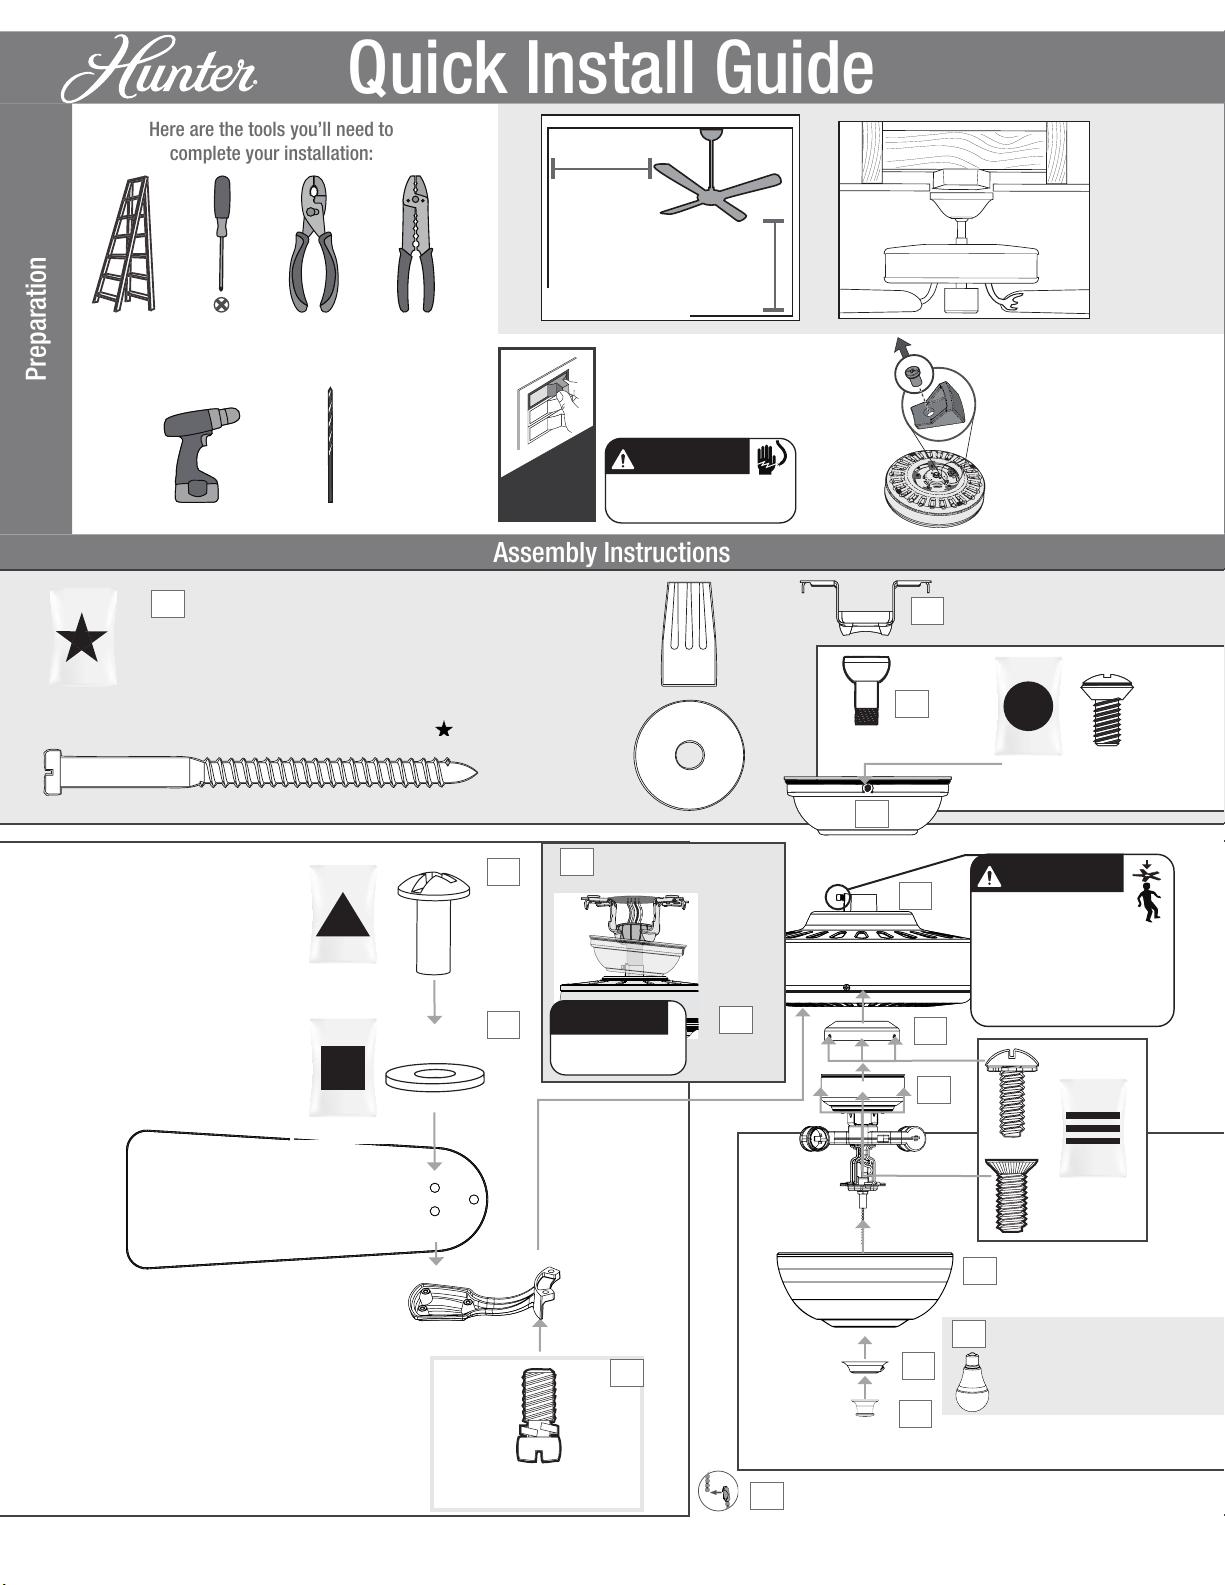
Quick Install Guide
Preparation
30 inches
from blade tip to
nearest wall or
obstruction
7 feet
from bottom
edge of blade to
the oor
OFF
Turn Power
D
I
S
C
A
R
D
K
E
E
P
!
Remove the
shipping blocks
from the motor.
Save the screws.
They will be
needed for blade
iron installation.
You must
be able to
secure the
fan to building
structure or
fan-rated
outlet box.
x4
x5
x2
x2
x2
x3
x3
For installing the hanger bracket and wiring the fan
For installing
the canopy
For installing the light kit
bag
bag
bag
x15
bag
x15
bag
You will nd these screws in
the motor’s shipping blocks.
For installing the blades
Assembly Instructions
x2
Install a bulb into each
of the sockets. When
necessary, replace with
bulbs of the same type
and wattage.
Connect the fan pull chain pendant to the
short chain coming from the switch housing.
WARNING
FAN FALL HAZARD
To prevent SERIOUS INJURY or DEATH:
• ALWAYS tighten setscrew with pliers.
• DO NOT hand tighten setscrew.
• CHECK the setscrew is tight using pliers
each time you change fan direction.
WARNING
To avoid possible electrical shock, before
installing your fan, disconnect the power by
turning off the circuit breakers to the outlet
box associated with the wall switch location.
OPTION 2: Wood Screws
Use wood screws and washers
(included) when securing to support
structure with approved electrical
outlet box. Drill 9/64” pilot holes in
support structure to aid in securing
ceiling bracket with hardware found
in the hardware bag.
OPTION 1: Machine Screws
Use machine screws (provided
with outlet box) and washers
when securing to existing ceiling
fan-rated outlet box. Make sure
it is securely installed and is
acceptable for fan support of
31.8 kg (70 lbs) or less.
1
STEP
1
STEP
2
STEP
3
STEP
6
STEP
7
STEP
8
STEP
9
STEP
10
STEP
11
STEP
12
STEP
13
STEP
14
STEP
15
STEP
16
STEP
4
STEP
5
STEP
Place the downrod ball into
the slot in the ceiling bracket.
See back
for wiring
Ladder
9/64” Drill Bit
Drill
Screwdriver Pliers Wire Strippers
OPTIONAL
If mounting to a support structure, you will also need
these tools.
Here are the tools you’ll need to
complete your installation:
NOTICE
To prevent damage to fan,
ALWAYS lift holding either the
fan housing or the downrod.
M3780-01 r121019 © 2019 Hunter Fan Company
Loading ...