Loading ...
Loading ...
Loading ...
6 7
INSTALLING
ACCESSORIES
INSTALLATION
preparing your appliance for the
first time
•Pleaseremoveallinternalboxesandbagsfromtheoven
before operation.
•Pleasewipeouttheoveninteriorpriortooperationwith
warm soapy water and polish dry with a soft clean cloth.
Do not close the oven door until the oven is completely
dry.
•Newappliancescanhaveanodourduringrst
operation.Itisrecommendedto‘runin’yourovenbefore
you cook for the first time. Run the oven at 180ºC for 2-4
hours and ensure that the room is well ventilated.
•DONOTlinetheovenwithfoil,itwilldamagetheenamel.
•Ifyourapplianceisttedwitha2-hour“AutoOff”
timer, make sure it is set to the ‘Off’ marker for manual
operation. See image.
Setting the time (POR788 only)
After electrically connecting the appliance, you must set the
time of day before you can operate your oven.
1. After the appliance has been electrically connected
“12:00”willashontheclockdisplay,alongwiththe
scrolling message “Welcome to Electrolux”.
2. To set the time of day in hours and minutes, press the
or buttons underneath the “set clock” graphic.
3.8secondsafterthelastchangethetimewillstopashing,
confirming the time has been set. Once the time has been
entered, the clock advances minute
by minute.
Note:
•Theclockhasa12hourdisplay
•Thedisplayhas3levelsofbrightness.
–Brightestillumination:whenevertheovenisinuse.
–Mediumillumination:theovenisnotinuse.
–Lowestillumination:theovenisnotinusebetween
thehoursof10pmand6am.
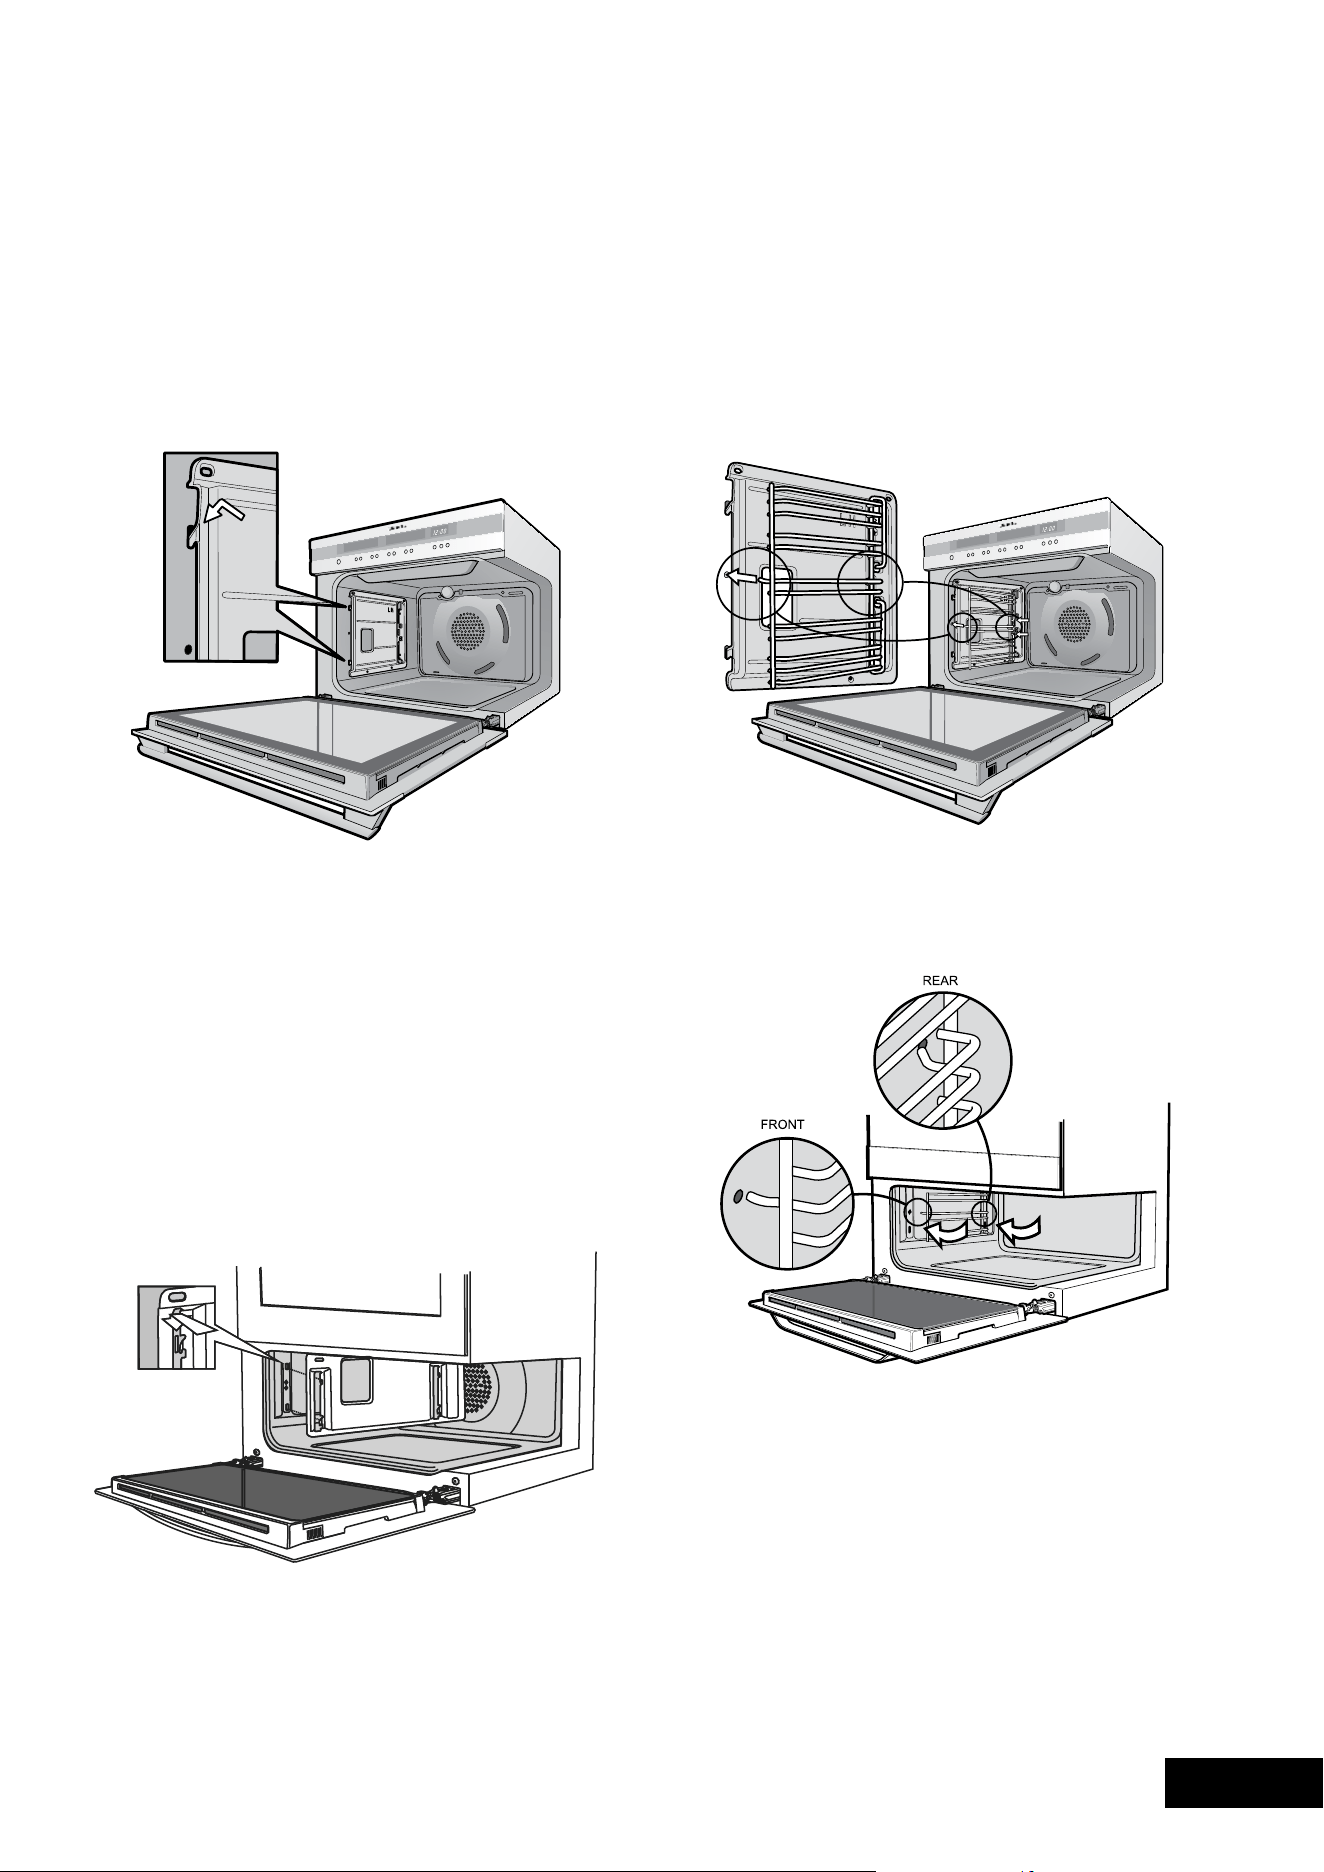
side racks
The side racks that come with your oven are all fitted the
same way and can be attached to either side of your oven.
•Insertthelargestpegintorearaccessholeprovided.See
diagram.
•Thenlocatethefrontpegintothefrontaccessholeand
push in firmly.
•Whenlocatingtheleftsideracksintothesmallovenor
grill ensure the pegs go into the top access holes.
setting the time
Ifyouhavepurchasedamodelttedwithanelectronicor
programmable timer, you must set the time of day before you
can operate your appliance.
Electronic Clock
•Aftertheappliancehasbeenelectricallyconnected
“12.00” will be displayed and the “clock” indicator will
ash.
•Tosetthetimeofday,press–or+.5secondsafter
the last change, the “clock” indicator will disappear,
confirming the time has been set.
NoTe:Theclockhasa24-hourdisplay.
Programmable Controller (POR783 only)
•Aftertheappliancehasbeenelectricallyconnected,the
set clock symbol
and timer arrow willashonthe
clock display.
•Tosetthetimeofday,press–or+.5secondsafterthe
last change the timer arrow will disappear, confirming
the time has been set. Once the time has been entered,
the clock advances minute by minute.
NoTe:Theclockhasa24-hourdisplay.
catalytic liners (on selected models)
Catalytic liners are coated with a specially formulated enamel
coating. This porous coating enables the “self cleaning”
process - see page 26 for more details. Catalytic liners must
be installed first but you can omit them, if you wish, with no
effect to cooking performance. Their sole purpose is to make
oven cleaning easier.
•Thecatalyticlinerswillattachtoeachsideofyouroven.
There will be a left hand and right hand version. This is
marked on the panel.
•Positiontherstlinerasperthediagram.Theblack,shiny
side of the liner should be facing the oven wall, the hooks
pointing down and the word ‘LH’ positioned to the top
rear portion of the oven. The right hand side will be a
mirror image of this.
•Linethehooksupwiththeslotsprovidedintheovenwall,
push them in and then allow the liner to slide down to its
final position.
•Theaccessholeforthesideracksshouldbevisiblewhen
the liner is correctly positioned - see diagram.
Loading ...
Loading ...
Loading ...