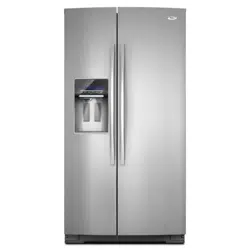
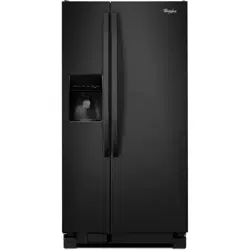
User Guide Side by Side Refrigerator for Whirlpool WRS322FDAM01
Contents
IMPORTANT SAFETY INSTRUCTIONS
PROPER DISPOSAL OF YOUR OLD REFRIGERATOR
OPERATING YOUR REFRIGERATOR
ICE AND WATER
ACCESSORIES
PROBLEM SOLVER
WARRANTY
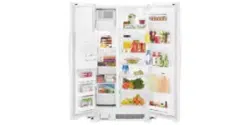
Ice Maker and Storage Bin
Allow 24 hours to produce the first batch of ice. Discard the first three batches of ice produced.
The quality of your ice will be only as good as the quality of the water supplied to your ice maker. Avoid connecting the ice maker to a softened water supply. Water softener chemicals (such as salt) can damage parts of the ice maker and lead to poor quality ice. If a softened water supply cannot be avoided, make sure the water softener is operating properly and is well maintained.
Do not use anything sharp to break up the ice in the storage bin. This can cause damage to the ice container and the dispenser mechanism.
Do not store anything on top of or in the ice maker or storage bin.
Turning the Ice Maker On/Off
To turn on the ice maker, lift open the ice maker door and lower the wire shutoff arm to the ON position.
To manually turn off the ice maker, lift the wire shutoff arm to the OFF (arm up) position and listen for the click. Ice can still be dispensed, but no more can be made.
Removing and Replacing the Ice Storage Bin
Lift and hold open the ice maker door.
Lift the wire shutoff arm so it clicks into the OFF (up) position. Release the ice maker door.
Lift up the front of the storage bin and pull it out.
Replace the bin by pushing it in all the way, or the dispenser will not work.
To restart ice production, lift open the ice maker door and push the wire shutoff arm down to the ON position.
Water Filtration System
Water Filter Status Light (on some models) - The filter status light will help you know when to change your water filter.
The light will change from green to yellow. This tells you that it is almost time to change the filter.
It is recommended that you replace the filter when the status light changes to red OR water flow to your water dispenser or ice maker decreases noticeably.
Non-Indicator Water Filter (on some models)
If your refrigerator does not have the water filter status light, you should change the water filter cartridge at least every 6 months depending on your water quality and usage. If the water flow to the water dispenser or ice maker decreases noticeably before 6 months have passed, replace the water filter more often.
Changing the Water Filter
Locate the water filter cover door in the base grille, and pull open the filter door. The filter will be released and then be ejected as the door is opened.
When the door is completely open, pull the filter straight out. NOTE: There may be some water in the filter. Some spilling may occur. Use a towel to wipe up any spills.
Take the new filter out of its packaging and remove the covers from the O-rings. Be sure the O-rings are still in place after the covers are removed.
With the arrow pointing to the left (toward the filter cover door’s hinge), align the new filter with the filter housing and slide it into place. The filter cover door will automatically begin to close as the new filter is inserted.
Close the filter cover door completely in order to snap the filter into place. You may need to press hard.
Flush the water system.
Troubleshooting
Refrigerator will not operate
Not connected to an electrical supply - Plug the power cord into a grounded 3 prong outlet. Do not use an extension cord.
No power to the electrical outlet - Plug in a lamp to see if the outlet is working.
Household fuse has blown or circuit breaker has tripped - Replace the fuse or reset the circuit breaker. If the problem continues, contact a licensed electrician.
Control or cooling is not turned on - Turn on the refrigerator control, or turn cooling on.
New installation - Following installation, allow 24 hours for the refrigerator and freezer to cool completely
Refrigerator seems noisy - The compressor in your new refrigerator regulates temperature more efficiently and uses less energy than older models. During various stages of operation, you may hear normal operating sounds that are unfamiliar. The following noises are normal:
Buzzing/Clicking - Heard when the water valve opens and closes to dispense water or fill the ice maker. If the refrigerator is connected to a water line, this is normal. If the refrigerator is not connected to a water line, turn off the ice maker.
Cracking/Crashing - Heard when ice is ejected from the ice maker mold.
Popping - Heard when the inside walls contract/expand, especially during initial cooldown.
Pulsating/Whirring - Heard when the fans/compressor adjust to optimize performance during normal operation.
Rattling - Heard when water passes through the water line, or due to the flow of refrigerant. Rattling may also come from items placed on top of the refrigerator.
Water running or gurgling - Heard when ice melts during the defrost cycle and water runs into the drain pan.
Sizzling - Heard when water drips onto the heater during the defrost cycle.
Motor seems to run too much
Your new refrigerator has an energy-efficient motor - The refrigerator may run longer than you’re used to, because the compressor and fans operate at lower speeds that are more energy-efficient. This is normal.
Temperature is too warm
New installation - Following installation, allow 24 hours for the refrigerator and freezer to cool completely. NOTE: Adjusting the temperature control(s) to the coldest setting will not cool either compartment (refrigerator or freezer) more quickly.
Doors are opened often or not closed completely - This allows warm air to enter the refrigerator. Minimize door openings, keep the doors fully closed, and make sure both doors are properly sealed.
Air vents are blocked - Remove items that are immediately in front of the vents.
Large amount of warm food recently added - Allow several hours for the refrigerator to return to its normal temperature.
Controls are not set correctly for the surrounding conditions - Adjust the controls to a colder setting. Check the temperature again in 24 hours.
Temperature is too cold
Controls are not set correctly for the surrounding conditions - Adjust the controls to a warmer setting. Check the temperature again in 24 hours.
Top refrigerator shelf is colder than lower shelves - On some models, air from the freezer enters the refrigerator compartment through vents near the top refrigerator shelf. As a result, the top shelf can be slightly colder than lower shelves.
Air vents are blocked - Remove items that are immediately in front of the vents.
Interior moisture buildup: Some moisture buildup is normal. Clean with a soft dry cloth.
Room is humid - A humid environment contributes to moisture buildup. Only use the refrigerator in an indoor location, with as little humidity as possible.
Doors are opened often or not closed completely - This allows humid air to enter the refrigerator. Minimize door openings, keep the doors fully closed, and make sure both doors are properly sealed.
INSTALLATION INSTRUCTIONS AND OWNER'S MANUAL Side By Side Refrigerator for Whirlpool WRS322FDAM01
Table of Contents
Refrigerator Safety
Proper Disposal Of Your Old Refrigerator
Installation Instructions
Unpack The Refrigerator
Door Removal, Leveling And Alignment
Handle Installation And Removal
Location Requirements
Electrical Requirements
Water Supply Requirements
Connect Water Supply
Refrigerator Care
Cleaning
Lights
Vacation And Moving Care
Problem Solver
Water Filter Certifications
Performance Data Sheet
Connect to Refrigerator
Style 1
Unplug refrigerator or disconnect power.
Remove and discard the short, black plastic part from the end of the water line inlet.
Thread the nut onto the end of the tubing. Tighten the nut by hand. Then tighten it with a wrench two more turns. Do not overtighten. NOTE: To avoid rattling, be sure the copper tubing does not touch the cabinet's side wall or other parts inside the cabinet.
Install the water supply tube clamp around the water supply line to reduce strain on the coupling.
Turn shutoff valve ON. Check for leaks.
Tighten any connections (including connections at the valve) or nuts that leak.
Style 2
Unplug refrigerator or disconnect power.
Remove and discard the plastic part that is attached to the inlet of the water valve.
Attach the copper tube to the valve inlet using a compression nut and sleeve as shown. Tighten the compression nut. Do not overtighten.
Use the tube clamp on the back of the refrigerator to secure the tubing to the refrigerator as shown. This will help avoid damage to the tubing when the refrigerator is pushed back against the wall.
Turn shutoff valve ON.
Check for leaks. Tighten any connections (including connections at the valve) or nuts that leak.
On some models, the ice maker is equipped with a built-in water strainer. If your water conditions require a second water strainer, install it in the 1/4"(6.35 mm) water line at either tube connection. Obtain a water strainer from your nearest appliance dealer.
Style 3
Unplug refrigerator or disconnect power.
Remove and discard the black nylon plug from the gray water tube on the rear of the refrigerator.
If the gray water tube supplied with the refrigerator is not long enough, a V4"x 1/4"(6.35 mm x 6.35 mm) coupling is needed in order to connect the water tubing to an existing household water line. Thread the provided nut onto the coupling on the end of the copper tubing. NOTE: Tighten the nut by hand. Then tighten it with a wrench two more turns. Do not overtighten.
Turn shutoff valve ON.
Check for leaks. Tighten any nuts or connections (including connections at the valve) that leak.
Refrigerator Care
Cleaning - To Clean Your Refrigerator: Do not use abrasive or harsh cleaners such as window sprays, scouring cleansers, flammable fluids, cleaning waxes, concentrated detergents, bleaches or cleansers containing petroleum products on plastic parts, interior and door liners or gaskets. Do not use paper towels, scouring pads, or other harsh cleaning tools.
Unplug refrigerator or disconnect power.
Hand wash, rinse, and dry removable parts and interior surfaces thoroughly. Use a clean sponge or soft cloth and a mild detergent in warm water.
Wash stainless steel and painted metal exteriors with a clean sponge or soft cloth and a mild detergent in warm water.
There is no need for routine condenser cleaning in normal home operating environments. If the environment is particularly greasy or dusty, or there is significant pet traffic in the home, the condenser should be cleaned every 2 to 3 months to ensure maximum efficiency.