Loading ...
Loading ...
Loading ...
Rinnai 13 GEPH_OIM
INSTALLATION
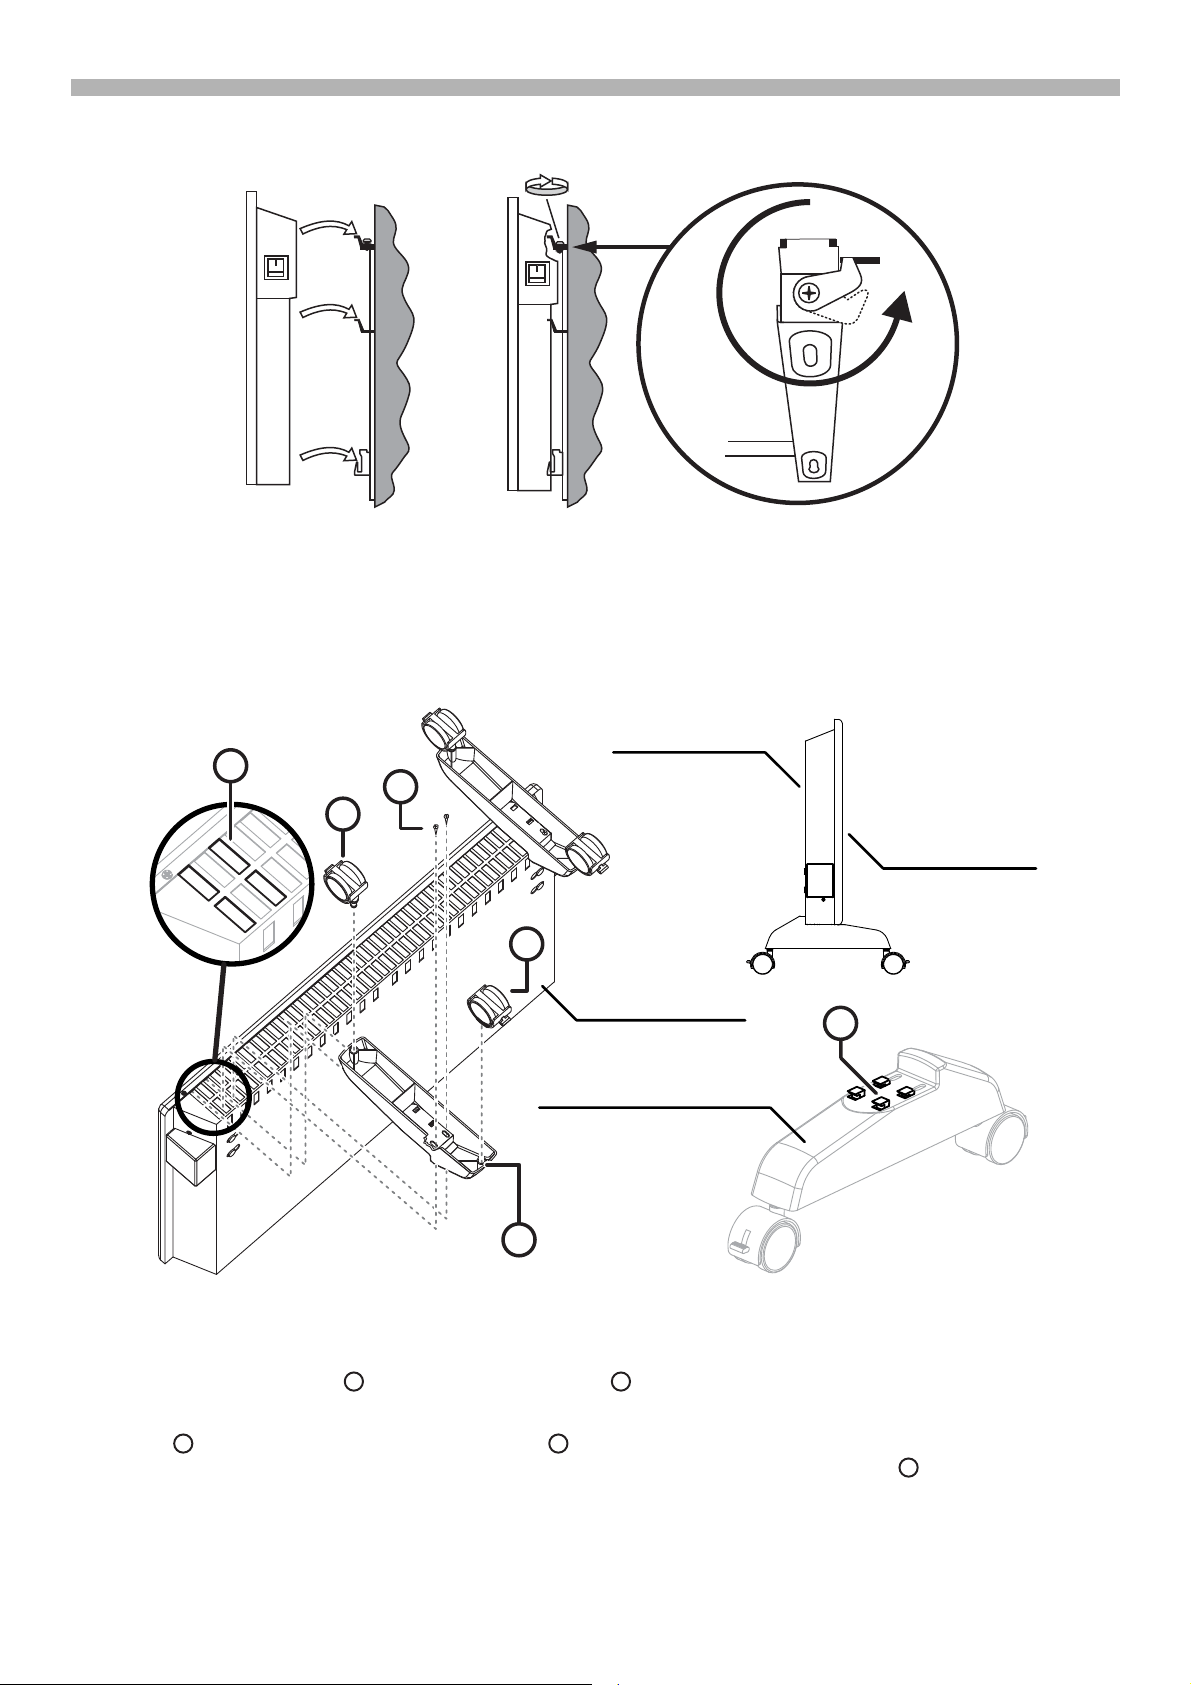
4. Secure the mounting bracket to the wall with the 4 mounting screws. For masonry walls use the plastic plugs
with screws provided. For plaster walls obtain suitable plasterboard fasteners from a building hardware supplier.
5. Re-attach heater to the mounting bracket (reverse method of step 2.) and secure with the locking screw(s).
6. Remove the cable tie from the flexible cord and insert the 2 pin plug of the heater into the power socket outlet.
DO NOT bundle or coil the flexible cord to reduce it’s length as overheating and subsequent fire hazard could
result.
FREESTANDING INSTALLATION
1. Be sure heater is unplugged and power switches are off.
2. Place the heater in an ‘upside down’ position with the back of the heater facing you.
3. Assemble the 2 castors to the each castor bracket by pushing the metal shaft fully home.
4. With the front end of the castor support bracket pointed towards the front of the heater, align the four locating
tabs with the four of the outer most air inlets then push down and forward until the tabs are fully engaged
with the heater. Then secure each of the castor brackets in place with retaining screws , using two for each.
5. Remove the cable tie from the flexible cord and insert the 2 pin plug of the heater into the power socket outlet.
DO NOT bundle or coil the flexible cord to reduce it’s length as overheating and subsequent fire hazard could
result.
A
A
D
E
B
C
Back of heater
Front of heater
Back of heater
Front of caster bracket
A
B
C
D
E
Loading ...
Loading ...
Loading ...