Loading ...
Loading ...
Loading ...
16
reversing the door cont.
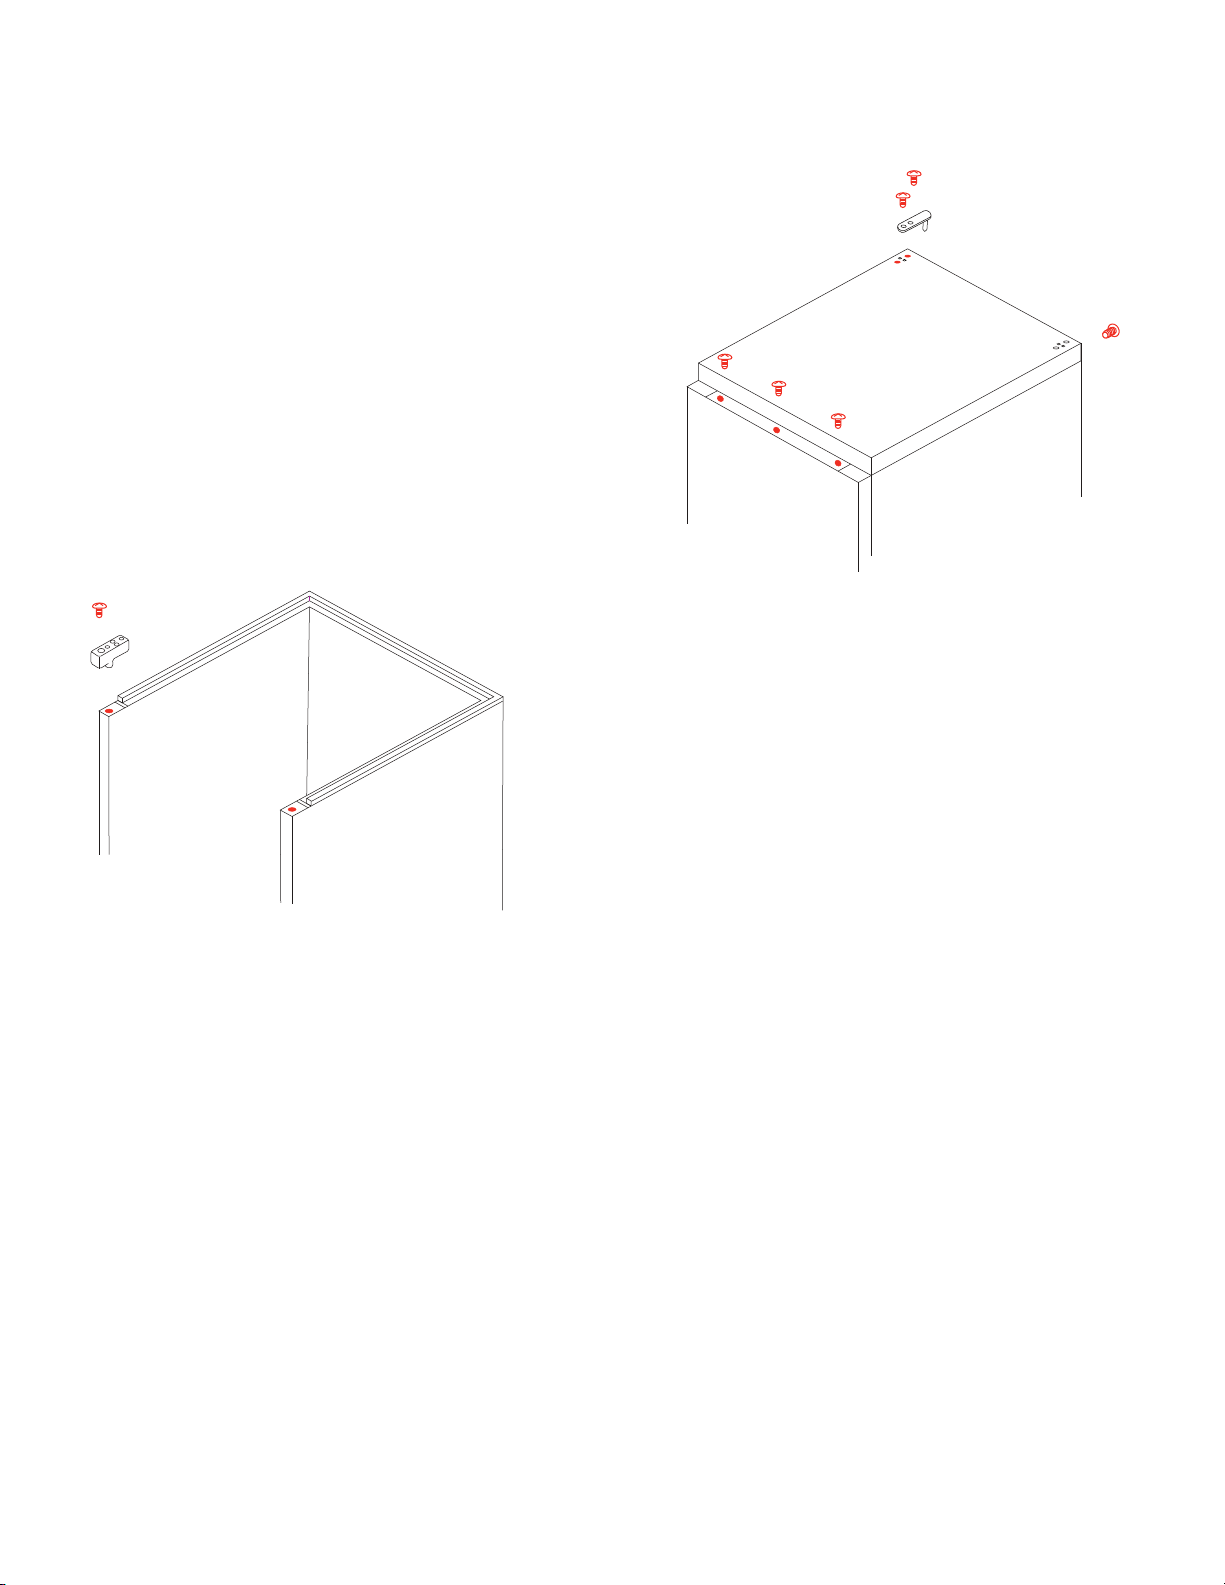
3. At the rear of the unit, there are three (3) screws
along the top. Remove these screws.
On the top front of the unit, there is one (1) additional
screw on the left hand side, remove this screw.
The Top Cover plate will now lift off.
.
REAR OF UNIT
TOP COVER
4. Remove the Top Hinge Support which is held in
place by one (1) screw from the right hand side and
transfer it to the left hand side re-attaching it with the
screw.
Replace the Top Cover plate u
sing the three (3)
screws along the rear of the unit. The screw removed
from the top front on the left hand side - must be screwed
into the corrosponding hole on the right hand side
TOP HINGE
SUPPORT
5. Remove the plugs from the left hand side screw and hinge pin holes on the Top Cover and door
and move them to the right hand side.
Center the hole in the bott
o
m left hand side of the door on the inge pin of the bottom hinge and slidet
down into place.
While supporting the door, slide the pin if the Top Hinge into the hole at the top left hand side of the
door and fasten the Top Hinge in place using the remaing two (2) screws.
Make sure the door operates freely and closes completely.
Loading ...
Loading ...
Loading ...