
Loading ...
Loading ...
Loading ...
HOW THE SINK FLANGE ASSEMBLES
www.xoappliance.com
E1
E2
E3
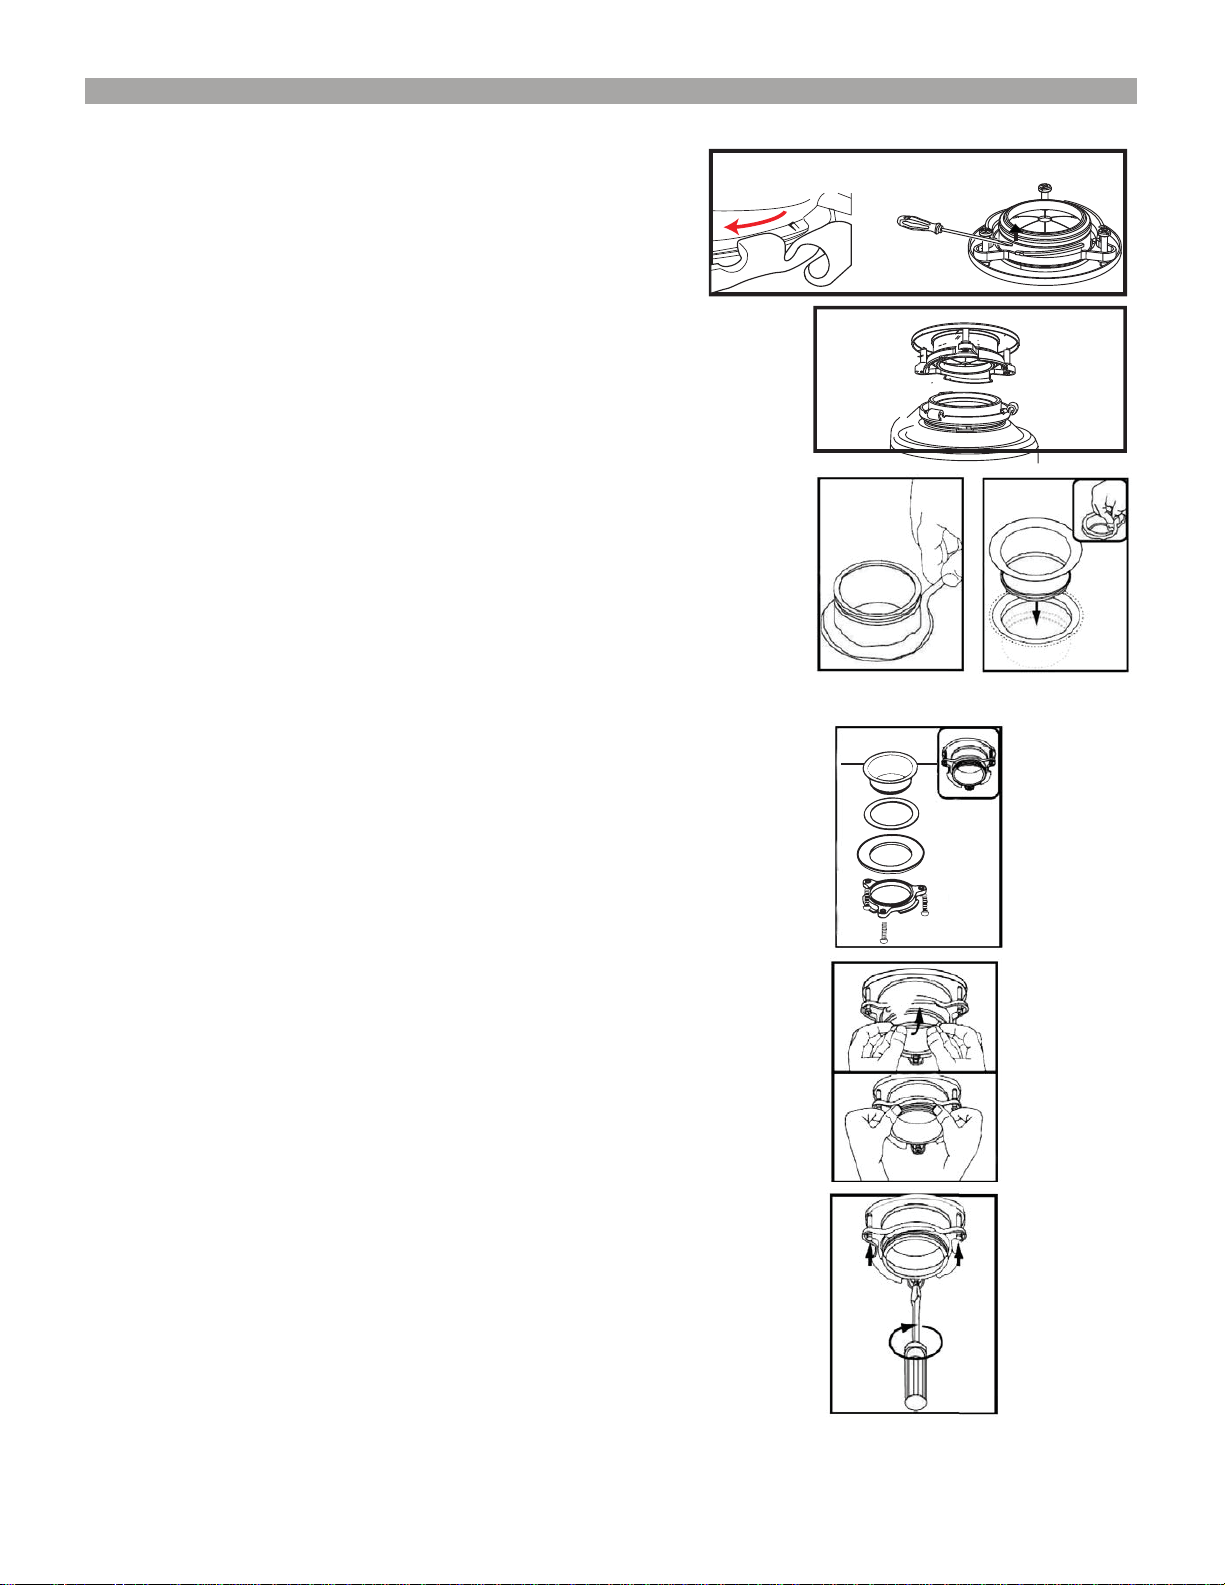
A. The Cushion Ring and the Lower Mount Ring will remain
attached to the disposer during installation. Take apart the
other parts of the mounting assembly by rotating the Lower Mount Ring
(J on page 3 ) clockwise until the Lower Mount Ring Tabs slide off from
the Upper Mount Ring ramp (A1 ). This allows you to pull the Sink Flange
up and out of the remaining Lower Mount Assembly. Note the order of
these parts as they are arranged in the required order. Unscrew the 3
Mount Screws until the Upper Mount Ring can be moved to the top of the
Support Flange. Remove the Retainer Ring with a flat head screw driver.(A2 )
B. Keep the remaining parts placed together in the order they were removed (B1 ).
Before you connect the disposer to the mount assembly under the sink, make sure the
Lower Mount Ring is in place and the black Cushion Ring is still engaged properly to
the top of the disposer hopper (B2 ).
C1
C2
F2
F1
D. Place a heavy object, such as the disposer (use a towel to prevent scratching sink)
on top of the Sink Flange to hold it down.
E. Take the remaining portion of the mount assembly, that was put aside. From
under the sink insert the Rubber Gasket (E1), then the Support Flange (E2) and
then the Upper Mount Ring (E3 ).
F. Hold the three parts in place while attaching the Retainer Ring (F1 ) by pulling it
apart and having it snap within the groove of the sink flange (F2 ).
G. Tighten the three Mount Screws evenly and firmly against the Support Flange
(G1 ). Do not over tighten.
H. Trim off any excess plumber’s putty in the sink with a plastic knife or something
similar that will not damage your sink. You may now remove the weight, Step “D”.
G1
A1
A2
B1
B2
C. Be sure the sink is clean. With Stainless Steel sinks, use the rubber gasket supplied
on the underside of the flange. For other types of sinks use plumber’s putty BUT DO
NOT USE BOTH. If plumber's putty is used, apply to underside rim of the sink flange (C1).
From top of the sink, push the sink flange down against the sink opening to make a
good seal (c2). DO NOT MOVE OR ROTATE the sink flange once it has been seated
or the seal may be broken.
Loading ...
Loading ...
Loading ...